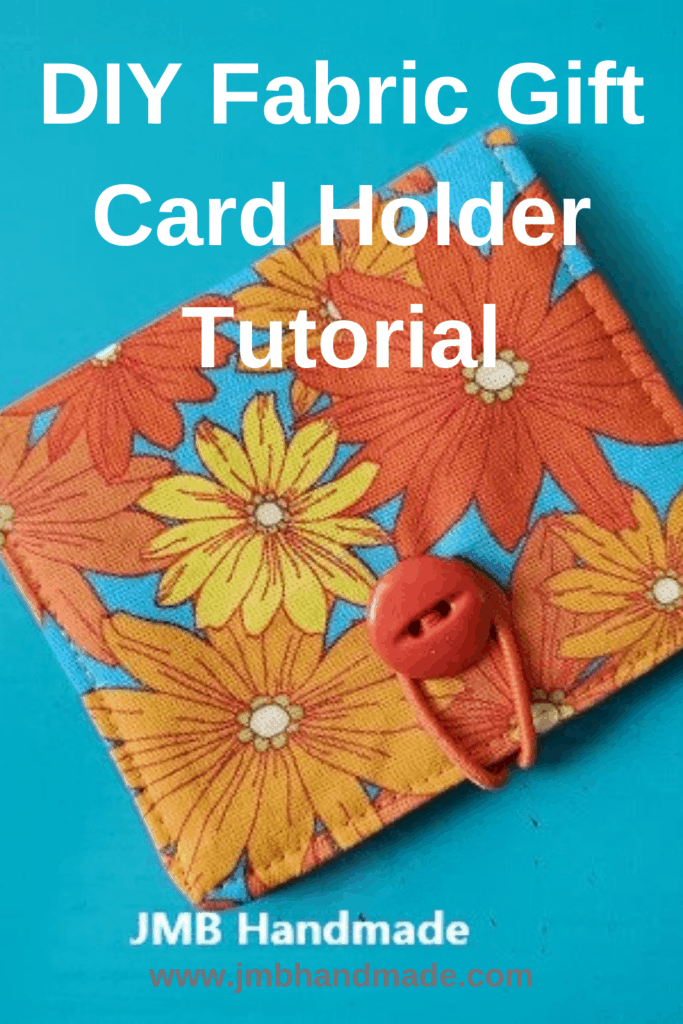
DIY Fabric Gift Card / Credit Card Holder Tutorial
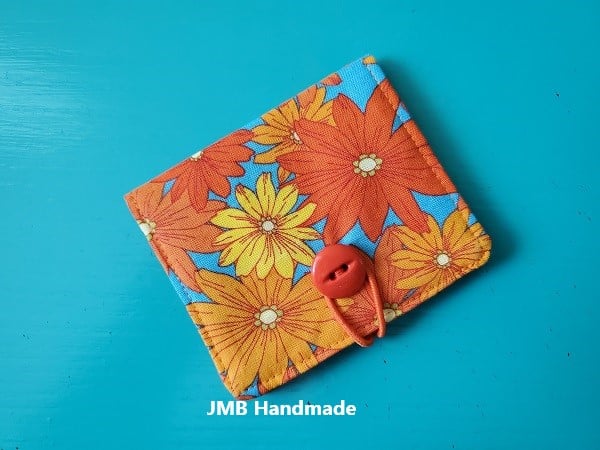
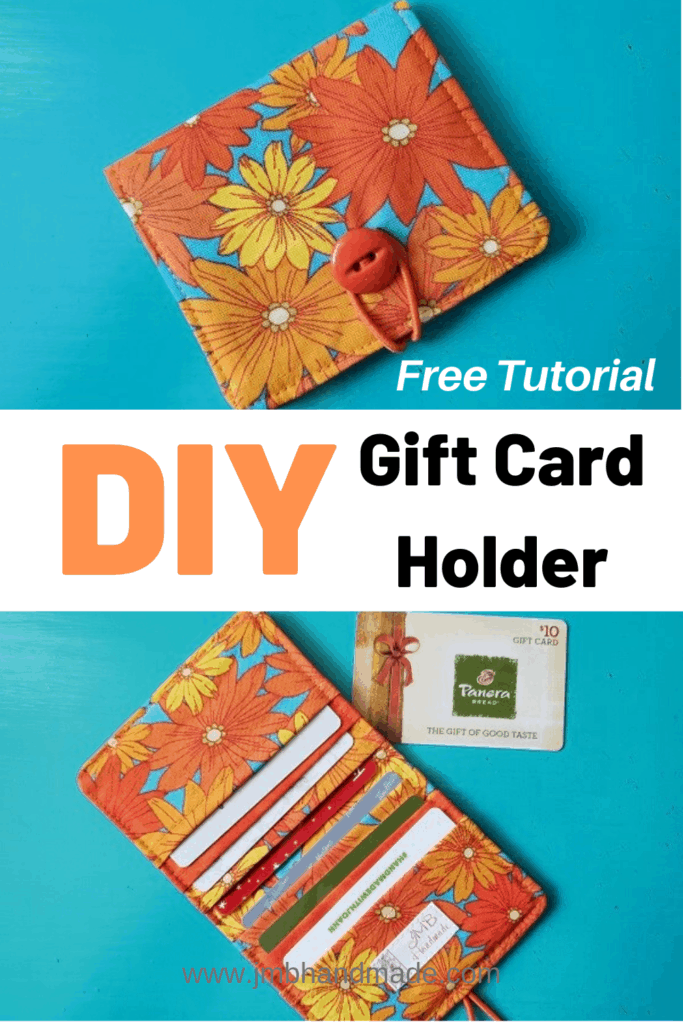
Keep all your gift cards and credit cards in one place with this easy card wallet tutorial.
I have a stack of gift cards that I received over the holidays from family, friends and work! Some cards ar from my birthday and Mother’s day. I seem to hang on to them until I find something I really want (unless it’s a Starbucks card. I tend to use those right away.)
The problem I have is keeping track of all of them. I used to just throw them in my wallet but then can never find them when I do want to use them. So I created a solution – the fabric gift card holder. This holder will fit credit cards and business cards as well, if you’re not a gift card hoarder like I am.
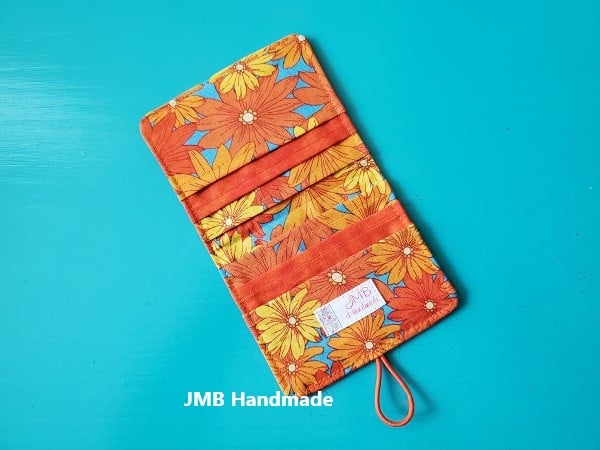
Below is the sewing pattern for the fabric gift card holder. There are 6 total card slots, three on each side and folds over like a wallet with a button closure. Each slot will hold two or three cards. If 6 card holder pockets are too many, check out my business card tutorial to sew a card holder with only two pockets (which holds multiple business cards in each slot.) Also, try sewing a matching zipper pouch to go with it.
If you like giving gift cards, consider making a fabric card holder to put the gift card in to make the gift a little more personal. The holder can be used over and over again. And you can use up some of those fabric scraps!
This post contains affiliate links. Please see disclosure for more information.
***You can find the ad-free, printable PDF version of this sewing tutorial available for purchase HERE. Includes 10 pages of step-by-step instructions with pictures. Print a copy to keep next to your sewing machine for easy reference.***
Supplies you will need for this fabric card holder:
- Cotton fabric – my favorite fabric shop
- Matching thread – my favorite is Gutermann
- Fusible interfacing – my favorite brand is Pellon
- Rotary cutter
- Clear ruler
- Cutting mat
- Marking pencil
- Sewing gauge
- Sewing scissors
- Small button – approximately 3/4″
- Elastic hair tie
- Sewing machine
Cut the fabric
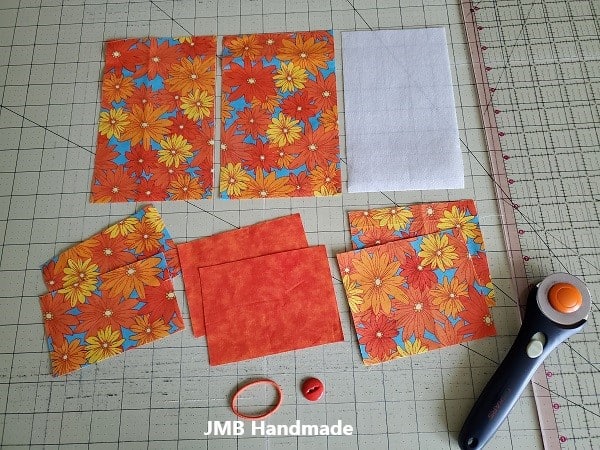
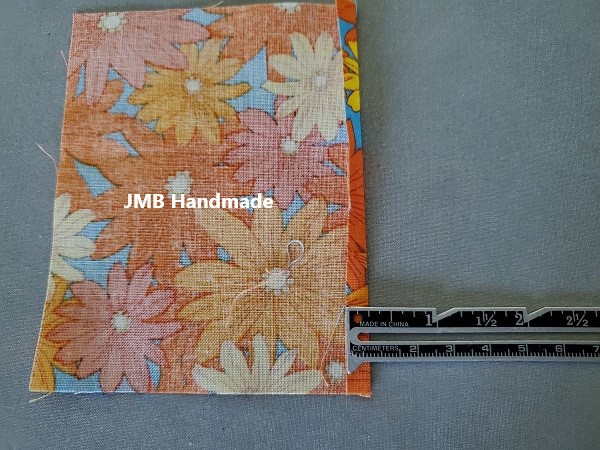
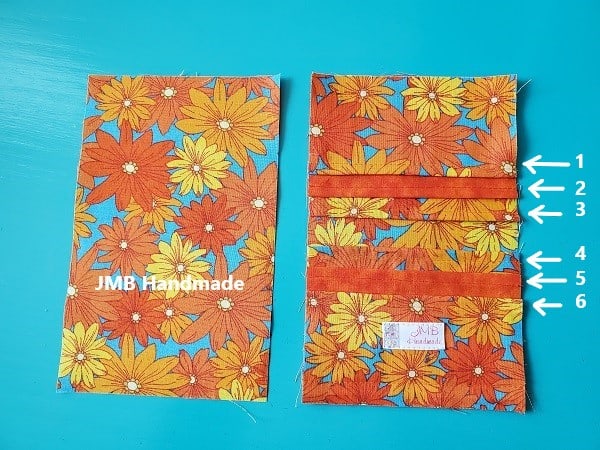
Using your rotary cutter, clear ruler and cutting mat, cut one outer fabric piece and one lining fabric piece, both measuring 4 3/4 inches by 7 1/2 inches.
Cut 2 fabric pieces 4 3/4 inches by 4 inches, 2 fabric pieces 4 3/4 inches by 3 1/2 inches, and 2 fabric pieces 4 3/4 inches by 3 inches. These six pieces will be the slots the cards will slide into.
Attach the interfacing
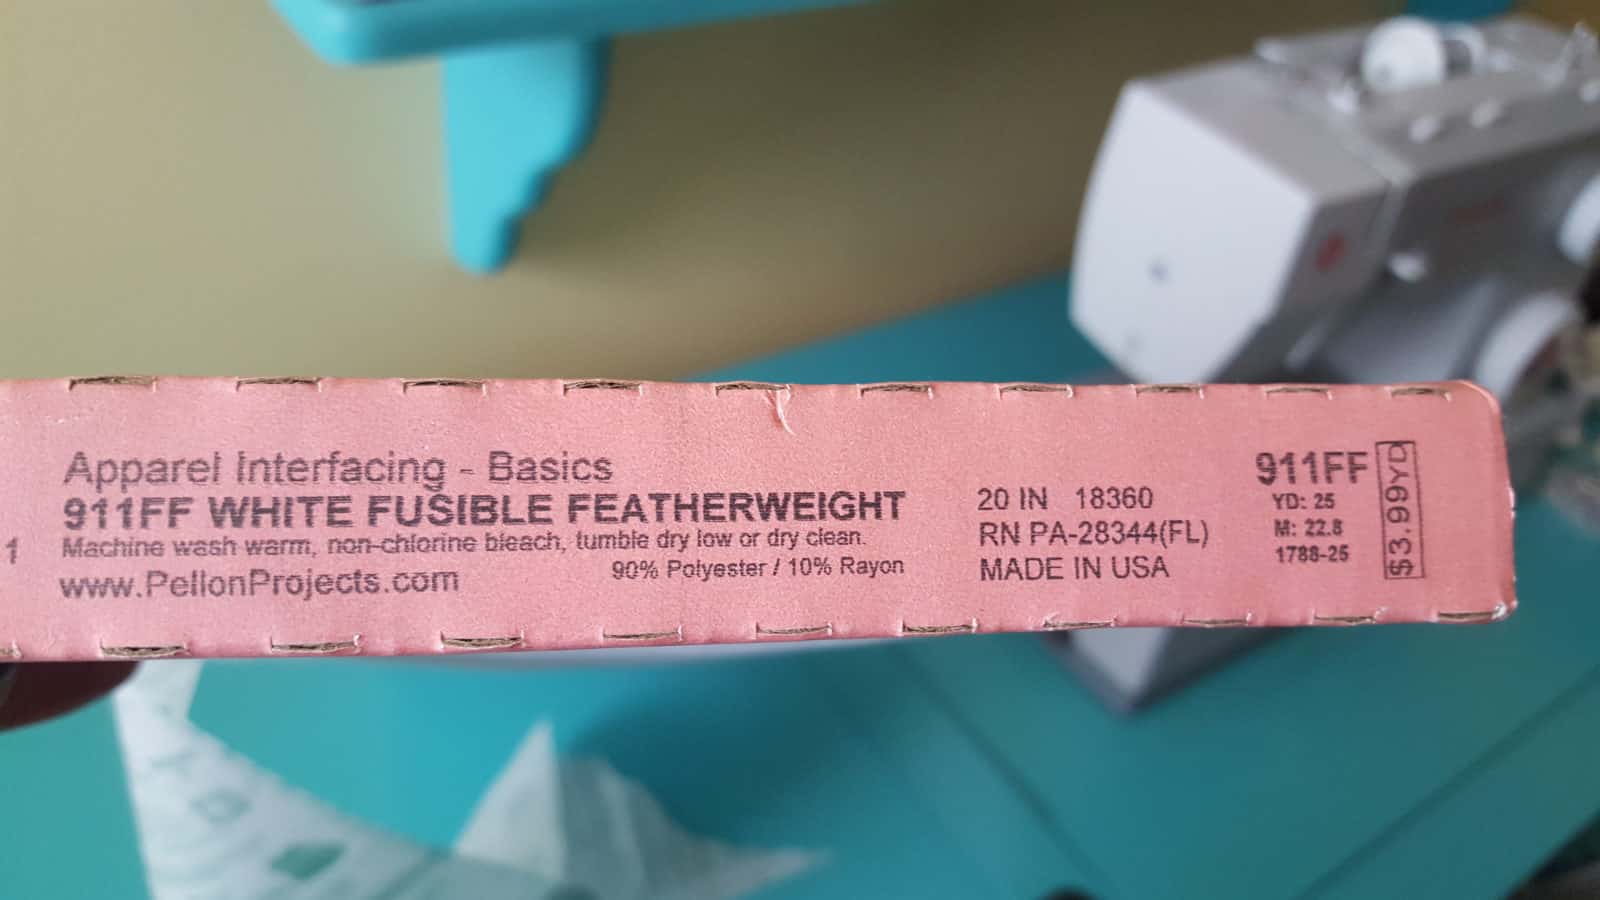
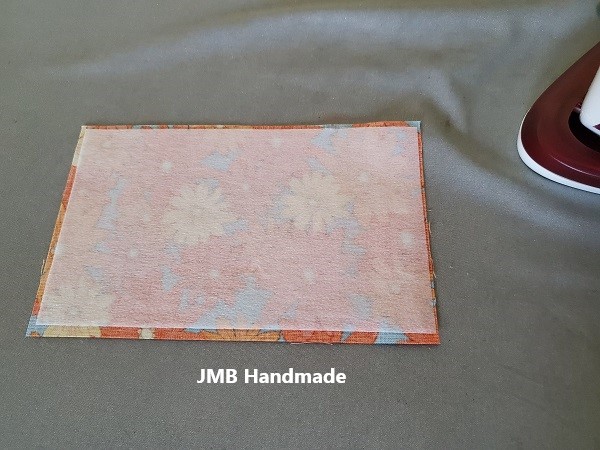
Cut one piece of the fusible interfacing just smaller than your outer fabric piece. For most of my handbags and accessories, I use Pellon 911FF Fusible Interfacing. Interfacing adds extra durability to your sewing projects.
Follow the instructions for fusing the interfacing to the outer fabric piece.
Hem the card slot fabric pieces
Fold over the top of the largest fabric piece 1/4 inch measuring with your sewing gauge. Press. Fold over again and press.

Straight stitch the fold you just made using matching thread.
Repeat with the other 5 card slot fabric pieces.
Attach the card slot fabric pieces
Now that all the hemming finished, it’s time to sew them into place starting with the 4 inch fabric pieces.
Place both 4 inch pieces on top of the lining fabric with the hems facing each other. Pin in place. Be sure to line up the corners.
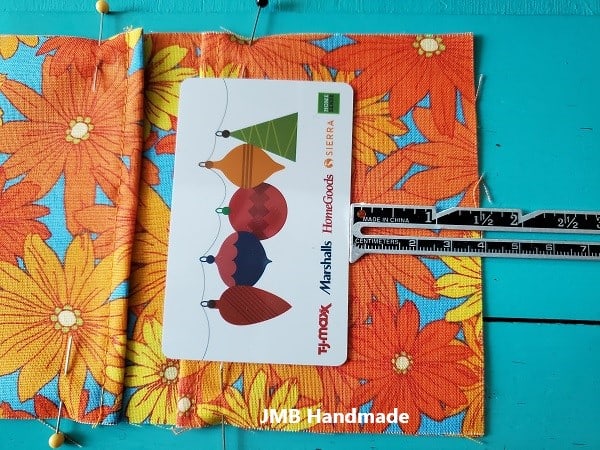
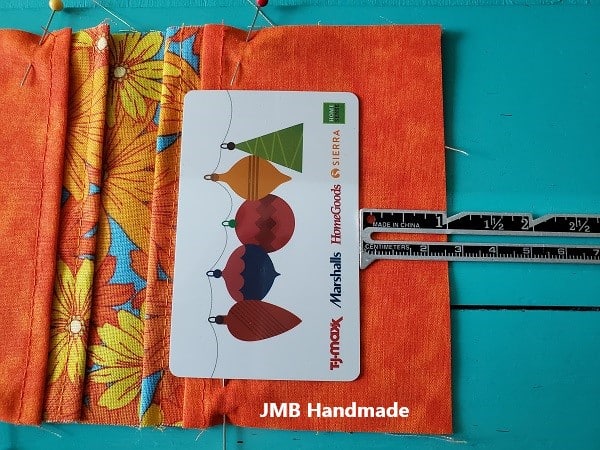
Take one of your gift cards and center it with a little but hanging over the top. This step is to make sure you have enough of the card sticking out so it’s easy to pull out when you need it. Use your sewing gauge to measure about 1 1/2 inches from the card to the bottom of the fabric (as shown above.)
Sew a straight stitch across 1 1/2 inches from the bottom. Sew a straight stitch on the other side as well measuring 1 1/2 inches from the bottom.
Next place the 3 1/2 inch fabric pieces on top of the 4 inch pieces you just sewed into place, lining up the corners. These will cover up the stitches you just sewed. Sew a straight stitch about one inch from the bottom.
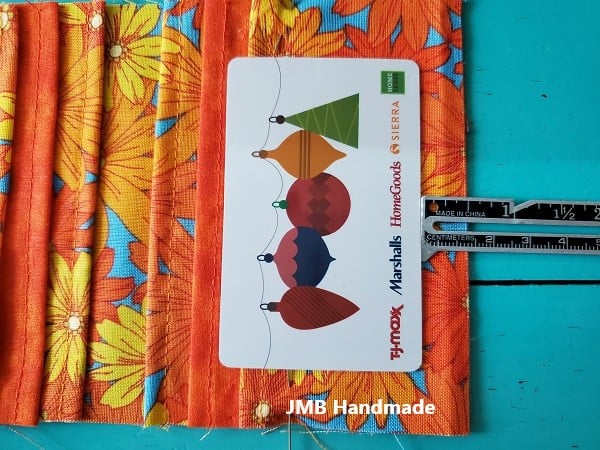
Place the 3 inch fabric pieces on top of the 3 1/2 inch pieces you just sewed, lining up the corners. Sew across about 1/2 inch from the bottom.
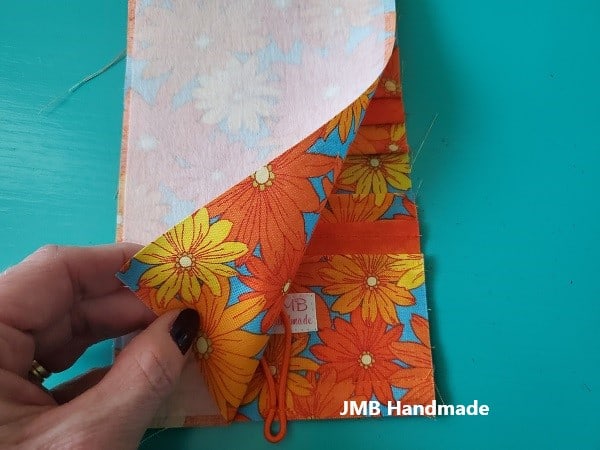
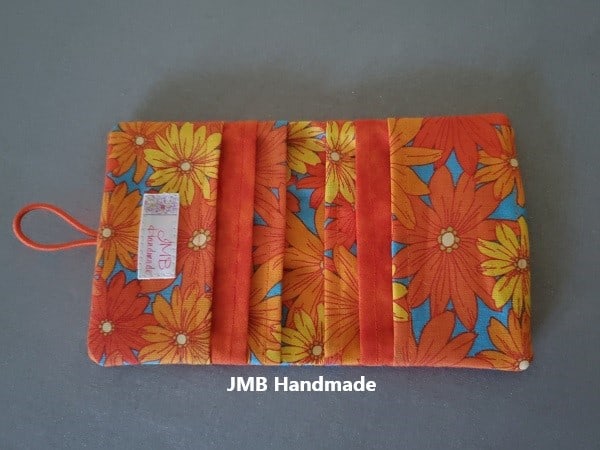
At this point you will have 3 card slots on each end as shown in above picture.
***You can find the ad-free, printable PDF version of this sewing tutorial available for purchase HERE. Includes 10 pages of step-by-step instructions with pictures. Print a copy to keep next to your sewing machine for easy reference.***
Attach the elastic hair tie
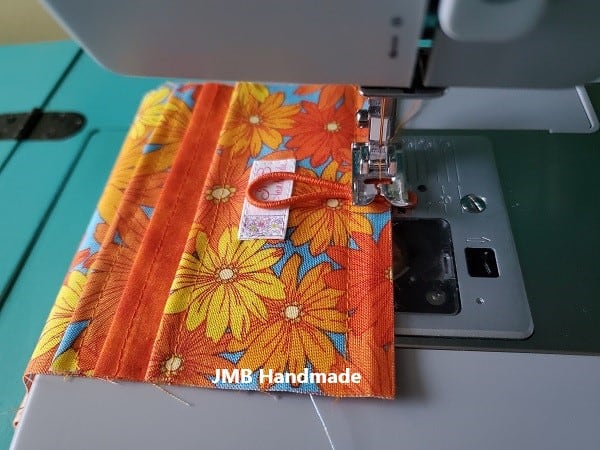
Center the elastic hair tie on the bottom of the card holder as shown above. Sew in place.
Sew it all together
Place the outer fabric piece on top of the lining piece with the card slots, right sides together. Pin in place.
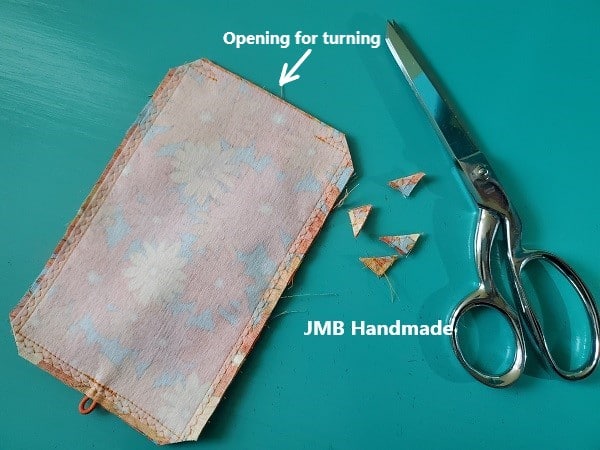
Straight stitch then zigzag stitch all around, leaving a small opening at the top for turning and sewing on the button. I line up the edge of the fabric with the edge of my presser foot and use that as a guide for the seam allowance. It’s about 1/4- inch. The opening for turning will be at the end without the hair tie. Cut the corners using your sewing scissors.
Turn right side out.
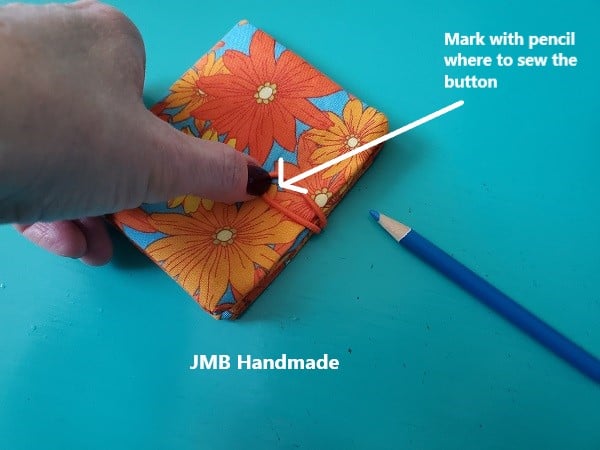
Fold the gift card holder in half and press. Mark a spot on the front with a marking pencil where the button will go. Sew on the button.
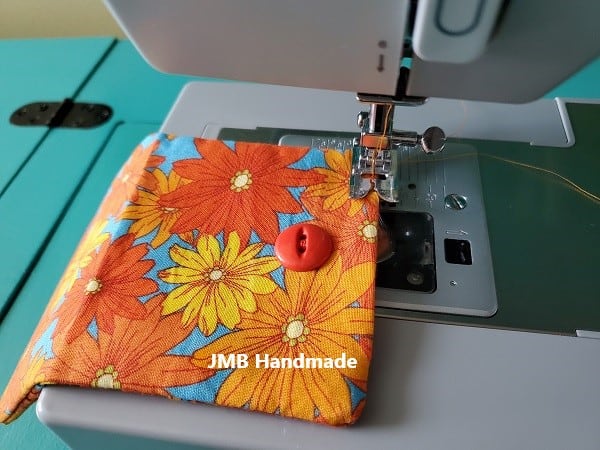
Straight stitch all around, pivot corners to give it a finished look and close up the opening. Press.
You are finished!
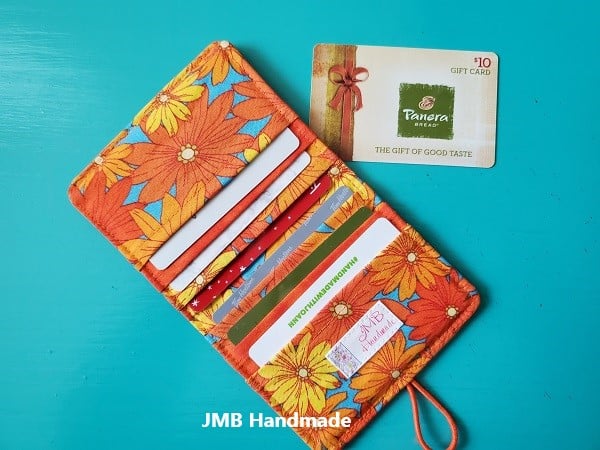
Now you can fill your little fabric card holder with all your gift cards or credit cards! Or even business cards! Happy sewing!
***You can find the ad-free, printable PDF version of this sewing tutorial available for purchase HERE. Includes 10 pages of step-by-step instructions with pictures. Print a copy to keep next to your sewing machine for easy reference.***
Pin for later!