Upcycle Your Jeans into a Denim Handbag
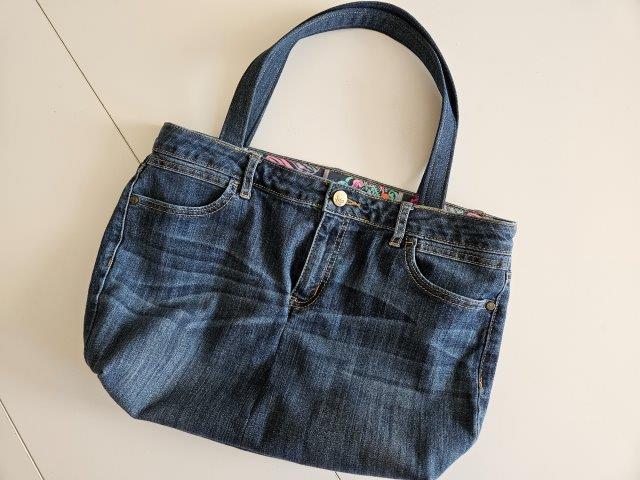
Upcycle a pair of old jeans into a handbag using this easy sewing tutorial with step-by-step instructions.
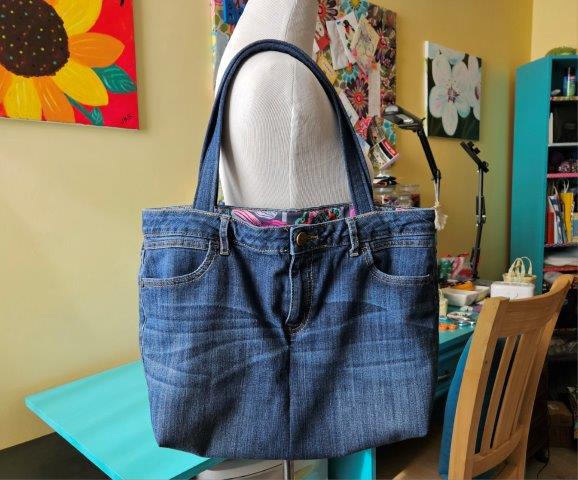
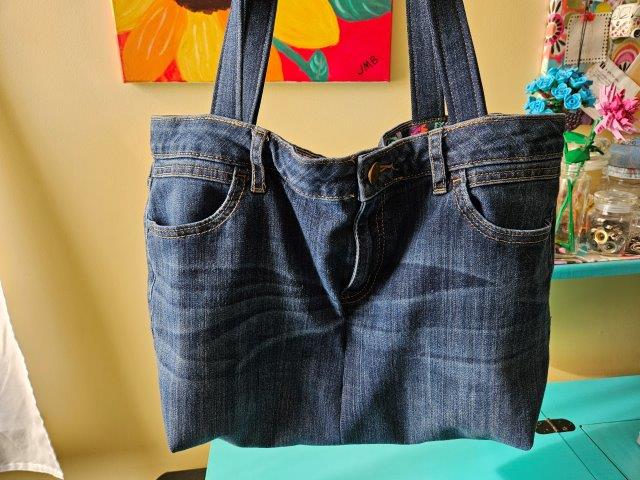
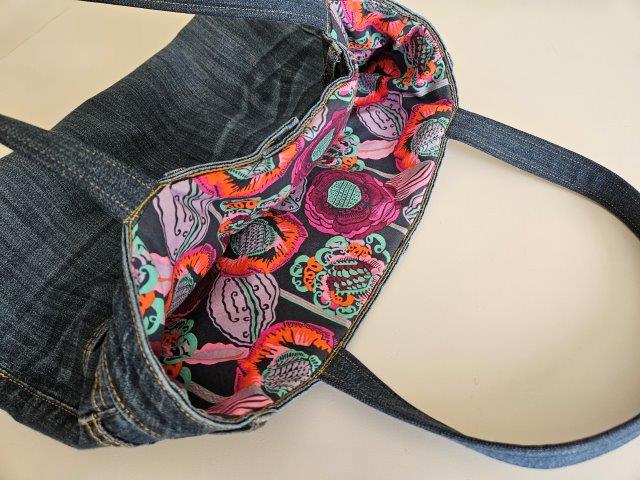
This denim jeans handbag is made from a pair of old jeans I can’t wear anymore. I used the top of the jeans as the body of the handbag and the legs to make the straps. I added a lining using cotton fabric and I think this bag turned out great!
If you have any leftover denim from the jeans, try sewing a matching mini card wallet for cash and credit cards or a mini zipper pouch key chain and hook it on one of the belt loops.
The instructions for this handbag are based on the pair of jeans I had on hand. You might have to adjust slightly based on the pair of jeans you will be using.
This post contains affiliate links at no cost to you. Please see below disclosure for more information.
***You can find the AD-FREE, printable PDF version of this sewing tutorial available for purchase in my Etsy shop HERE. Includes 17 pages of step-by-step instructions with pictures. Print a copy to keep next to your sewing machine for easy reference.***
Denim jeans handbag supplies needed:
- A pair of denim jeans
- Lining fabric – my favorite fabric shop
- Cutting mat
- Rotary cutter
- Clear ruler
- Fusible interfacing
- Marking pencil or pen
- Sewing scissors
- Sewing machine
Cut the legs of your jeans
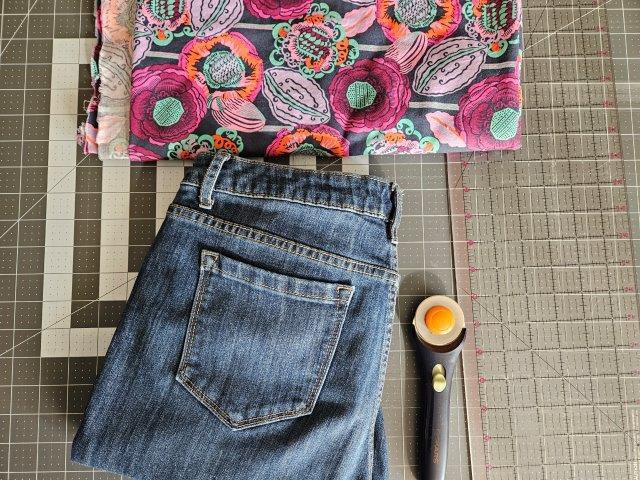
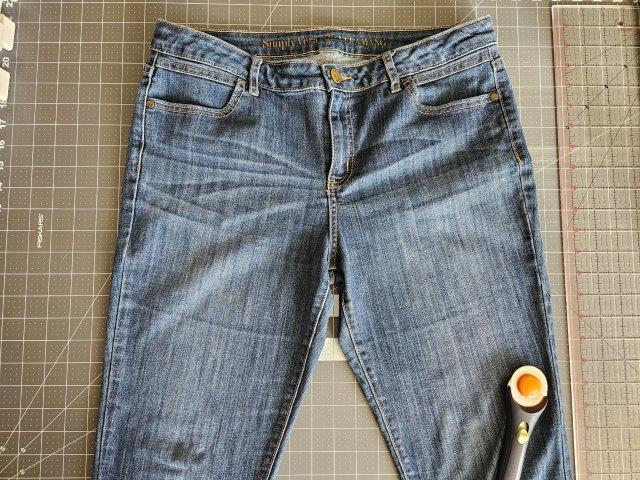
Place your jeans on your cutting mat and decide how long you would like your denim jeans handbag to be, make a mark if needed.
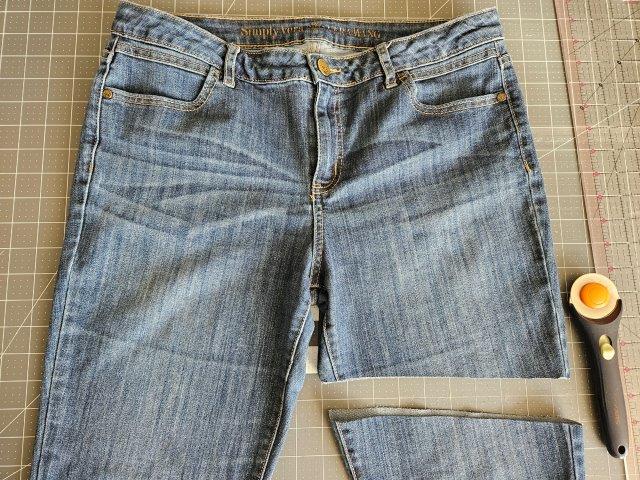
Use your rotary cutter to cut one of the legs just below your desired length. You’ll be trimming them again in a later step.
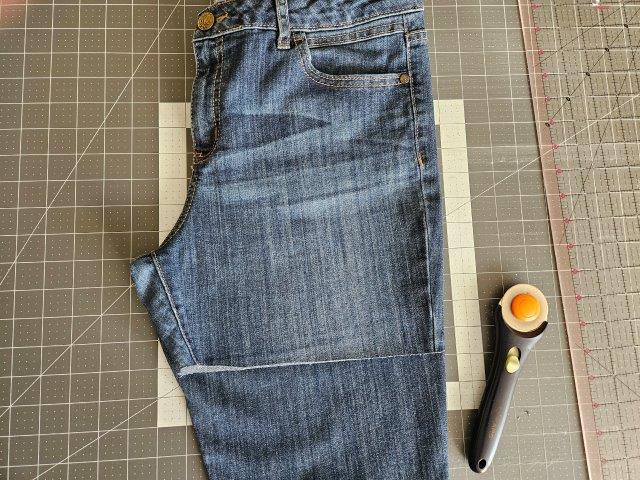
Fold the jeans in half with the front of the jeans facing out.
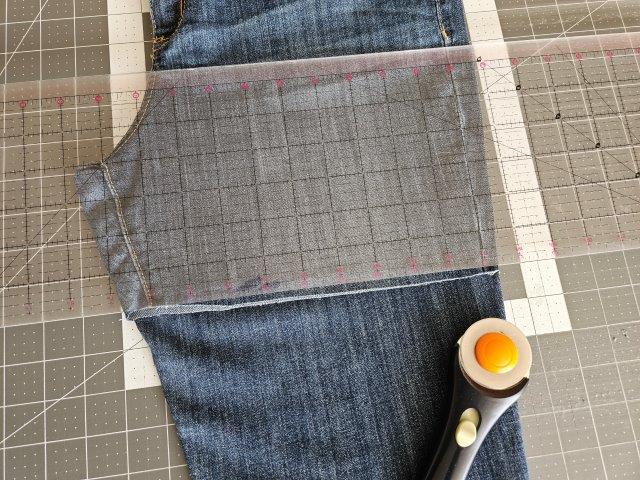
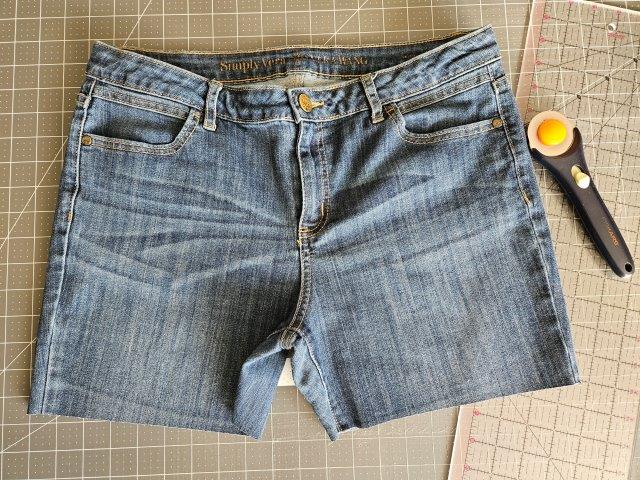
Use your rotary cutter and clear ruler and trim the jeans to make the legs even.
Cut the seam at the crotch
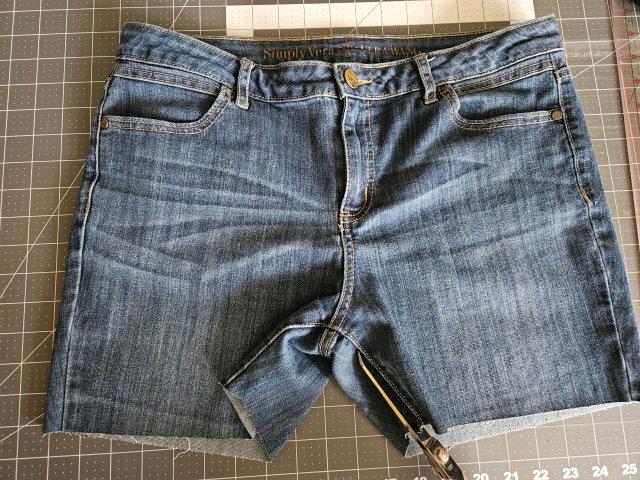
Grab your sewing scissors and cut along the seam at the crotch of the jeans to open the bottom up like a skirt.
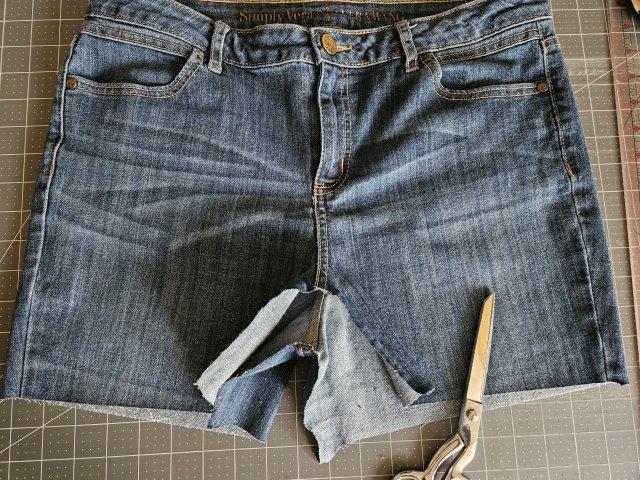
Then cut the seam off to help reduce the bulk.
Turn your handbag inside out
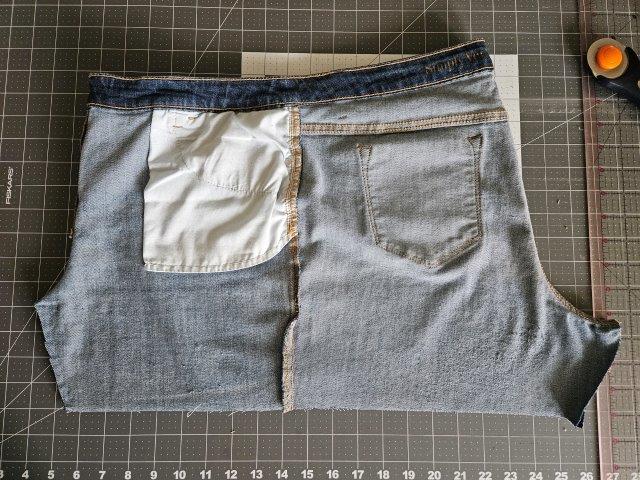
Turn the denim jeans handbag inside out and fold in half so the zipper is facing to the left. You’re going to cut the extra denim in the front and the back of the jeans to create straight edges.
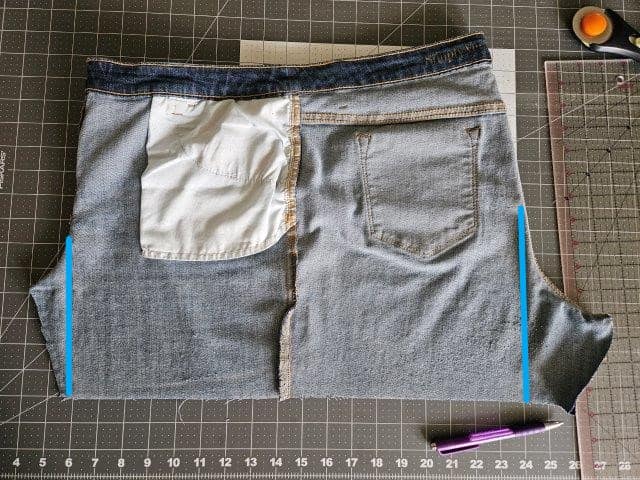
Draw a line from the zipper to the bottom using a marking pencil or a pen. Pin to hold in place. Now, draw a line from the back seam to the bottom. Pin to hold in place. See blue lines in above picture.
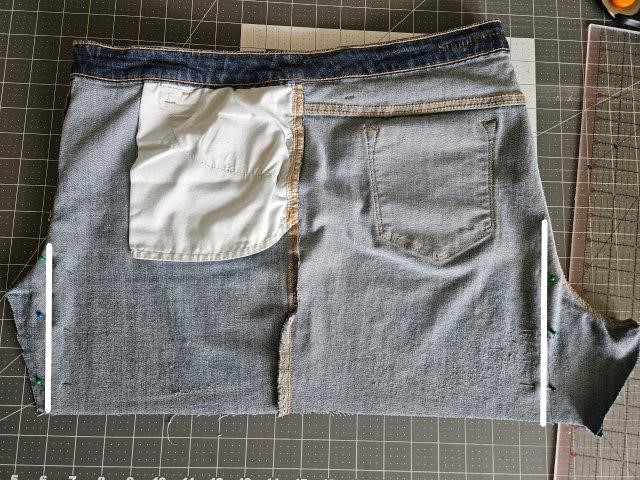
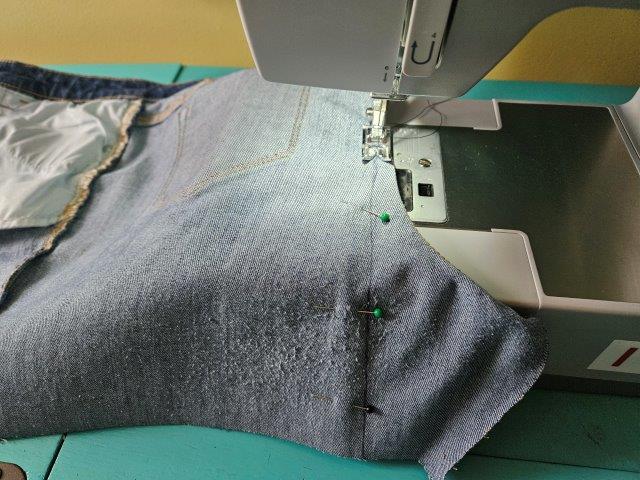
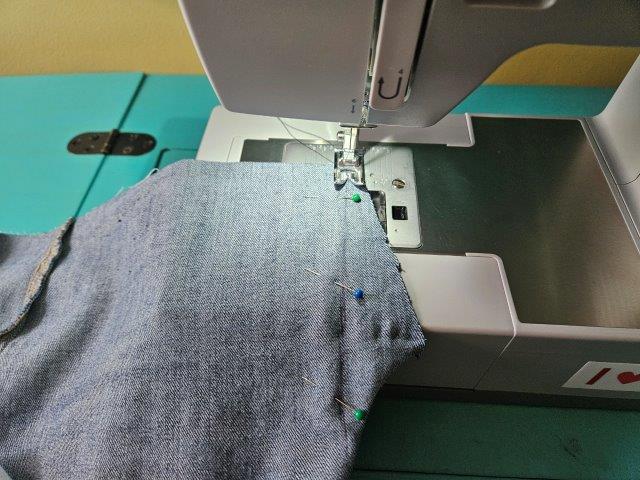
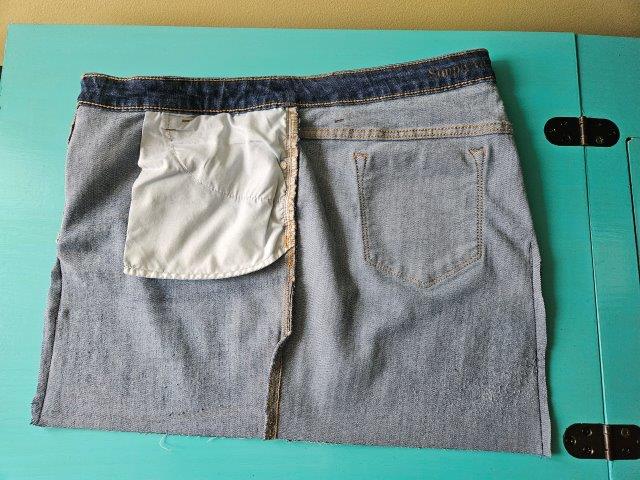
Sew along both lines and trim the excess fabric.
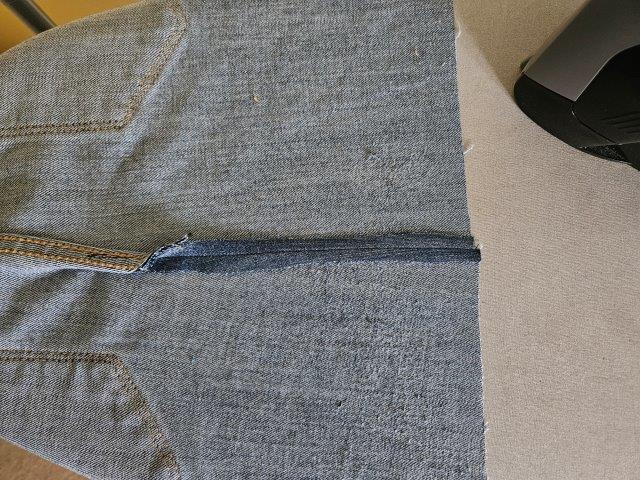
Press the seams flat.
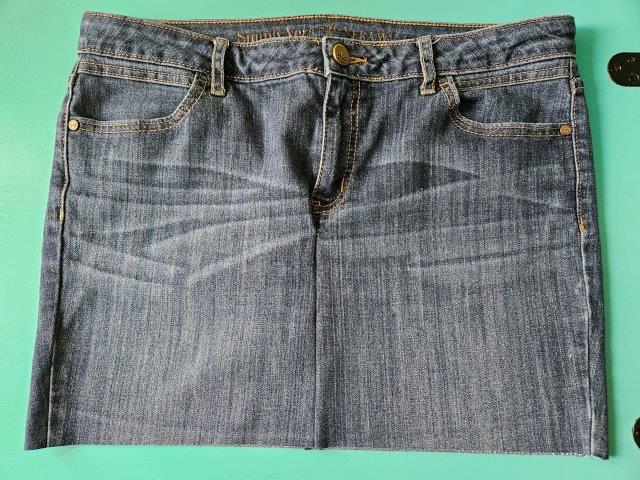
The above picture shows what your denim jeans handbag should look like at this point.
***You can find the AD-FREE, printable PDF version of this sewing tutorial available for purchase in my Etsy shop HERE. Includes 17 pages of step-by-step instructions with pictures. Print a copy to keep next to your sewing machine for easy reference.***
Sew the bottom edge
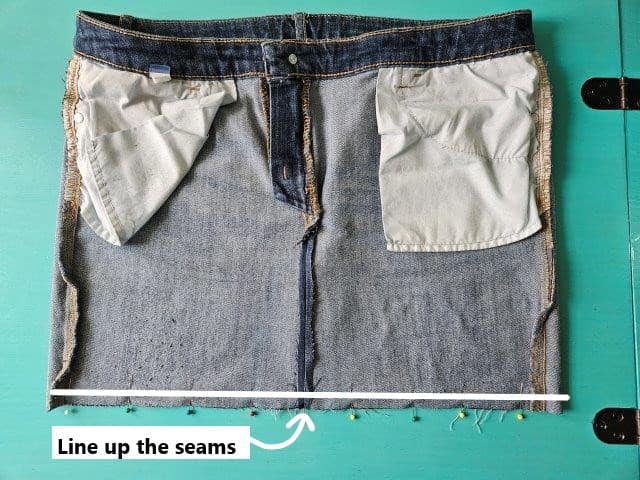
Turn the jeans inside out and lay flat with the zipper in the front. Be sure the seams are lined up. Pin in place.
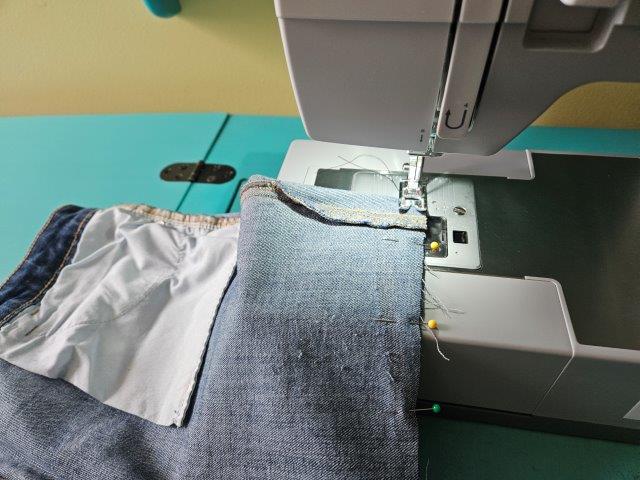
Sew along the bottom edge using a 3/8″ seam allowance. Trim any excess fabric.
Cut the legs for the straps
You are going to use the legs of the jeans to make the straps.
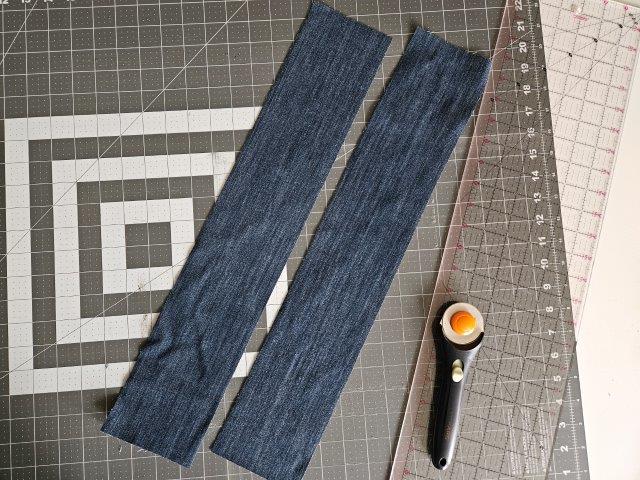
Using your cutting mat, clear ruler, and rotary cutter, cut two strips from the legs your desired width and length. I cut the legs 4″W x 21″L (the entire length of my leg fabric). Cutting the fabric 4″W will give me a 1″W finished strap.
RULE OF THUMB: Decide how wide you would like your straps to be, then multiply that number by 4 and that will be how wide you will need to cut your fabric. For this denim jeans handbag, the finished straps are 1″, multiply that number by 4 (1 x 4 = 4). Therefore, I need to cut the fabric 4-inches wide.
Attach the interfacing
I’m using Pellon P44F Fusible Interfacing for this handbag.
Cut the fusible interfacing the same size as your straps. Attach the interfacing to the wrong sides of the straps following the package instructions.
Make the straps
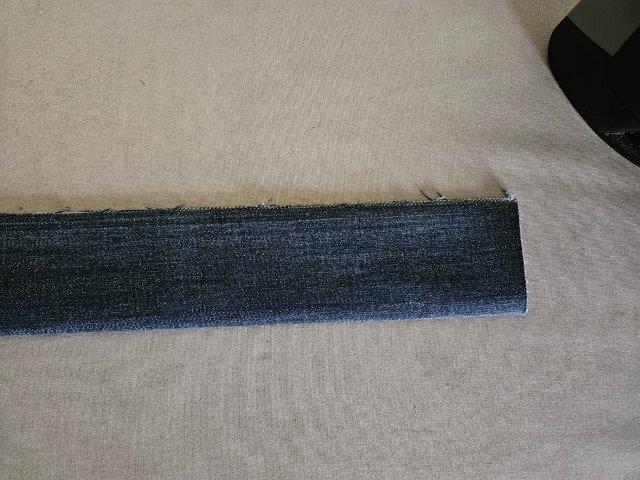
Once you have the fusible interfacing attached to your straps, lay your straps right side down on your ironing board. Fold each strap in half lengthwise and press the fold.
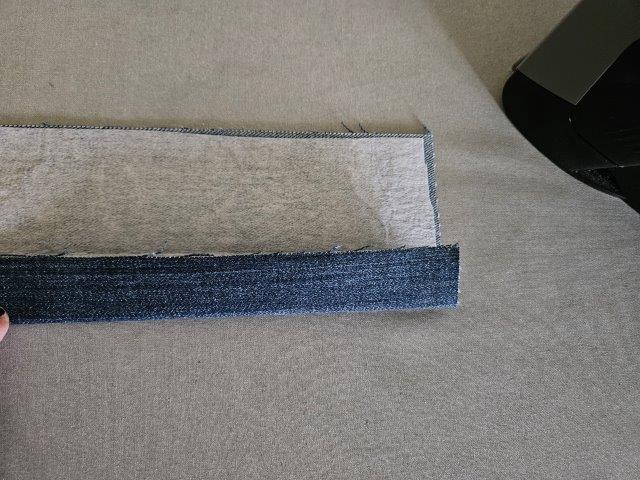
Open back up and fold the outside edge to the center and press.
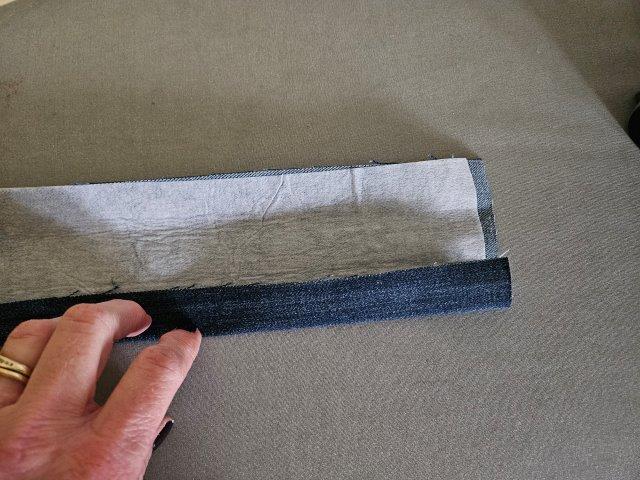
Turn the strap around and fold the other outside edge to the center and press.
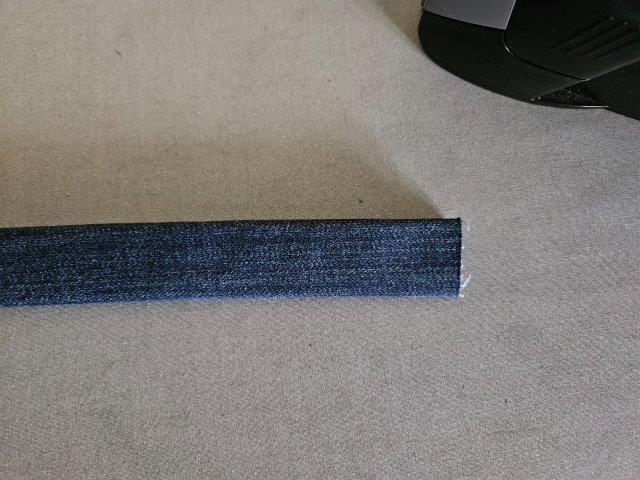
Fold in half again and press.
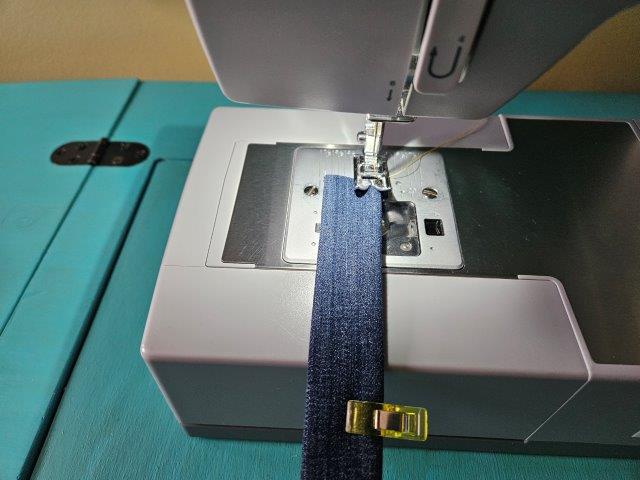
Sew the strap along both folded edges.
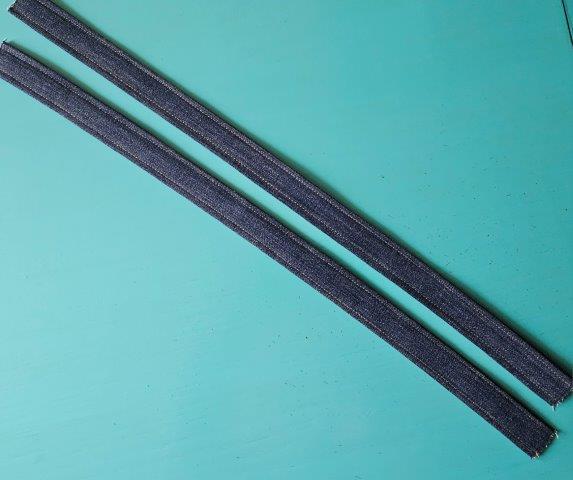
The above picture shows the sewn straps.
Make the handbag lining
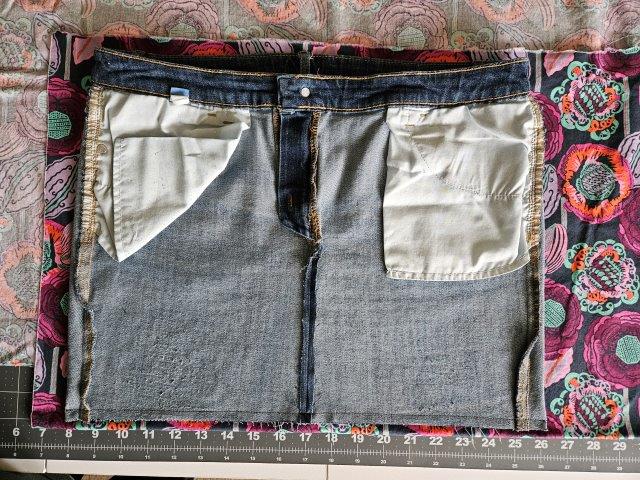
Fold your lining fabric in half with the fold at the bottom. Place your denim handbag on top of your lining fabric and trace the sides using a pen or marking pencil. Give yourself enough on each side for a 3/8″ seam allowance and an inch at the top for hemming.
Cut the fabric along the lines you traced using your sewing scissors.
Hem the top of the lining
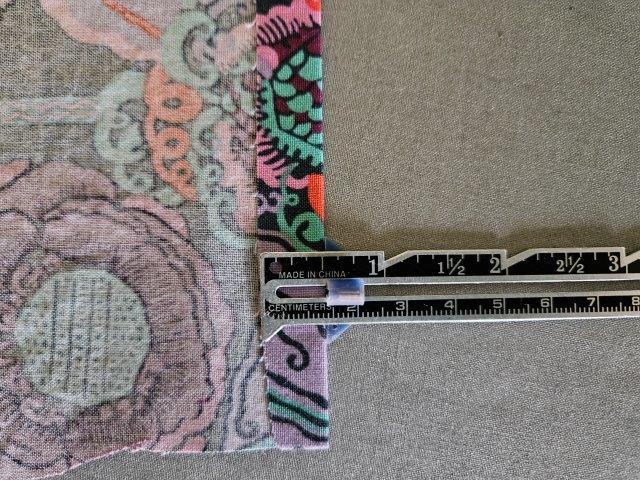
Unfold the lining fabric and place wrong side up on your ironing board and fold each short edge (the top of the lining edges) 1/2″ and press the fold. Fold over again 1/2″ and press the fold. Hemming the top of the lining will hide the raw edges.
Add inside pockets (optional)
At this point, you have the option of adding pockets to the lining fabric pieces if you want pockets on the inside of your denim jeans handbag. To add a zipper pocket, follow these instructions on how to add a zipper pocket. For slip pockets, follow these instructions on how to add slip pockets to a bag.
Sew the lining sides
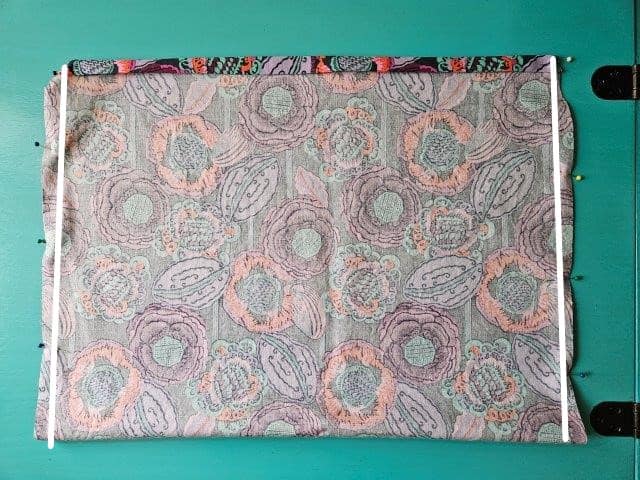
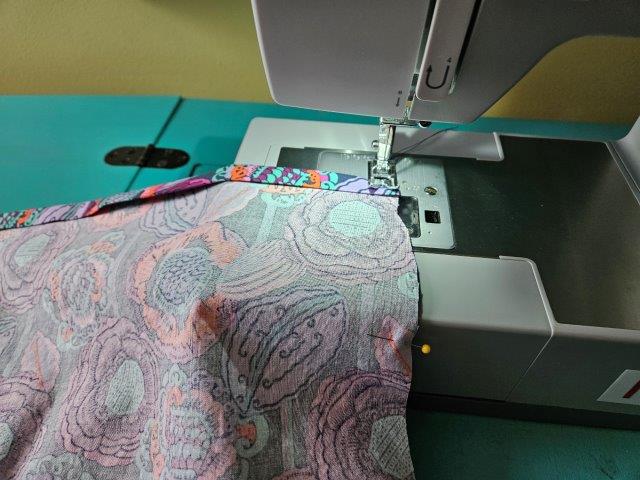
Fold the lining fabric in half, right sides together. Sew along each side of the lining using a 3/8″ seam allowance.
Square the bottom
You are going to cut squares from each bottom corner to create the square bottom of the denim bag.
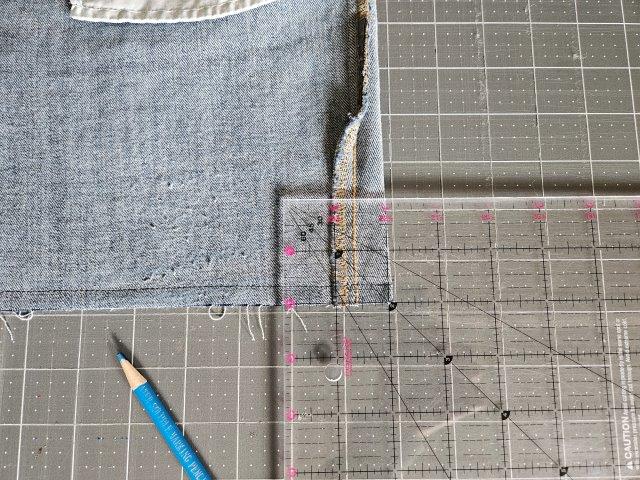
Starting with the denim piece, use your clear ruler and marking pencil to make a 2-inch square at each bottom corner.
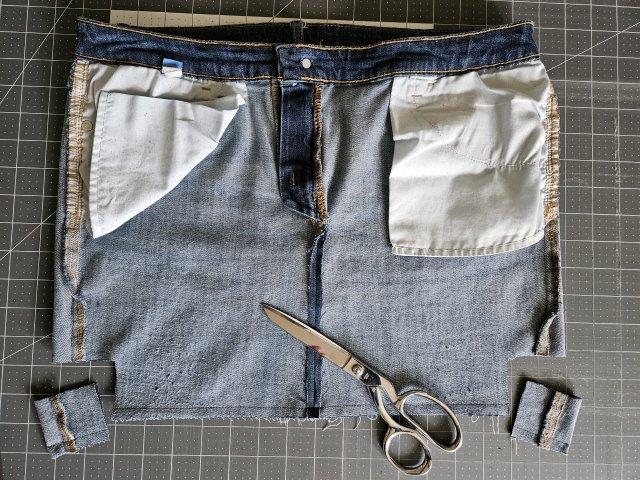
Cut out the squares with your sewing scissors.
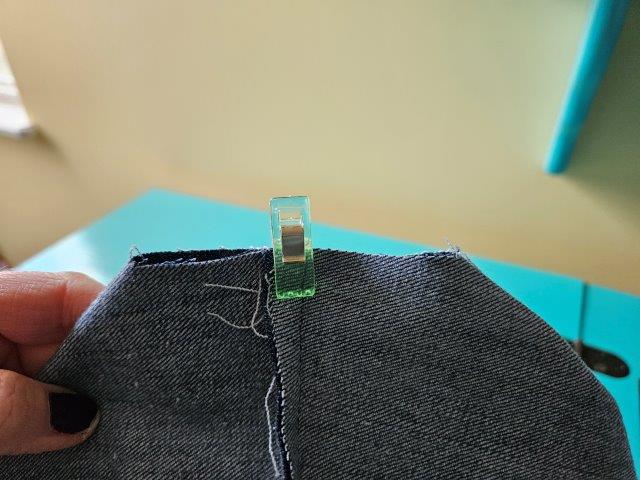
Pinch the corner together and line up the seams. Clip or pin to hold in place.
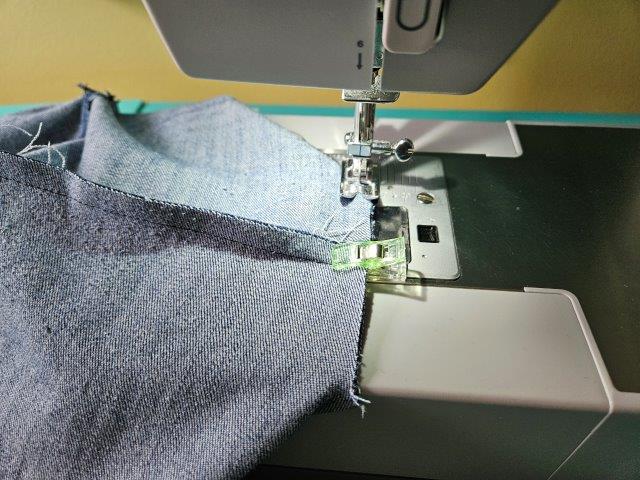
Sew along the edge.
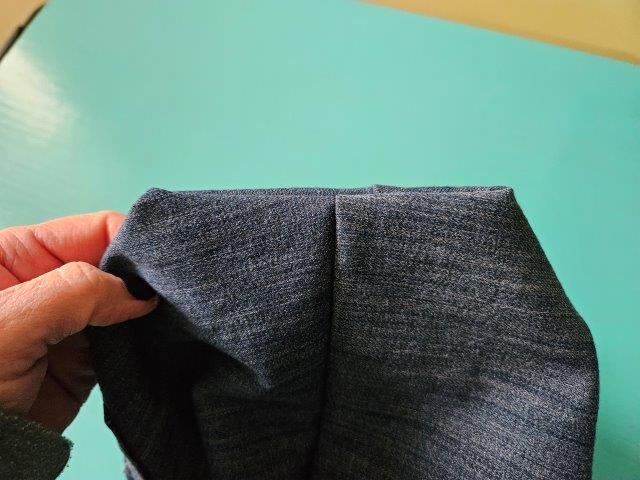
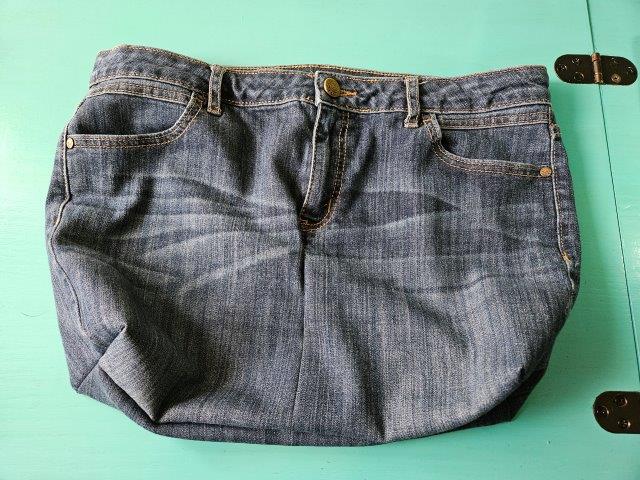
Your bag bottom is now 4-inches wide.
RULE OF THUMB: The finished bottom width of the denim bag is going to be two times the width of the squares you cut. For this bag, the squares are two inches which makes the finished bottom width 4 inches. For a 6 inch wide bottom, you’ll cut the squares 3 inches wide.
Repeat these steps with the bag lining.
Attach the straps
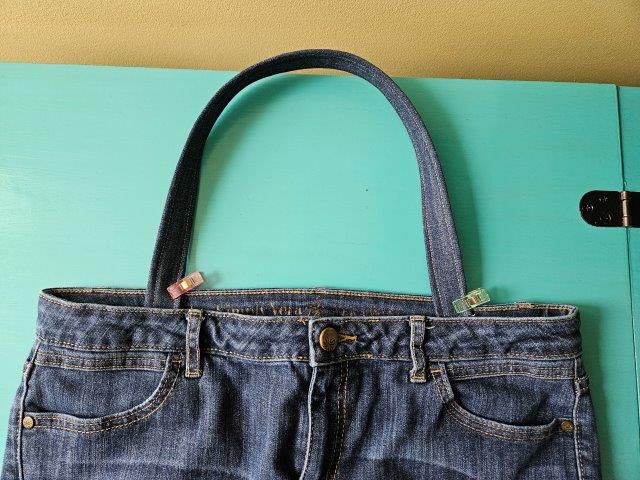
Decide where you would like the straps to be placed then pin or clip to hold in place. See above picture. The lining will hide the raw edges.
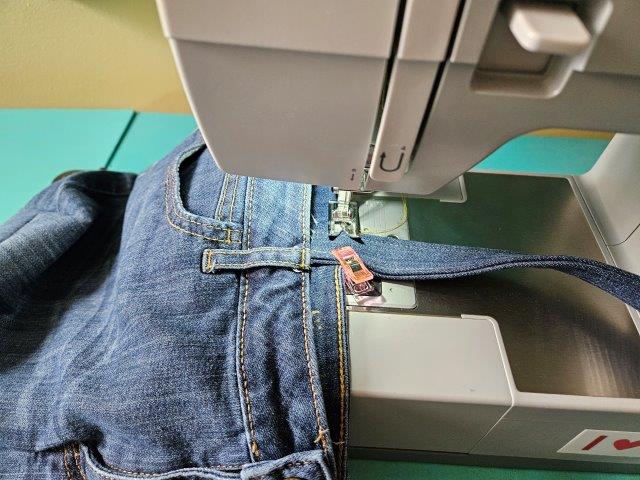
I used matching thread and sewed at the top of the waistband along the existing stitching. Sew over the strap a couple times for extra durability.
NOTE: I would liked to have sewn the straps at both the top and bottom of the waistband along the stitching but my straps weren’t long enough. Feel free to do this if you have longer straps to make them more secure.
Add the lining
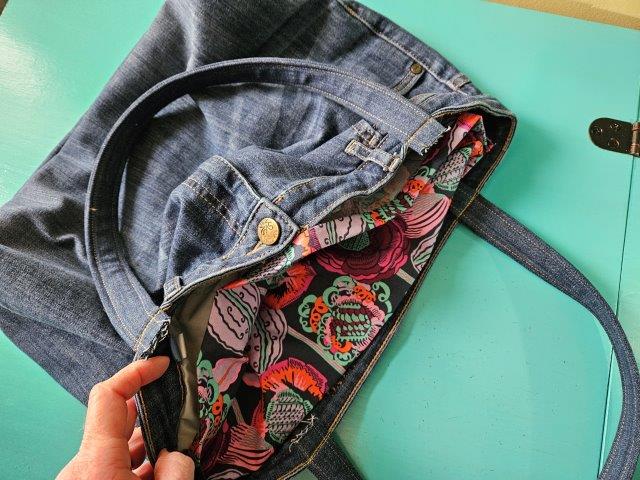
With the lining inside out, insert the lining into the denim bag. Line up the top of the lining with the top stitching of the waistband. Pin or clip all around.
At this point, you can either use your sewing machine to top stitch all around following the existing stitching. Use a needle used for jeans because you will be sewing over the top part of the belt loops.
Or you can sew by hand all around using the ladder stitch. If you use the ladder stitch, be sure your needle is only going through the inside layer of the waistband so your stitching doesn’t show on the outside of the bag.
I decided to hand stitch because of the placement of the front button on the jeans.
Press the inside of the bag. Add embellishments if you’d like and fill with goodies!
***You can find the AD-FREE, printable PDF version of this sewing tutorial available for purchase in my Etsy shop HERE. Includes 17 pages of step-by-step instructions with pictures. Print a copy to keep next to your sewing machine for easy reference.***
Pin for later!

You are finished!
I hope you enjoyed upcycling your denim jeans and creating a new handbag! Happy sewing!

Other handbag sewing tutorials:
- Quilted Patchwork Handbag Sewing Tutorial
- Curved Top Shoulder Bag Pattern
- Simple Tote Bag Sewing Project
- DIY Messenger Sling Bag