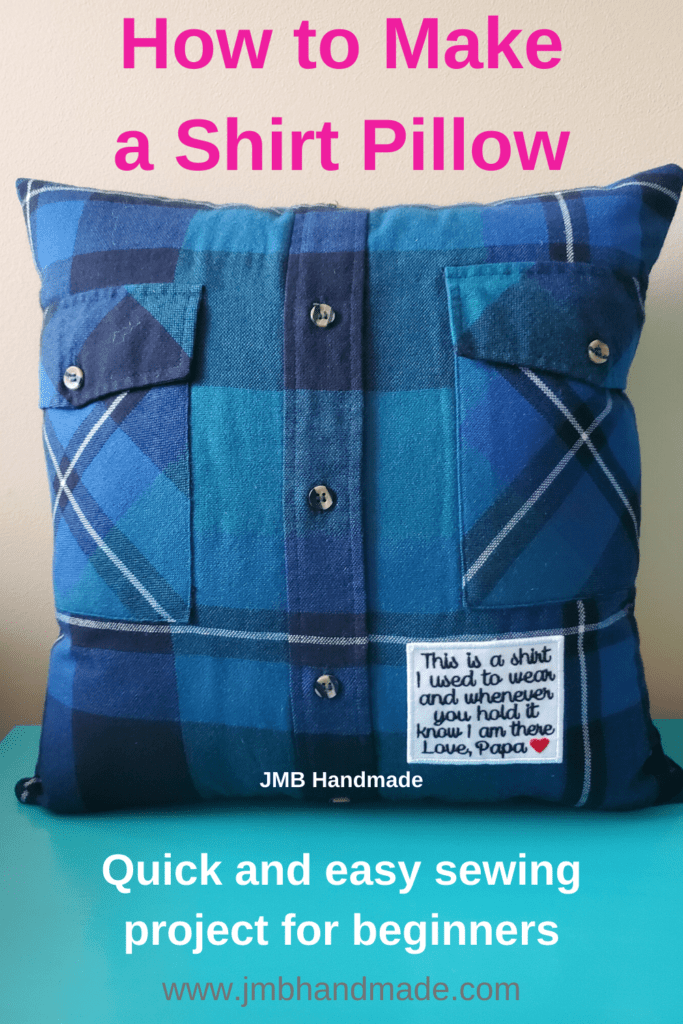
How to Sew a Memory Pillow Out of Shirts
Memory pillow tutorial to show you how to turn button up shirts or t-shirts into pillows.
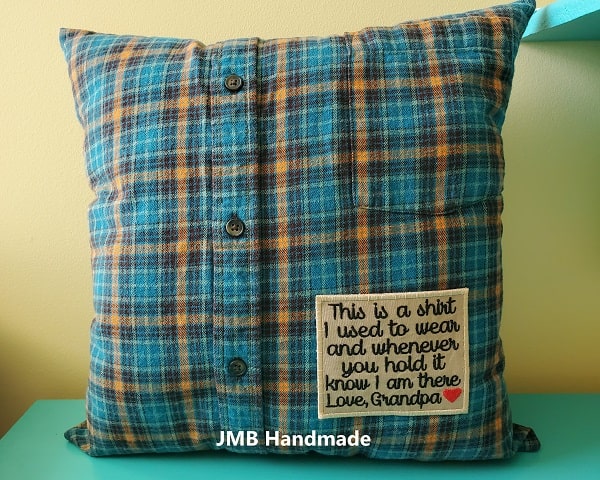
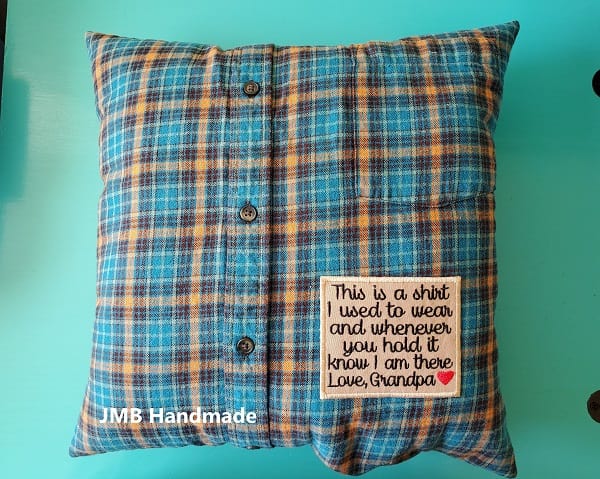
It’s really hard when you have a loved one pass away. Sometimes saving a piece of clothing makes you feel better. I recently had an order to make memory pillows out of button up shirts for someone who recently lost their father. She wanted four made – one for each of her children so each would have a keepsake of their grandfather. These make great gifts for love ones who will cherish them as well.
Use the shirt sleeves or shirt fabric scraps to create memory Christmas ornaments.
If you have more than a few shirts, try making a memory t-shirt quilt or a memory teddy bear pillow. The button up shirts can be used as well.
This post contains affiliate links. Please see disclosure for more information.
I would like to share my instructions with you on how I made these memory pillows. Here you go!
***You can find the ad-free, printable PDF version of this sewing tutorial available for purchase HERE. Includes 12-pages of step-by-step instructions with pictures. Print a copy to keep next to your sewing machine for easy reference.***
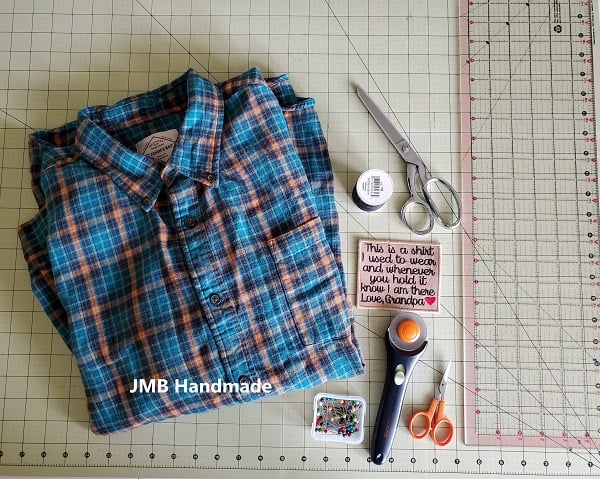
Memory pillow supplies list
- Flannel shirt, button up shirt, t-shirt or sweatshirt
- Cutting mat
- Rotary cutter
- Clear Ruler
- Fusible interfacing
- Sewing scissors
- Thread scissors
- Needle and thread
- Straight pins
- Poly-fil stuffing
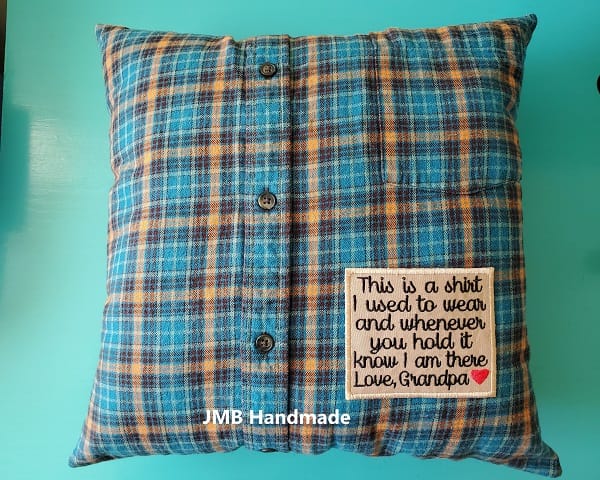
- Custom embroidered patch (optional)
- Sewing machine
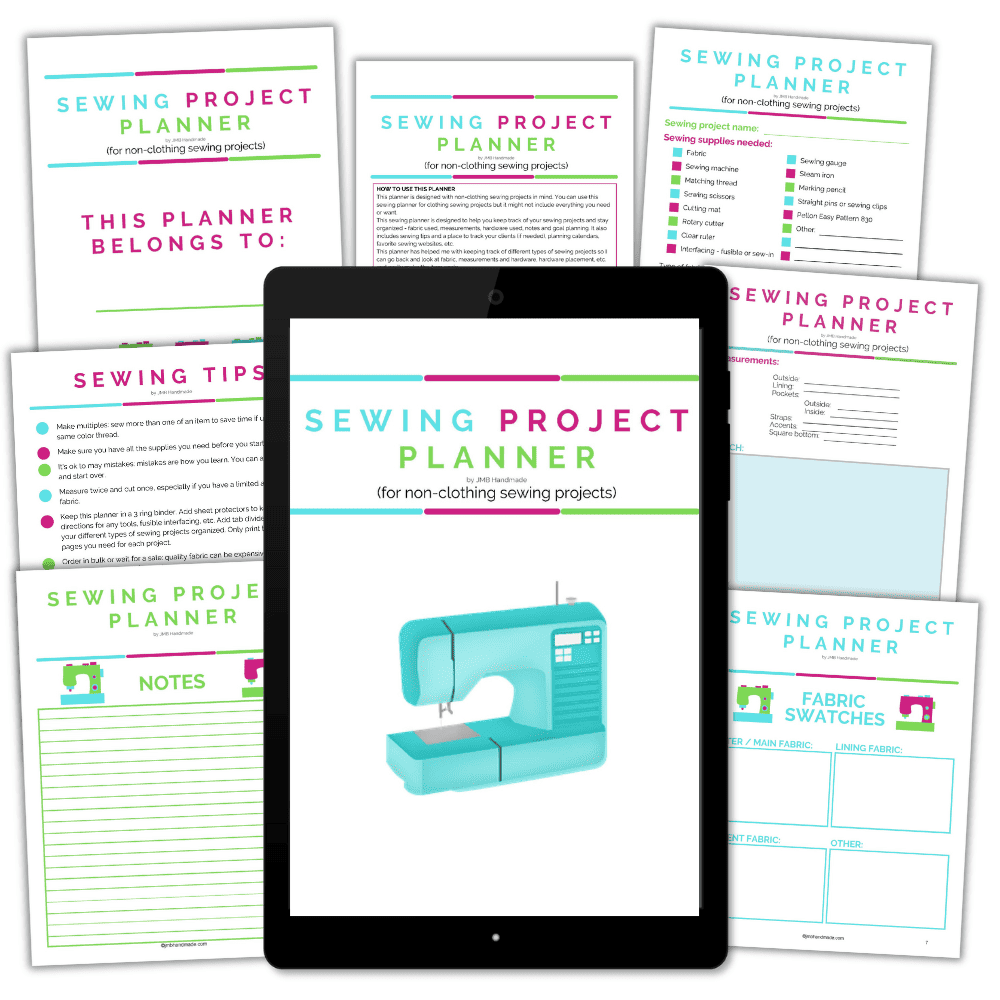
Keep track of your sewing projects, like this one, with a sewing planner. This sewing planner is specifically designed for non-clothing sewing projects and helps you stay organized – fabric used, measurements, hardware used, notes, etc. Also included are pages such as sewing tips and fabric shops. Get your sewing planner HERE.
Cut the shirt
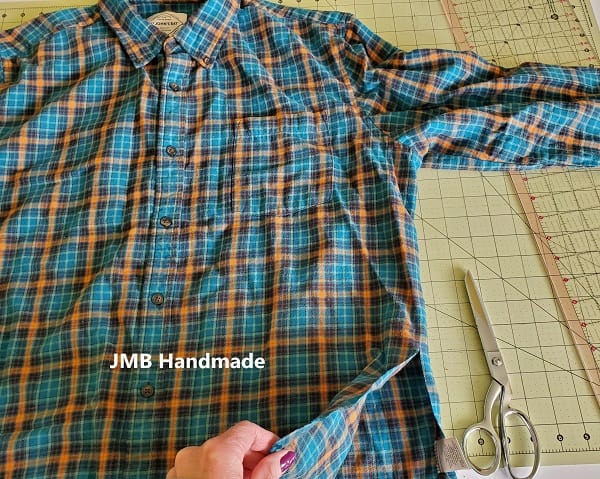
Using your sewing scissors, cut the shirt into two large pieces.

The pillow size for this project is 16 inches by 16 inches. You can make it any size you want. Using your cutting mat, clear ruler, and rotary cutter, cut each shirt piece 16 inches long by 16 inches wide.
You now have two shirt pieces the same size. Don’t worry about the wrinkles (if you have wrinkles). We will be pressing those out when we do the interfacing step. My buttons are a little off center because I wanted to keep the pocket for the memory pillow and I didn’t want to cut through the pocket.
Attach the interfacing
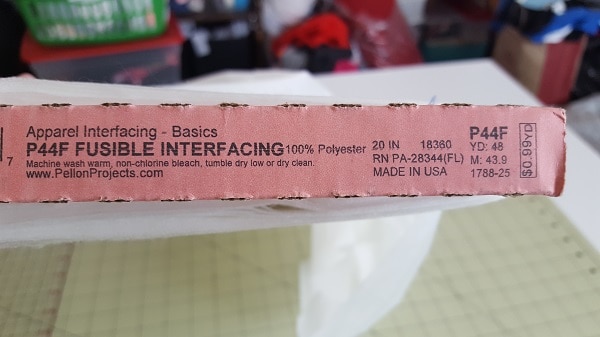
Cut the fusible interfacing just smaller than your shirt pieces. Pellon is my go-to brand for all my sewing projects. I use the Pellon P44F Fusible Interfacing for memory pillows because it is a little bit thinner. It will keep the buttons closed without gaping and stabilize the fabric to make working with the shirt pieces easier.
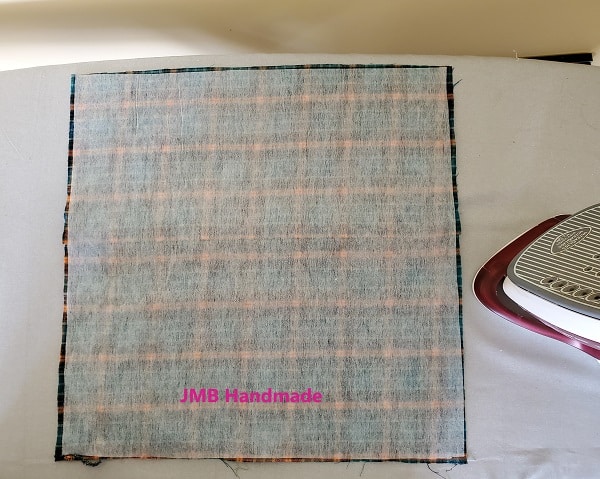
Place one of the shirt pieces on your ironing board, wrong side up.
Press the fusible interfacing onto the shirt piece. Do this with the other shirt piece as well.
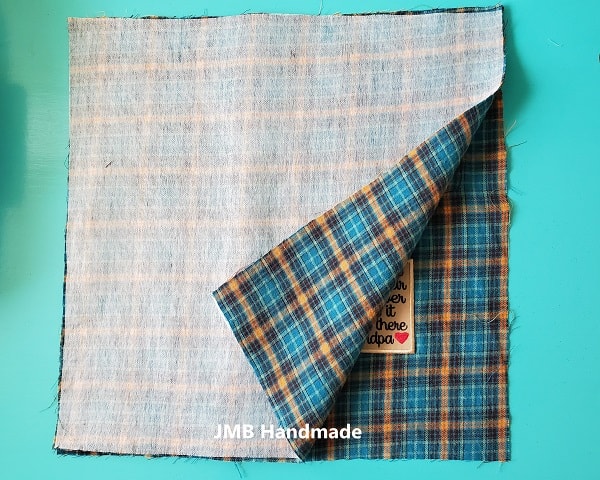
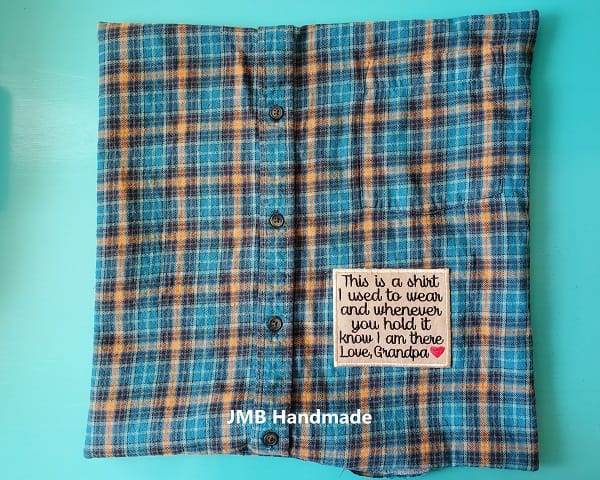
Sew on the embroidered patch
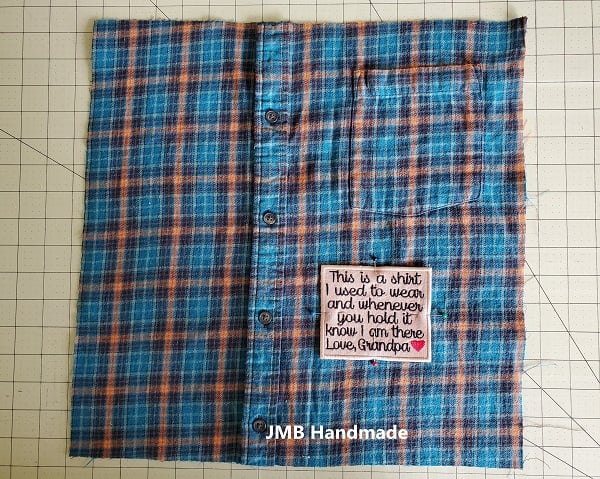
If you are using an embroidered patch for your pillow, now is the time to sew it on. I placed it just below the pocket, but you can place it anywhere you like.
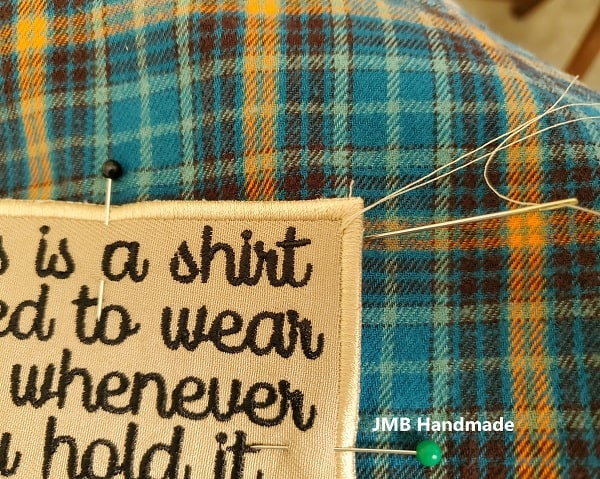
Using a sewing needle and matching thread, sew around the perimeter of the patch. My stitches were about 1/4-inch apart.

This is what it looks like sewn on the shirt piece.
***You can find the ad-free, printable PDF version of this sewing tutorial available for purchase HERE. Includes 12-pages of step-by-step instructions with pictures. Print a copy to keep next to your sewing machine for easy reference.***
Time to sew together
Place the shirt pieces on top of each other, right sides together.
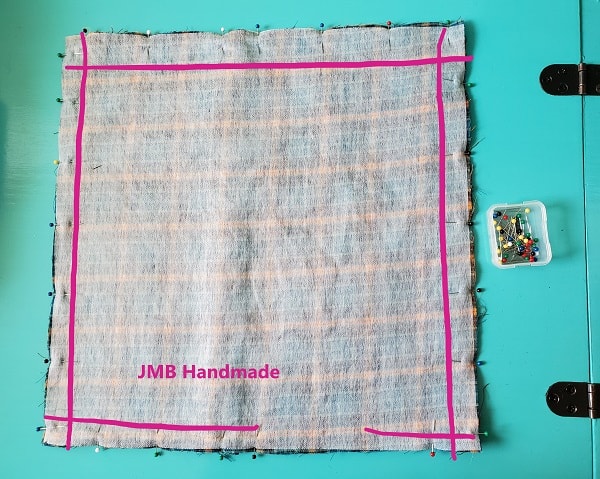
Pin all around using your straight pins. Leave an opening at the bottom (big enough for your hand to fit through) for turning.
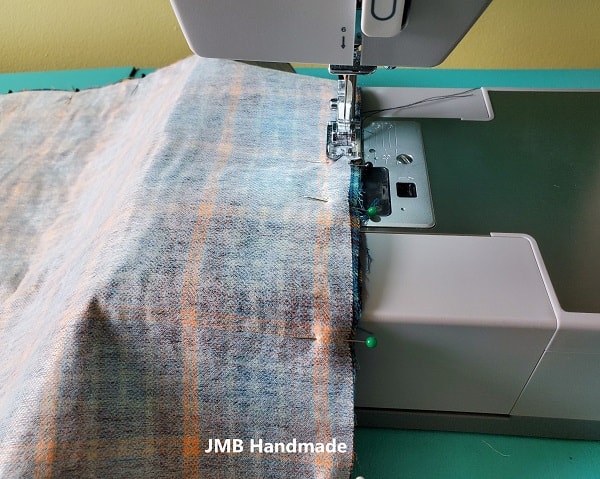
Using your sewing machine, sew the outer perimeter using the straight stitch. (See pink lines above) I line up my straight stitch foot with the edge of my fabric and that is my seam allowance. It’s about 1/4-inch. Sew the zigzag stitch all around as well to prevent the fabric from fraying.
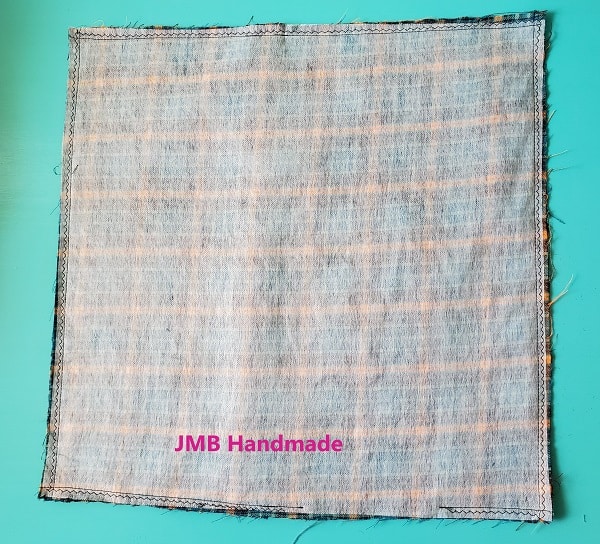
What it looks like after sewing.
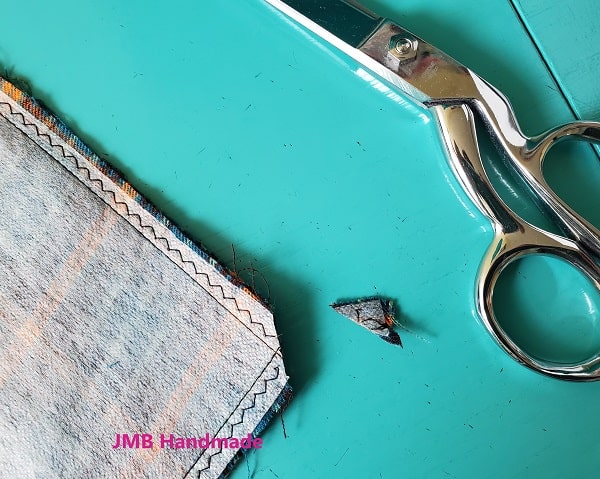
Clip all four corners using your sewing scissors.
Turn right side out and push out corners. Careful not to push through the stitches you just sewed!
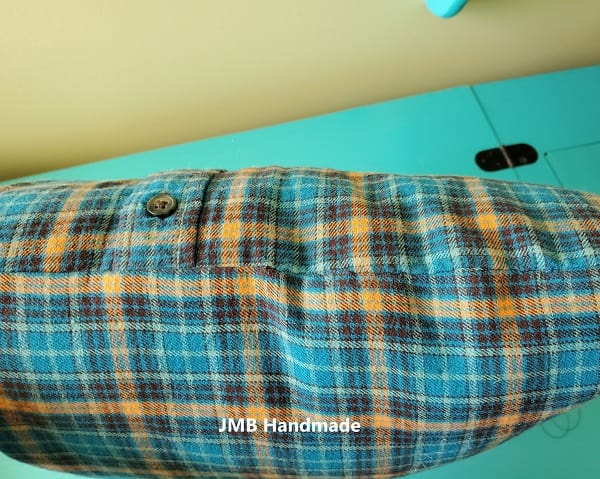
Add the stuffing
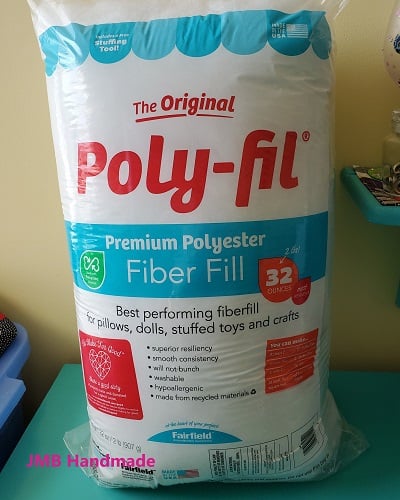
Time to stuff your pillow! I use Poly-fil to stuff my pillows. I like it because I can decide how full I want the pillow and Poly-fil helps keep the pillows shape much longer than a pillow form. Plus, you can make the pillow any size you want and not have to worry about fitting the pillow form.
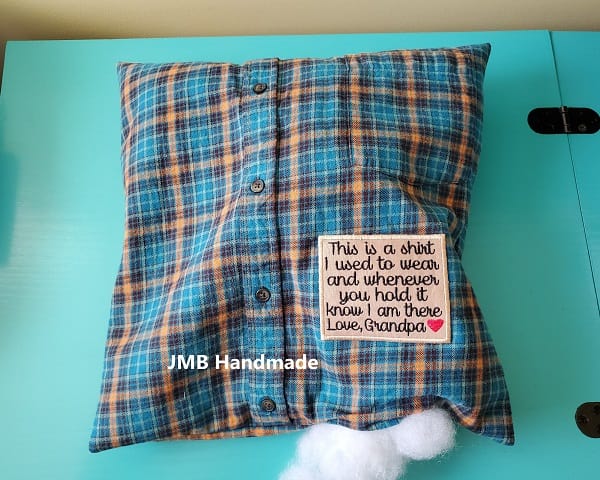
Stuff your pillow using a little bit of the Poly-fil at a time starting with the corners. Keep stuffing until the pillow is a full as you like.
Stitch the opening closed
Using your sewing needle and thread, hand sew the opening closed using the ladder stitch or invisible stitch. Double thread your needle for extra durability.
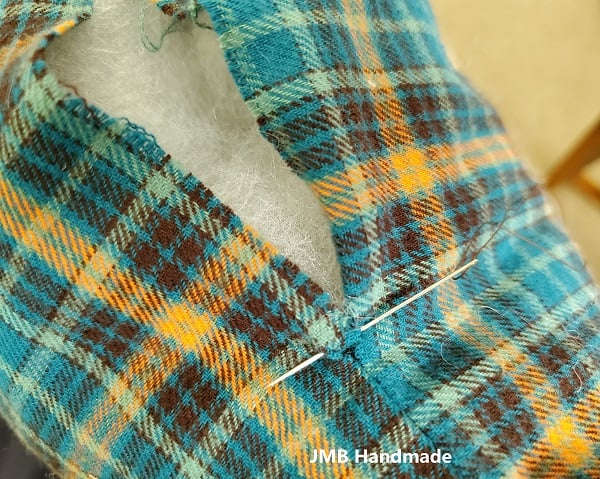
Fold the hem inward. You might need to press the hem if it doesn’t want to stay inward. Insert your need inside the opening where the sewing machine ended and pull through. Your knot should be on the inside.
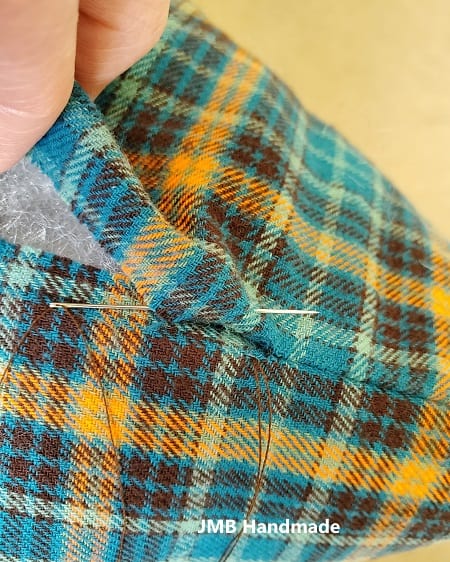
Directly across on the opposite side, insert your needle where the hem is folded and pull through.
On the opposite side, insert your needle right along the fold of the hem as shown above and pull through.
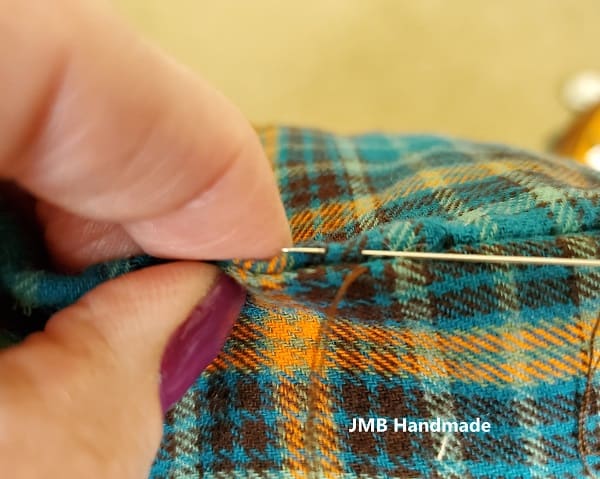
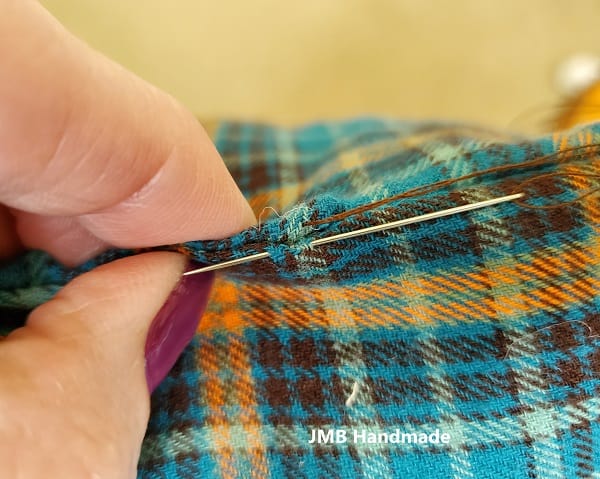
Do the same thing on the opposite side. Continue until the opening is closed. Knot your thread and cut.
See above for finished look.
***You can find the ad-free, printable PDF version of this sewing tutorial available for purchase HERE. Includes 12-pages of step-by-step instructions with pictures. Print a copy to keep next to your sewing machine for easy reference.***
You are finished!
I hope you find some comfort in making your memory pillow. I would love to see your finished project! Please feel free share and comment below. Happy sewing!
Pin and save for later!
Related T-Shirt / Shirt Sewing Projects
- How to Make a Memory T-Shirt Quilt
- T-Shirt Scarf Tutorial
- How to Make a Standard Size T-Shirt Quilt Pillowcase