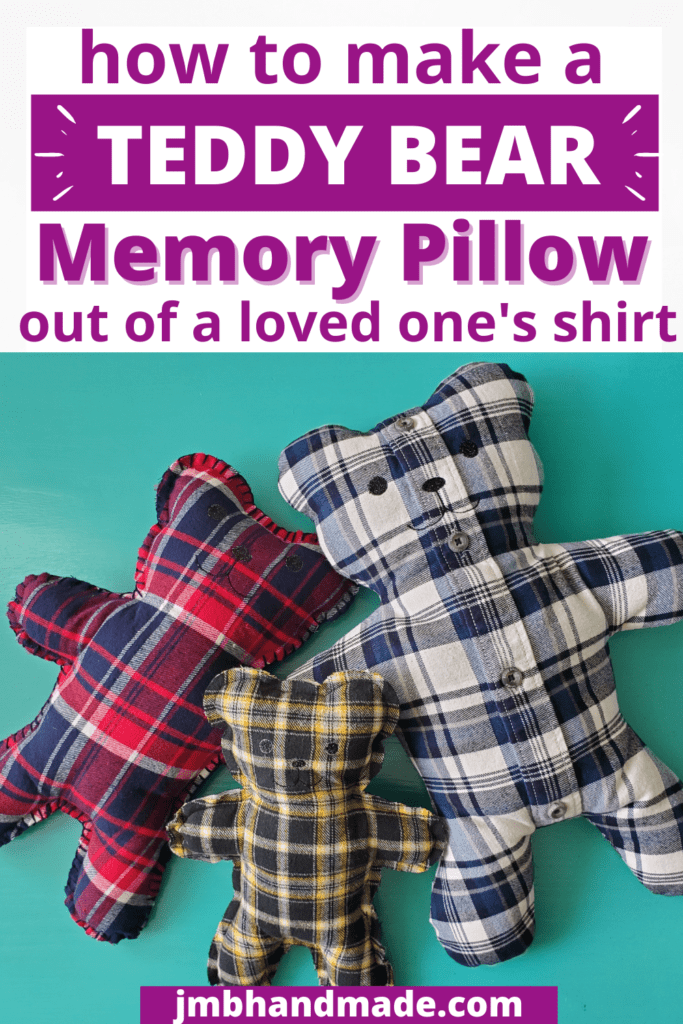
How to Make a Memory Teddy Bear Pillow
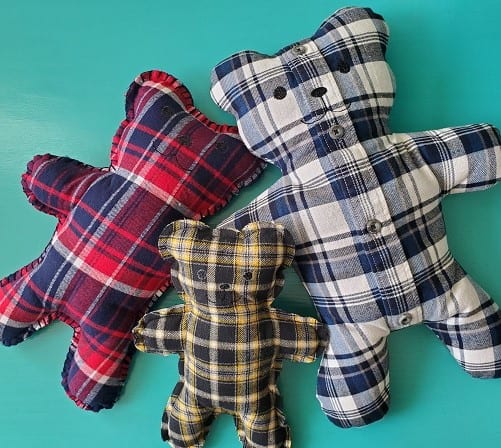
Memory teddy bear pillows are a wonderful way to preserve the memory of a loved one. Use a piece of clothing and make a teddy bear pillow using the template and simple instructions.
I wanted to make my own version of the memory bear so I created this pattern and sewing tutorial for you. It is a much simpler bear pattern. Use a loved one’s shirt or any piece of clothing or fabric and make a teddy bear pillow to remember your loved one.
Make a memory pillow along with the teddy bear pillow out of your loved one’s shirts and give away to family members as gifts.
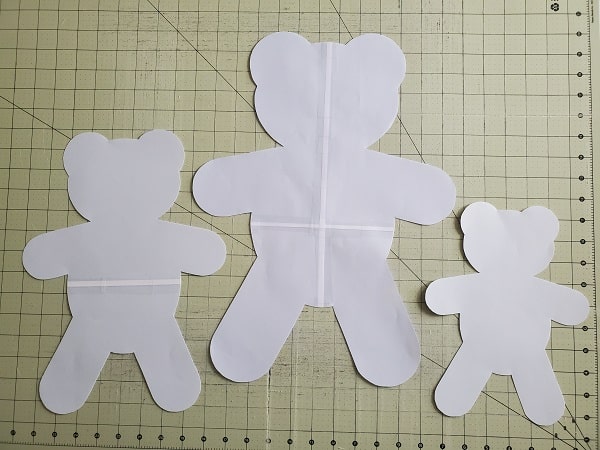
This pattern has three different size templates – large, medium and small. I used the large bear pattern for this sewing tutorial.
This post contains affiliate links. Please see disclosure for more information.
***You can find the ad-free, printable PDF version of this sewing tutorial available for purchase in my Etsy Shop HERE. Includes 19-pages of step-by-step instructions with pictures and templates. Print a copy to keep next to your sewing machine for easy reference.***
Memory Teddy Bear supply list:
- Shirt or fabric
- Teddy Bear template (download below PDF document)
- Embroidered memory patch (if using)
- Bear face embroidery pattern (if using)
- Pellon 830 Easy Pattern (optional, to make template)
- Fusible Interfacing – Pellon P44F Fusible Interfacing
- Poly-fil for stuffing the bear
- Clothes iron
- Sewing scissors – Gingher 5 inch is the best
- Straight pins
- Matching thread
- Sewing machine
- Embroidery machine (optional)
Download the teddy bear template
Download the teddy bear template PDF document by clicking on the above button(s). This sewing tutorial uses the large bear template.
Keep track of your sewing projects, like this one, with a sewing planner. This sewing planner is specifically designed for non-clothing sewing projects and helps you stay organized – fabric used, measurements, hardware used, notes, etc. Also included are pages such as sewing tips and fabric shops. Get your sewing planner HERE.
Print the teddy bear template
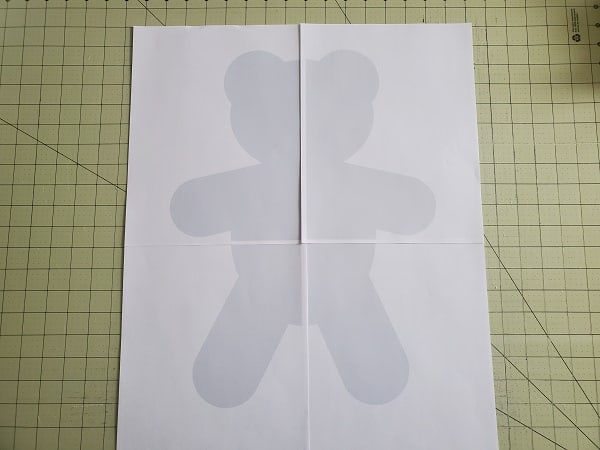
Print the large bear template. Be sure your printer settings are set on “Actual Size” and “Tile only large pages”. Otherwise, the template will not be full size. There are four pages to the large teddy bear template. Tape the pages together as shown in the above picture. Cut out the bear.
You can use this printed paper bear as your template or you can create a template in the next step by tracing your bear.
Create the bear template
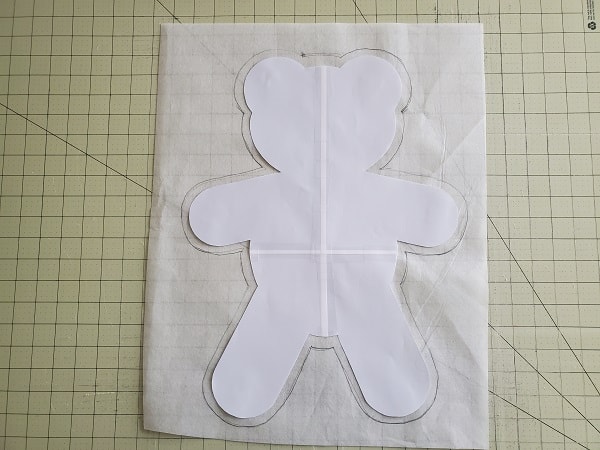
Trace your bear onto your template material, if using. I use Pellon 830 Easy Pattern for all my templates. You can use it over and over again and it lasts forever. To allow for the seam allowance, I made my template a little larger (this is optional) and I only did this for the large bear.
Once you have your bear traced, cut out your template. Mark “front” on one side of your template with a pencil then mark “back” on the other side.
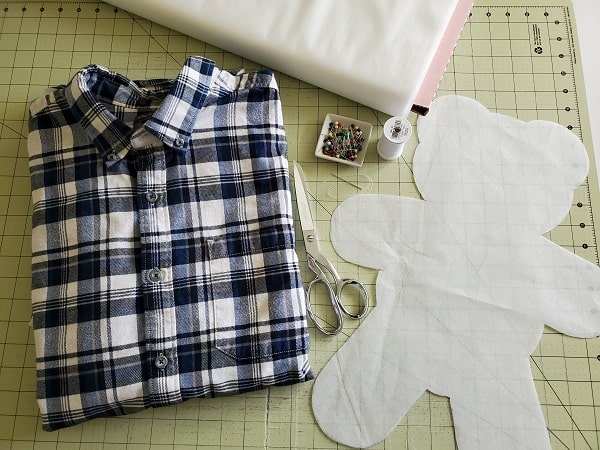
Cut your shirt or fabric
Cut your shirt into two large pieces, one piece for the front of the bear and one piece for the back, big enough to fit your bear template.
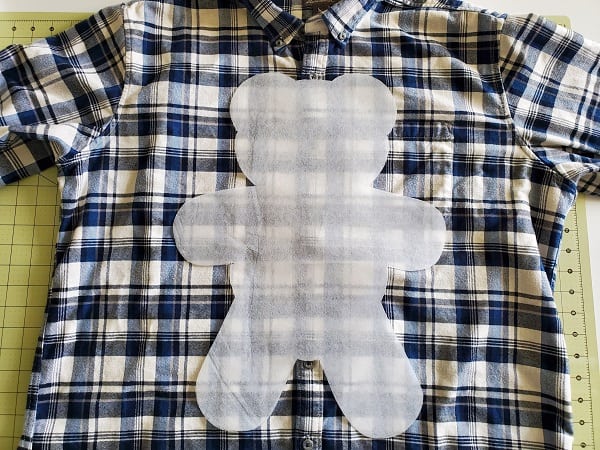
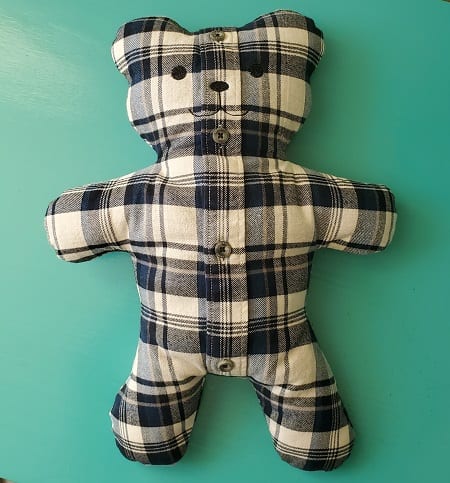
Figure out where you want your bear template to be on your shirt. I wanted to include the buttons on my pillow so I placed my template so the buttons are down the middle of the front of the bear. I removed the shirt pocket.
Attach the fusible interfacing
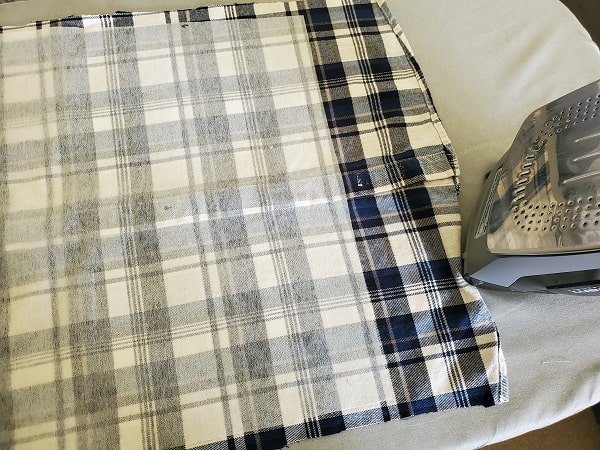
Attach the fusible interfacing on the back of both pieces of your shirt. The interfacing is lightweight and will keep the fabric from stretching. I use Pellon P44F Fusible Interfacing for all my memory sewing projects like my t-shirt quilts and heart ornaments.
Cut out your bear
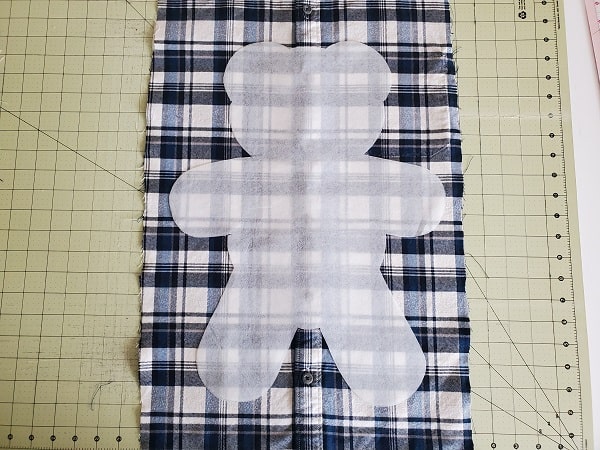
Place the front of your bear on top of the front of your shirt. Be sure the buttons, if using, are not in the seam allowance.
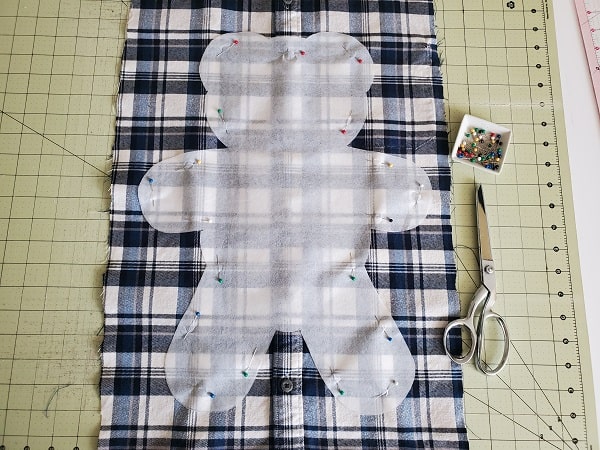
Pin in place. Use your sewing scissors to cut out your teddy bear. If you have a small pair of sewing scissors, it makes the cutting much easier. I have been using Gingher 5″ sewing scissors for memory bears since making this tutorial. The smaller scissors make a huge difference in cutting! (Picture above is showing the larger Gingher scissors).
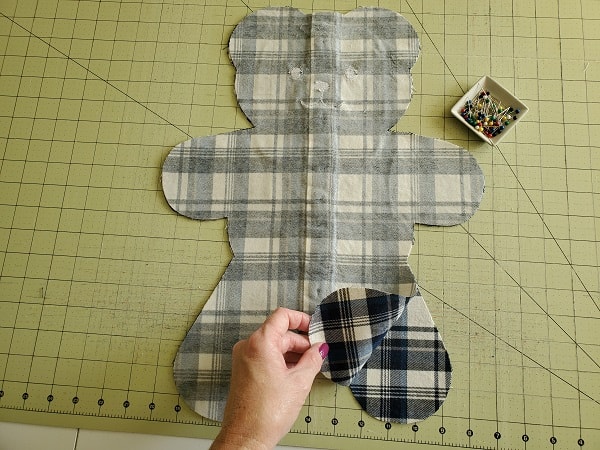
Flip your bear template over to the back and cut the back of the bear. You can also place the back fabric under the front fabric with the wrong sides together and cut both together with the front of your template facing up on the fabric.
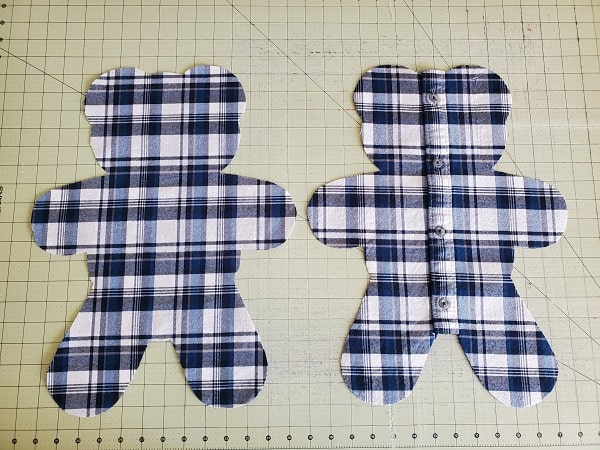
The above picture shows the front and back of the cut teddy bear.
***You can find the ad-free, printable PDF version of this sewing tutorial available for purchase in my Etsy Shop HERE. Includes 19-pages of step-by-step instructions with pictures and templates. Print a copy to keep next to your sewing machine for easy reference.***
Add your embroidery patch and face

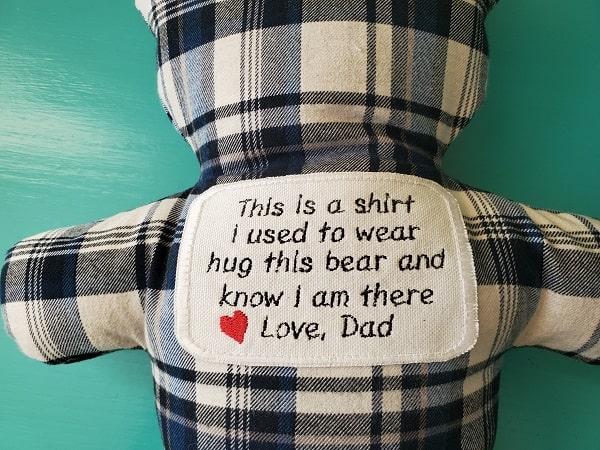
Attach your memory patch (if using) to the back of the teddy bear using matching thread.
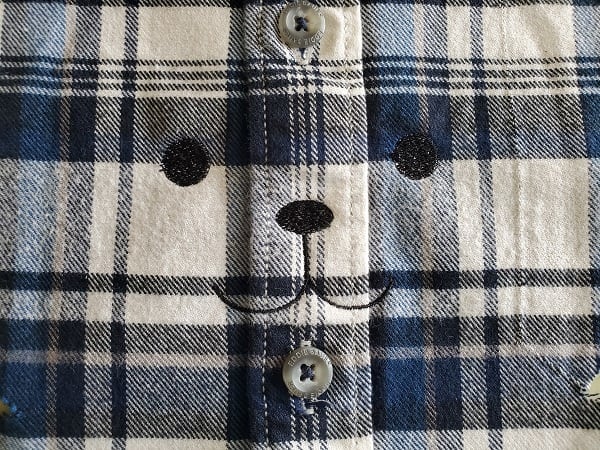
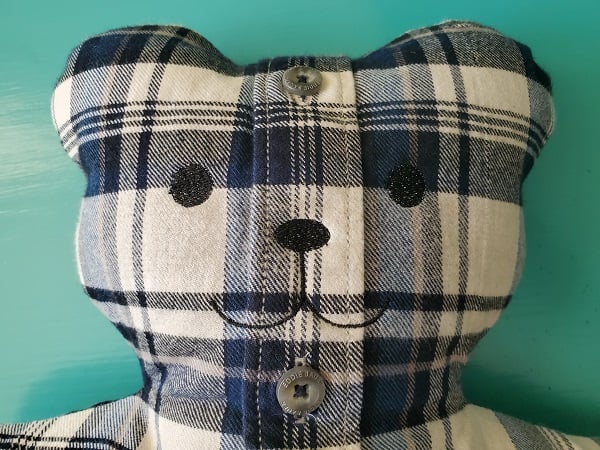
Use your embroidery machine to add your bear face. You can find the embroidery face pattern here. I like how this pattern comes in three different sizes and gives the bear pillow some personality.
Sew the teddy bear pillow together
Place the front of the bear on top of the back of the bear, right sides together. Be sure to line up all the edges.
NOTE: When sewing the medium and small bears, place wrong sides together and stitch together on the outside. Finish by using the blanket stitch around the bear (optional).
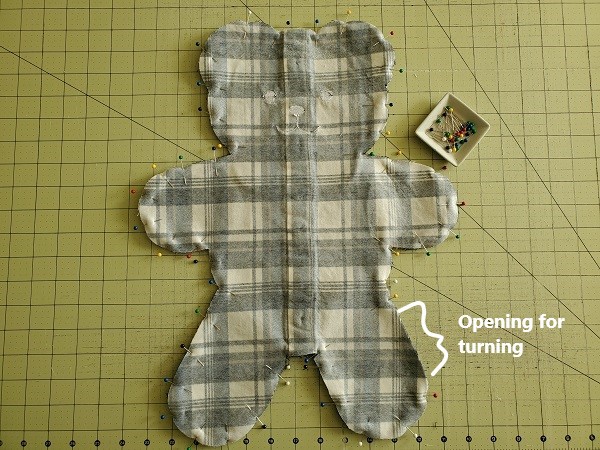
Pin in place, leaving an opening on the outside of one of the legs for turning and stuffing.
Use your sewing machine to sew around the bear, pivot corners when needed. Take your time.
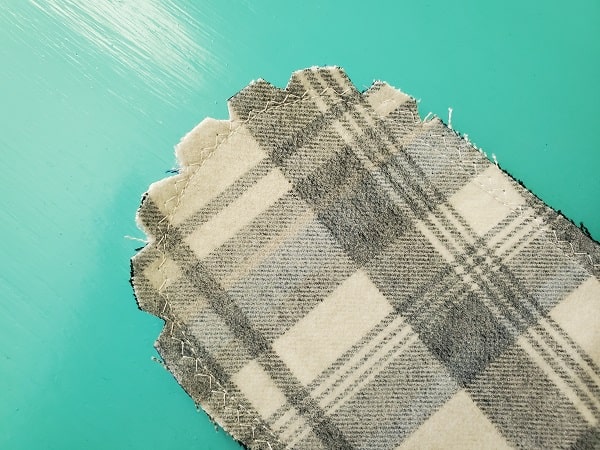
Make little triangle cuts around the curves using your sewing scissors.
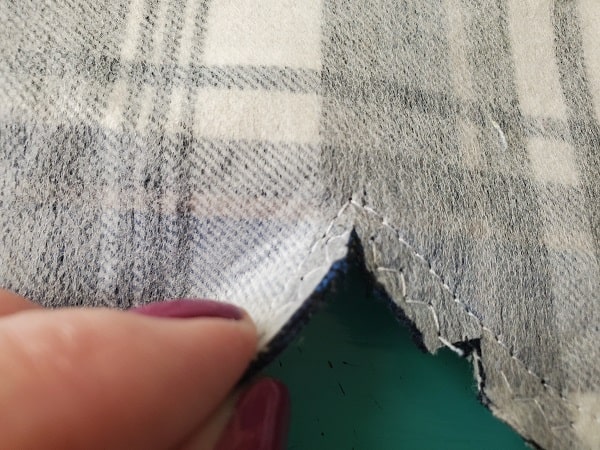
Cut a slit in the sharp corners.
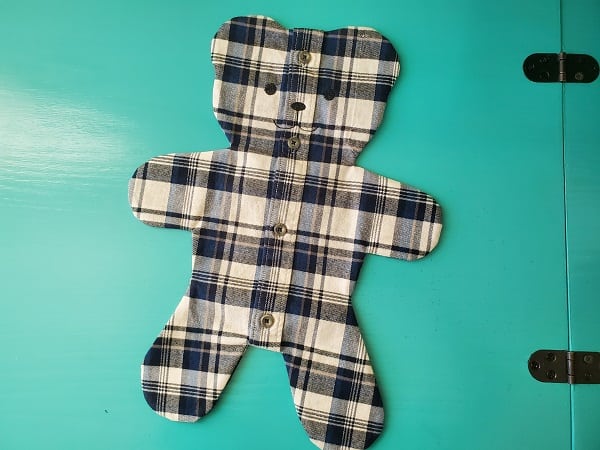
Turn your teddy bear right side out and admire how cute it is!
Stuff the teddy bear pillow
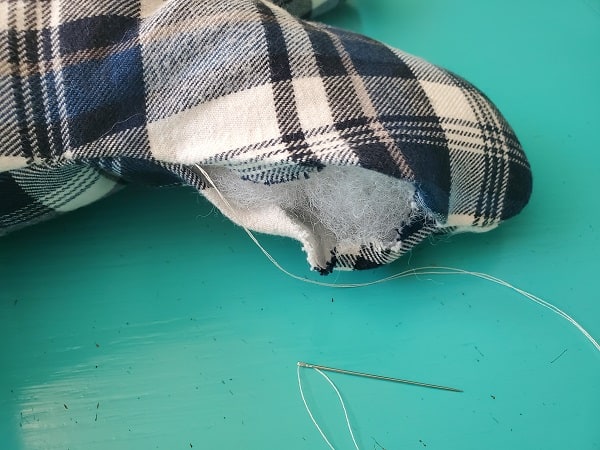
Stuff your pillow with Poly-fil stuffing. Be sure not to over stuff. Then sew the opening closed using the ladder stitch.
***You can find the ad-free, printable PDF version of this sewing tutorial available for purchase in my Etsy Shop HERE. Includes 19-pages of step-by-step instructions with pictures and templates. Print a copy to keep next to your sewing machine for easy reference.***
You are finished!
I hope you enjoyed this sewing tutorial and it helps bring you comfort knowing you have a piece of your loved one to hug.

Pin for later!