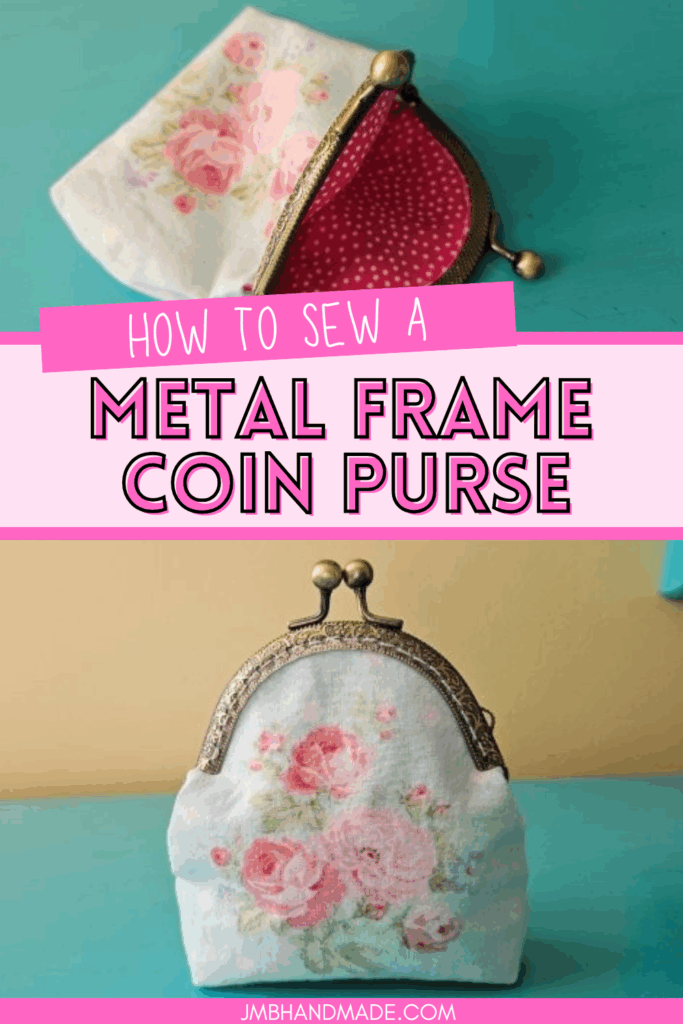
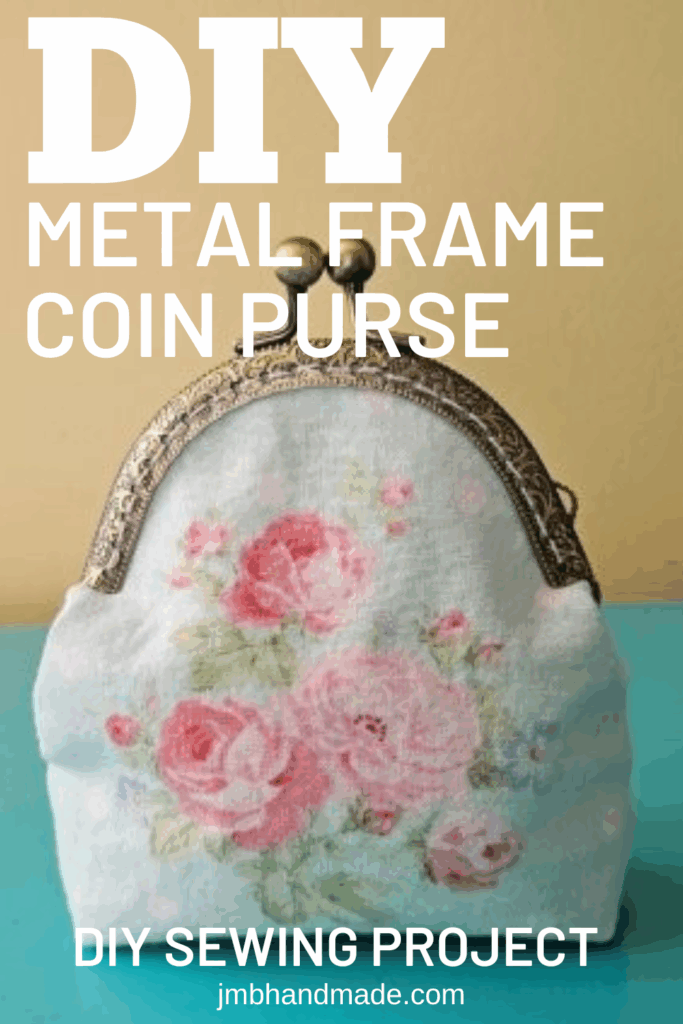
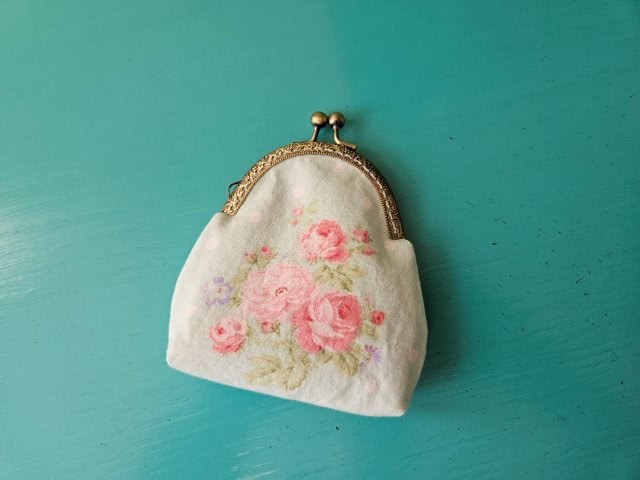
Metal Frame Coin Purse Sewing Tutorial

Sew a cute coin purse clutch with metal frame clasp using this sewing tutorial.
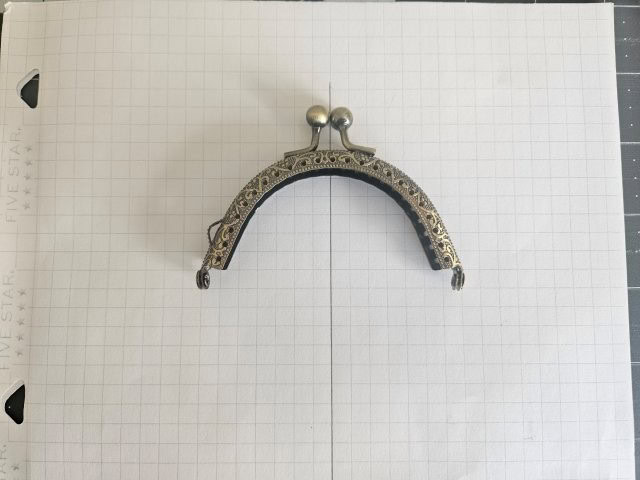
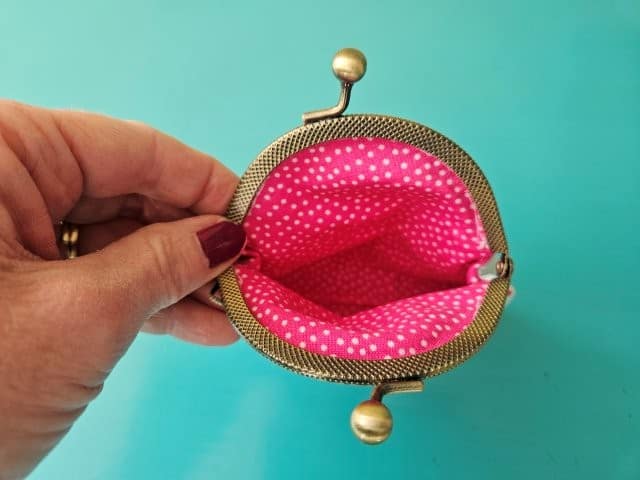
For this metal frame coin purse sewing tutorial, I am using a rounded top frame with the holes to hand stitch it on. There are many different styles and sizes and you can use these instructions for any type of frame.
I have attached the template I’m using for this tutorial for you to download, if you want to use the same size and style as this coin purse (rounded top 3.35″). If not, follow the instructions below to create your own template.
The finished coin purse measures approximately 4″W x 5″H including the clasp.
Try sewing a matching handbag to go with your new coin purse clutch. Choose from this list of easy bag patterns to sew.
This post contains affiliate links. Please see below disclosure for more information.
***You can find the AD-FREE, printable PDF version of this sewing tutorial available for purchase in my Etsy shop HERE. Includes 13 pages of step-by-step instructions with pictures. Print a copy to keep next to your sewing machine for easy reference.***
Frame coin purse supplies needed:
- One fat quarter for outer fabric – my favorite fabric shop
- One fat quarter for lining fabric
- Fusible interfacing – Pellon P44F Fusible Interfacing
- Metal purse frame with stitching holes
- Graph paper
- Pellon 830 Easy Pattern (optional)
- Matching thread
- Ruler and pencil
- Sewing scissors
- Sewing machine
Download the template
Click below to download the template for the 3.35″ rounded metal frame used in this tutorial or create your own template using the below instructions.
Create the template
You are going to create a template for the metal frame coin purse. I’m using a 3.35″ rounded metal frame but you can use any size and shape you like. Once you create a template for one frame, you can follow these instructions for any frame.
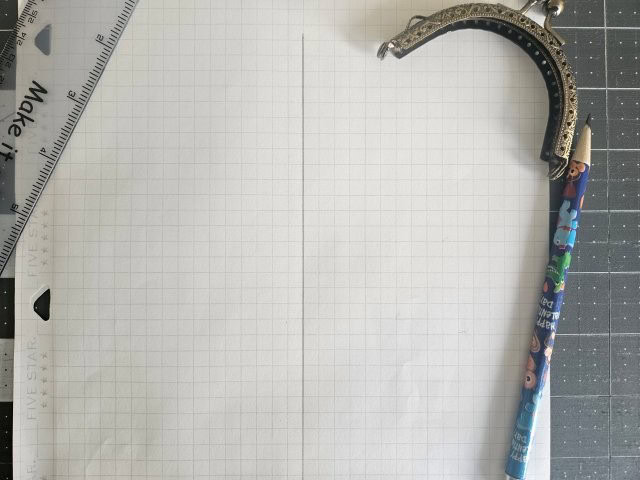
Using a ruler and graph paper, draw a vertical line (this will be the center of the purse).
Place the clasp frame on top of the graph paper with the vertical line in the center of the frame.

Trace the top of the frame ending at the last stitching hole in the frame.
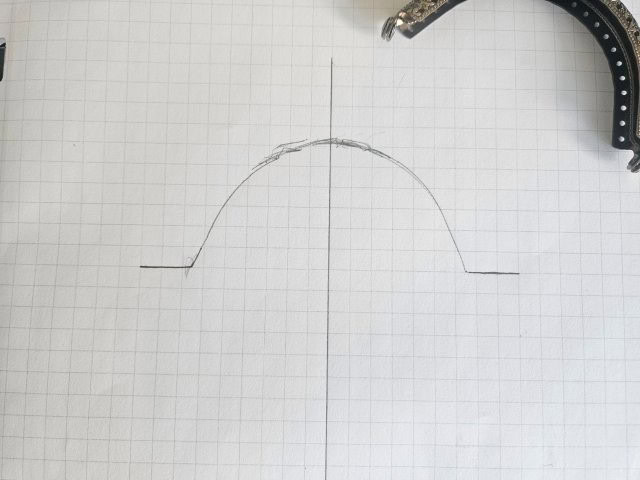
At the end of the frame, where the holes stop, measure out 1/2″ and draw a line on both sides of the frame.
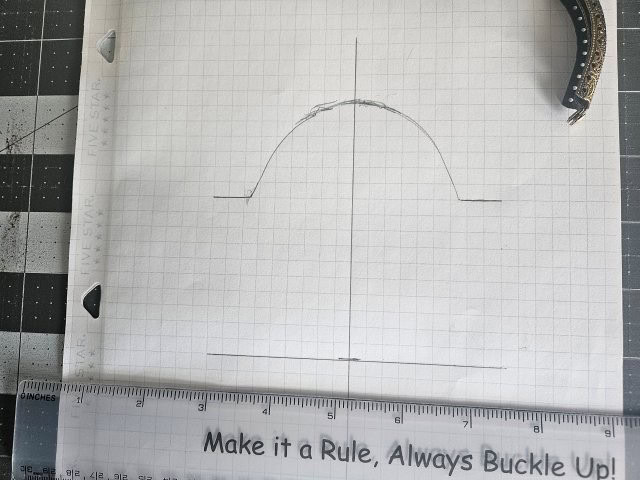
Decide how tall you would like your coin purse to be and make a mark on your center vertical line. I want my metal frame coin purse to be 4-inches so I made a mark 4-inches from the top of the frame.
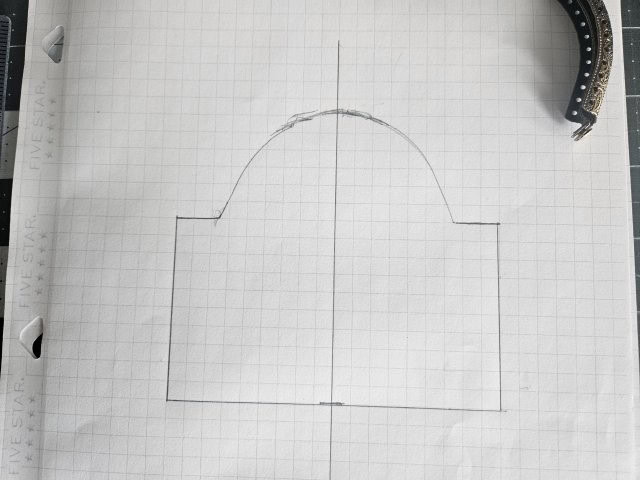
Draw a horizontal line extending the mark you just made. Then draw two vertical lines on each side connecting the horizontal lines.
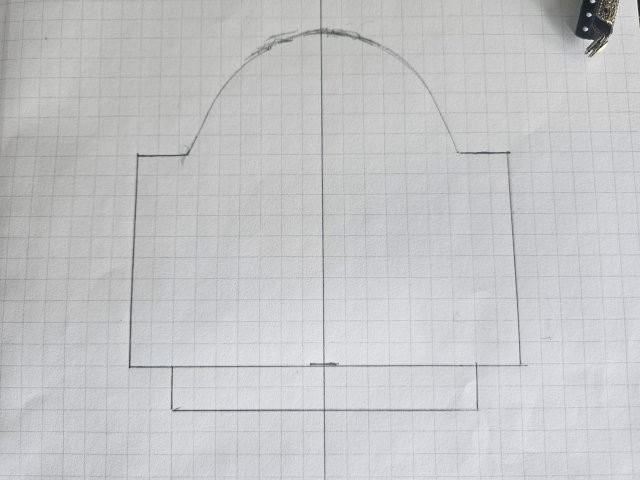
To create the square bottom, draw a rectangle on the bottom measuring 1/2″ in from the two sides and 1/2″ from the bottom horizontal line.
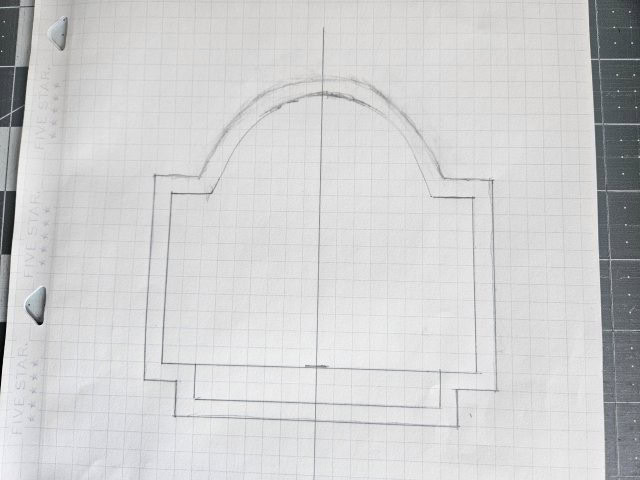
Now it’s time to add the seam allowance. You’re going to draw an outline to allow for the seam allowance. On the graph paper I’m using, the grids are 1/4″ so I just used the grids as a guide and will use a 1/4″ seam allowance.
Cut out the template
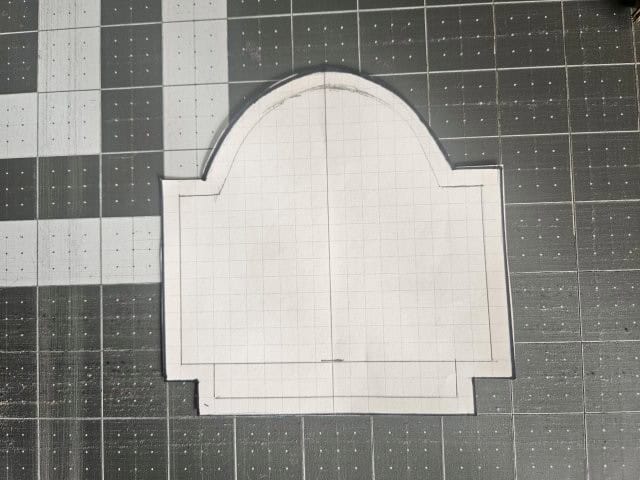
You’re going to cut along the outside line of the template (I traced over the lines with a black marker). Fold the template in half to make sure it’s symmetrical. Make adjustments if needed.
Trace the template onto pattern material (optional). My go pattern material is Pellon 830 Easy Pattern. The pattern material is easier to work with if you plan on making multiple frame purses.
Cut the fabric pieces
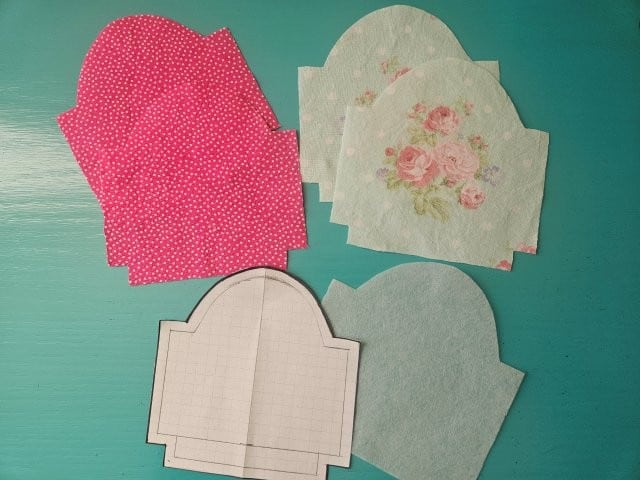
Place the template on top of the fabric. Cut out two pieces from the outer fabric and two pieces from the lining fabric using your sewing scissors.
Attach the interfacing
You are going to attach the interfacing to the fabric pieces. I’m using Pellon P44F Fusible Interfacing but any lightweight fusible interfacing will work for this metal frame clutch.
Attach the interfacing to the wrong side of all fabric pieces following the package instructions.
***You can find the AD-FREE, printable PDF version of this sewing tutorial available for purchase in my Etsy shop HERE. Includes 13 pages of step-by-step instructions with pictures. Print a copy to keep next to your sewing machine for easy reference.***
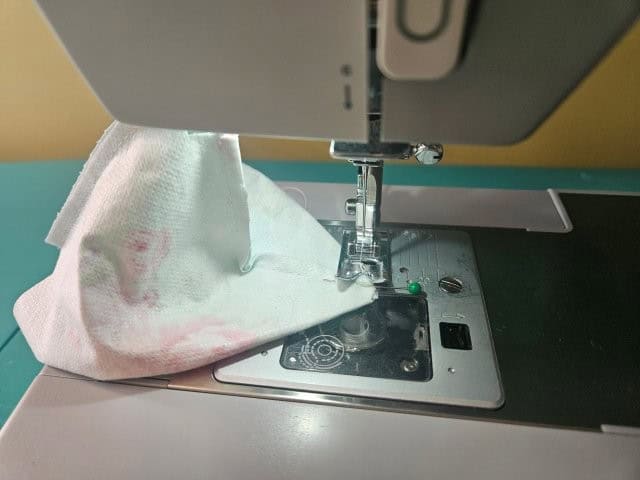
Sew the fabric pieces

Starting with the outer fabric, place the fabric pieces right sides together.
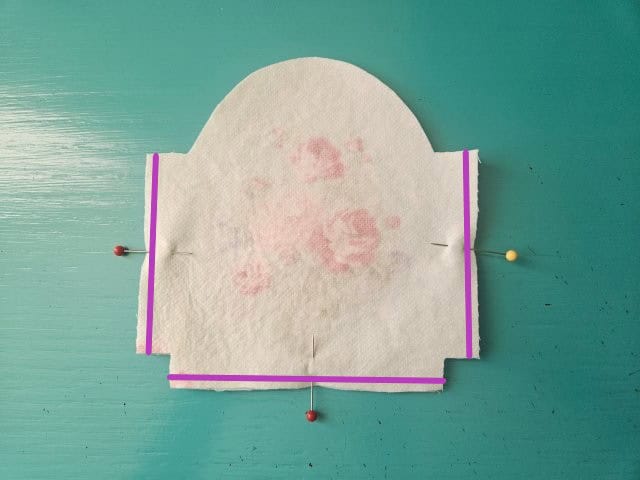
Sew along the sides and bottom using 1/4″ seam allowance.
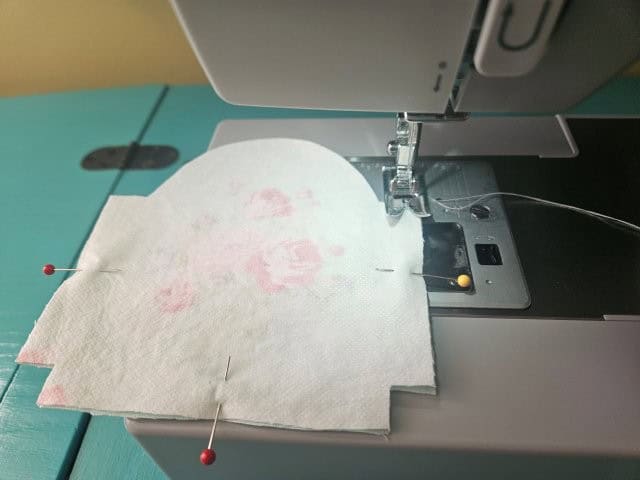
Pinch the bottom squares, lining up the seams.
Sew along the edge using a 1/4″ seam allowance.
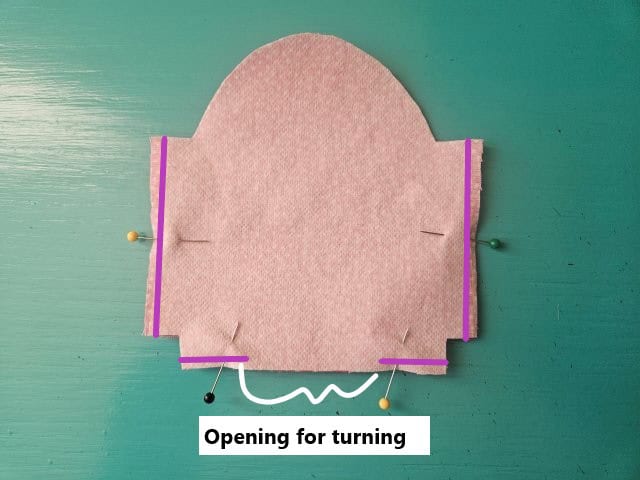
Repeat with the lining fabric pieces. Leave an opening at the bottom of the lining for turning.
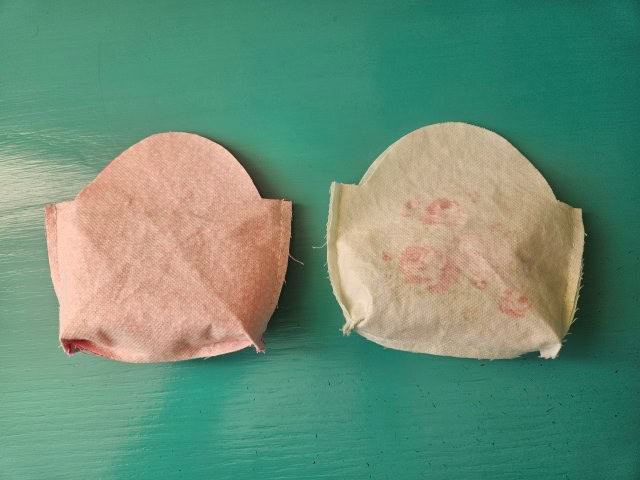
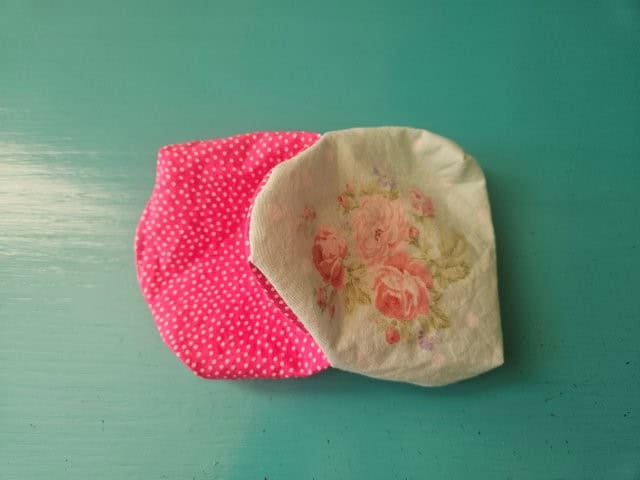
You now have one outer purse and one lining purse.
Sew it all together
Turn the outer fabric right side out and place inside the lining piece. The right sides of the fabric should be facing each other.

Line up the seams and pin to hold in place.

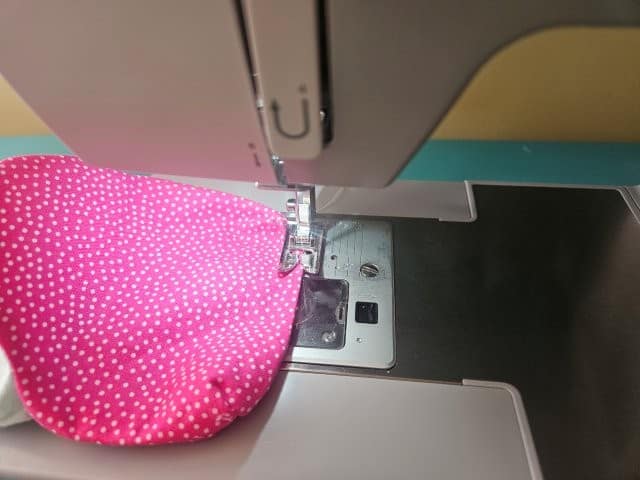
Sew around the top using a 1/4″ seam allowance.
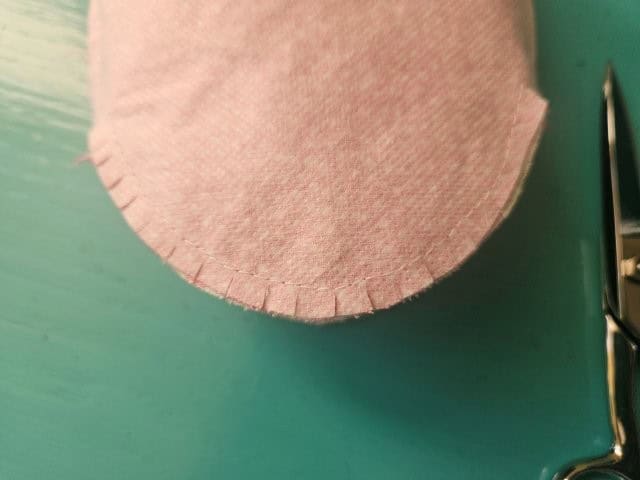
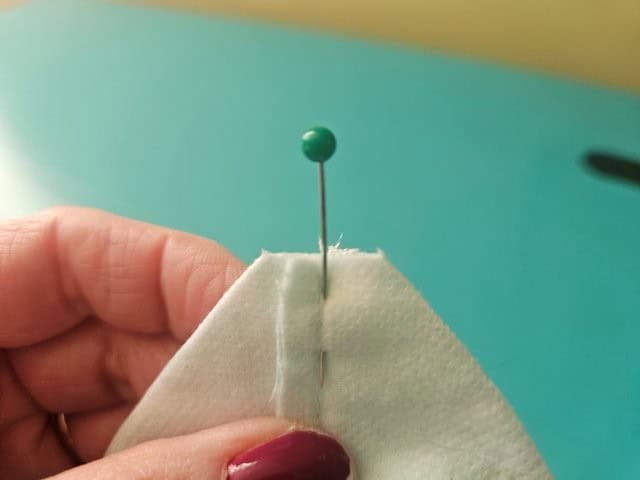
Clip around the curves and the corners.
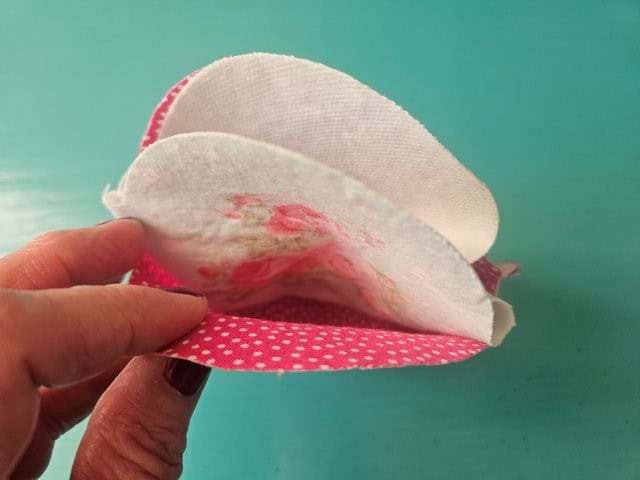
Turn right side out using the opening in the bottom of the lining.
Sew the opening closed using a 1/8″ seam allowance.
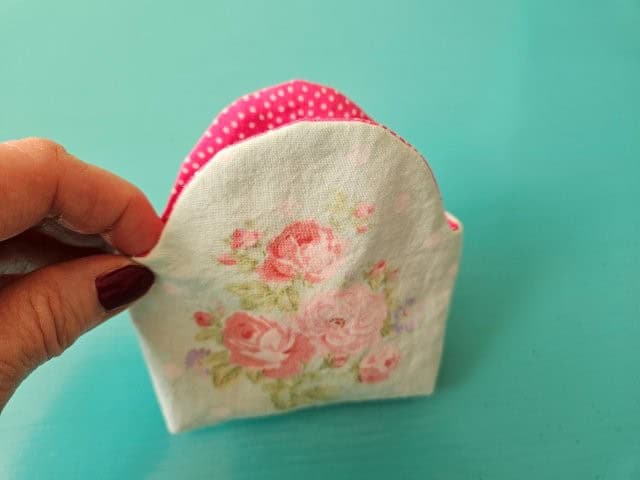
Push the lining inside the clutch. Press.
Add the metal frame
Slip the coin purse into the frame, lining it up as best you can.
Use a needle and matching thread and stitch the frame onto the purse. The thread most likely will show on the inside of the purse, and that’s okay.
Tuck the sides under the hinges. Press.
Pin for later!
***You can find the AD-FREE, printable PDF version of this sewing tutorial available for purchase in my Etsy shop HERE. Includes 13 pages of step-by-step instructions with pictures. Print a copy to keep next to your sewing machine for easy reference.***
You are finished!
I hope you enjoyed this sewing tutorial for a metal frame coin purse! Now you can make multiple clutches in all sizes! Happy sewing!

Other small sewing projects to try:
- Small Zipper Pouch Coin Purse
- Business Card Holder
- How to Sew a Fabric Lanyard
- Fabric Key Fob Sewing Tutorial