How to Make a Pleated Zipper Pouch – Sewing Tutorial
A cute pleated zipper pouch sewing tutorial with step-by-step instructions and pictures. Perfect pouch pattern for beginners.
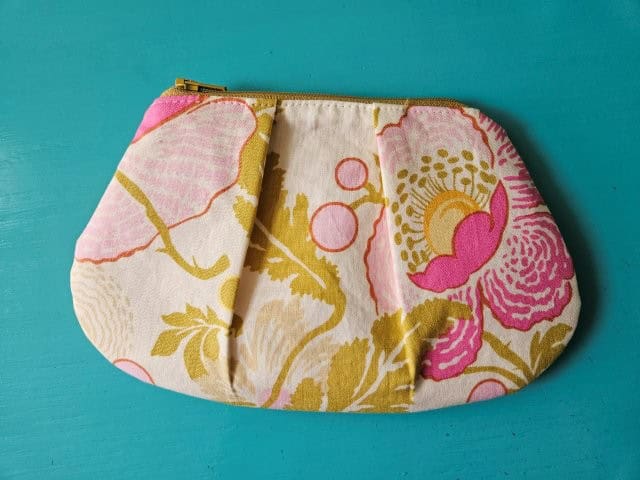
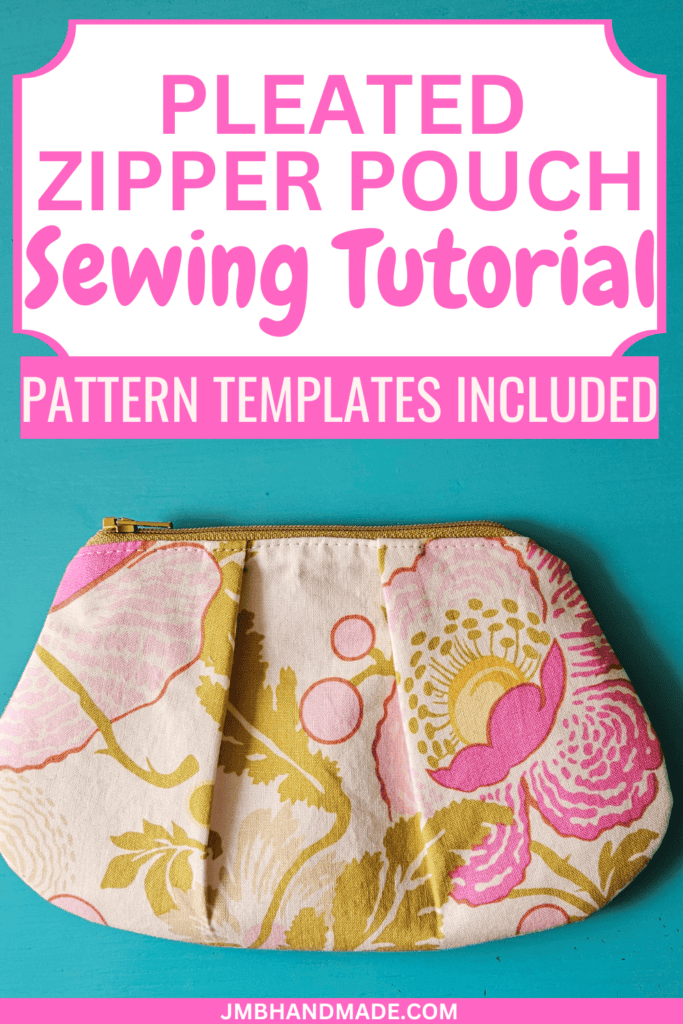
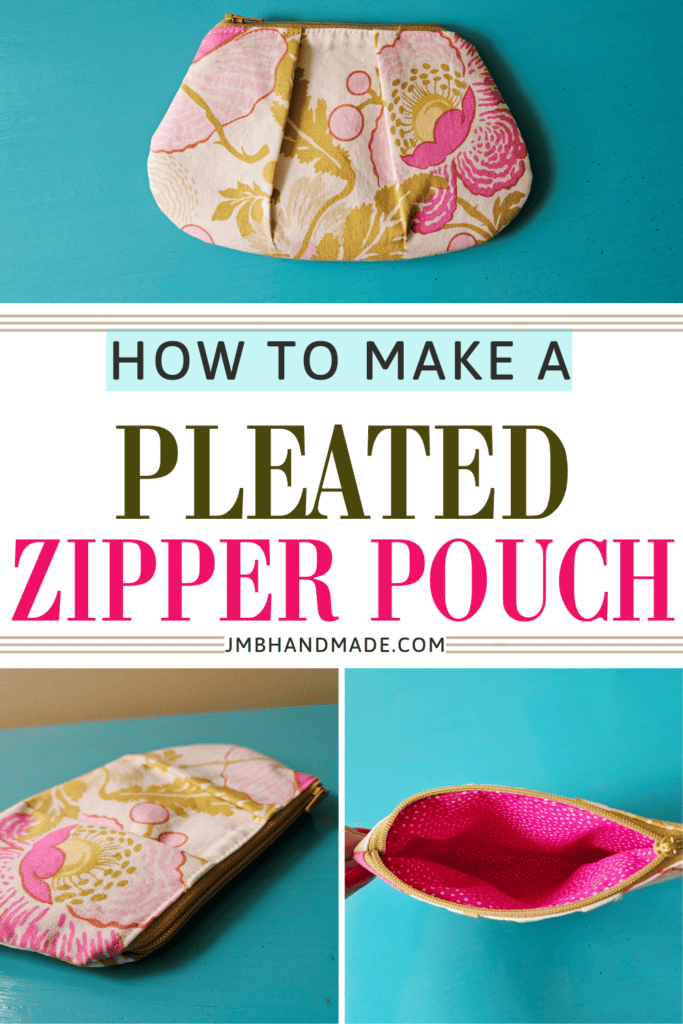
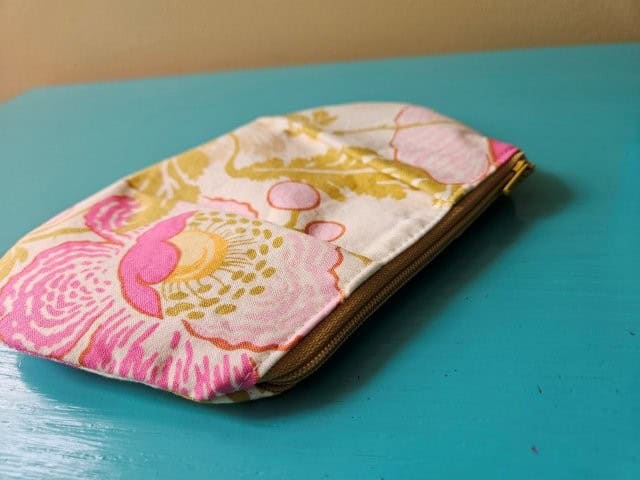
The pleated zipper pouch with rounded bottom has two pleats and is the perfect size pouch for makeup in your purse, crochet hooks, sewing notions, or whatever you might need.
You can use this pouch as a little clutch purse. It’s just the right size for your phone, cash, and a few essentials. Try sewing a small zipper pouch coin purse to fit inside and also a mini card wallet for cash and cards.
The finished zipper pouch is approximately 8.5″W (at the widest part) x 5.5″H.
This post contains affiliate links. Please see below disclosure for more information.
***You can find the AD-FREE, printable PDF version of this sewing tutorial available for purchase in my Etsy shop HERE. Includes 15 pages of step-by-step instructions with pictures. Print a copy to keep next to your sewing machine for easy reference.***
Zipper pouch sewing supplies needed:
- Outer fabric (2) – 11″W x 7″H – my favorite fabric shop
- Lining fabric (2) – 10″W x 6″H
- Pleated zipper pouch template (see below download)
- Cutting mat
- Rotary cutter
- Clear ruler
- Fusible interfacing – Pellon P44F Fusible Interfacing
- Zipper – 7-inches – my go to zipper shop
- Marking pencil
- Sewing scissors
- Sewing machine
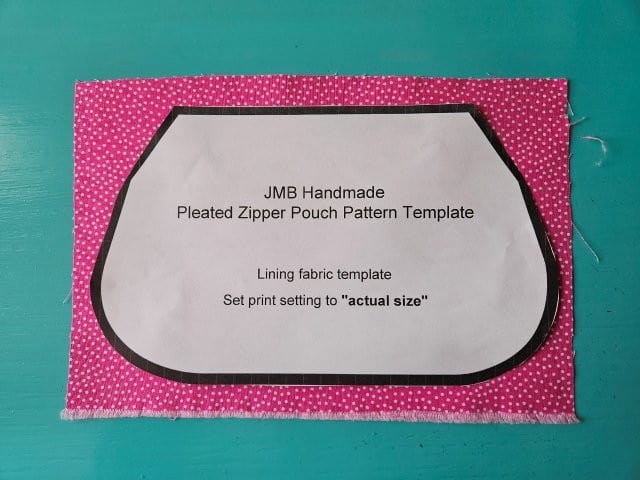
Download the zipper pouch template
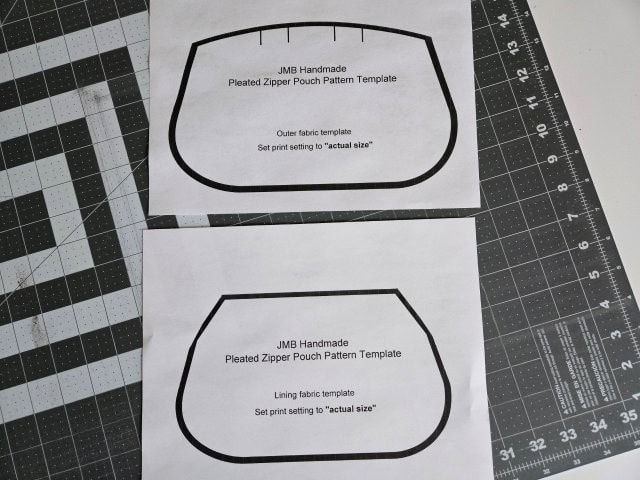
Download and print the pleated zipper pouch templates. Be sure your printer is set to “actual size”.
Cut out the templates along the outside of the black lines using your paper scissors.
Measure and cut your fabric
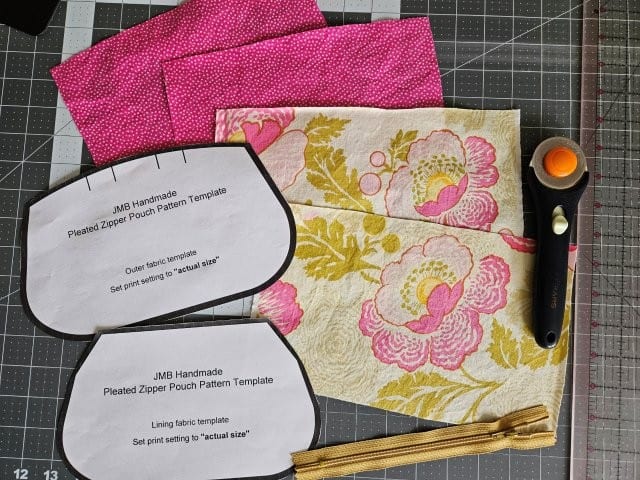
Using your cutting mat, clear ruler, and rotary cutter, cut two pieces of outer fabric measuring 11″W x 7″H and two pieces of lining fabric measuring 10″W x 6″H. You want the pieces big enough to fit the template.
Attach the fusible interfacing
For this zipper pouch sewing pattern, I’m using Pellon P44F Fusible Interfacing but any lightweight interfacing will work.
Attach the fusible interfacing to the wrong side of all the fabric pieces following the package instructions.
Cut the fabric using the template
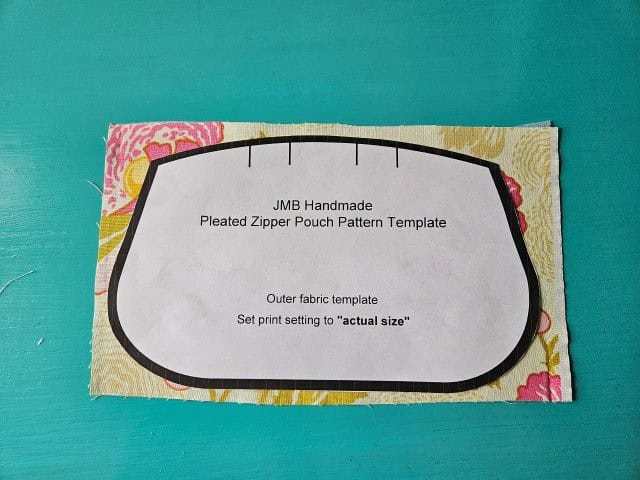
Place the outer fabric template on top of one of the outer fabric pieces. I put tape on the back of the template to hold in place. You can also use pins, or sewing pattern weights. Cut around the template using your sewing scissors.
NOTE: if you are planning on making multiple zipper pouches, you might consider tracing the template onto Pellon 830 Easy Pattern – you can easily pin it to the fabric and the template will last a long time.
Repeat with the other outer fabric piece.
Repeat these steps with the lining fabric template and the lining fabric pieces.
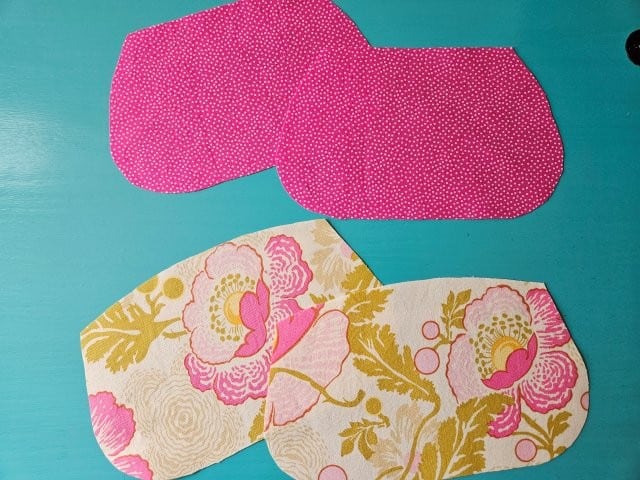
You should now have two outer fabric pieces and two lining fabric pieces.
Make the zipper pouch pleats
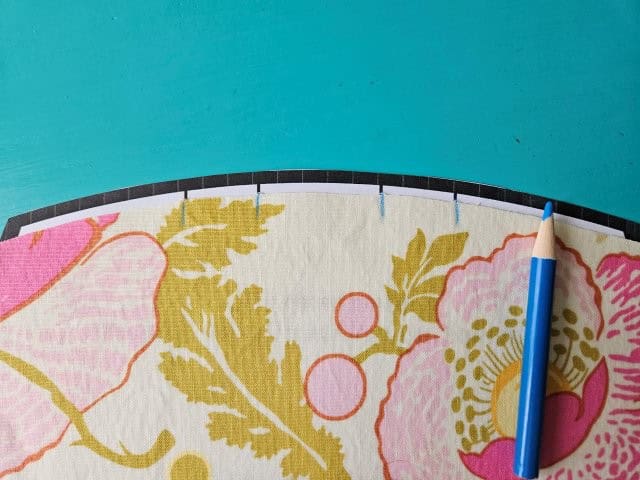
Place one of the cut outer fabric pieces on top of the outer fabric template. Use a marking pencil and mark the lines on the fabric where the pleats should go. Repeat with the other outer fabric piece.
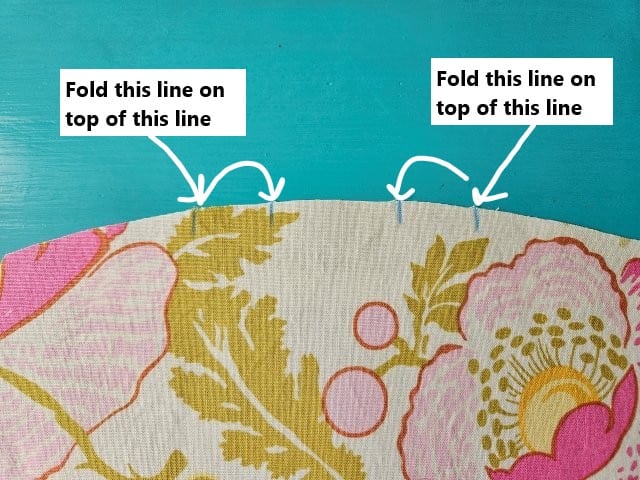
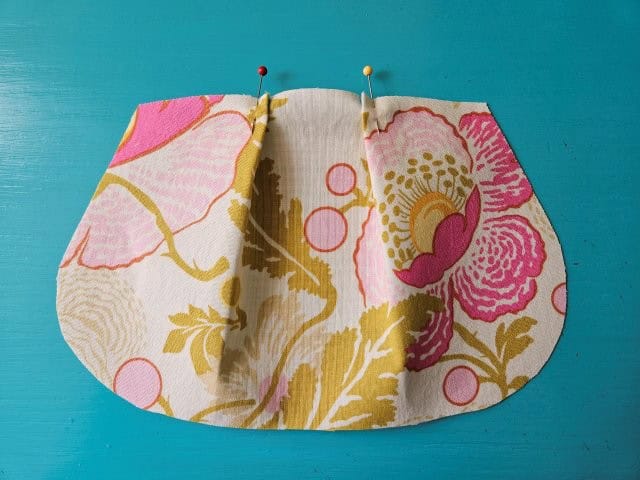
Fold one mark on top of the other mark, folding towards the center of the pouch. Pin to hold in place. Fold the other side the same way towards the center of the pouch. Pin to hold in place.

Sew over the pleats to baste in place.
***You can find the AD-FREE, printable PDF version of this sewing tutorial available for purchase in my Etsy shop HERE. Includes 15 pages of step-by-step instructions with pictures. Print a copy to keep next to your sewing machine for easy reference.***
Add the zipper
For this zippered pouch, I’m adding a 7-inch zipper. There will be some extra at the end but will be trimmed after the zippered is added.
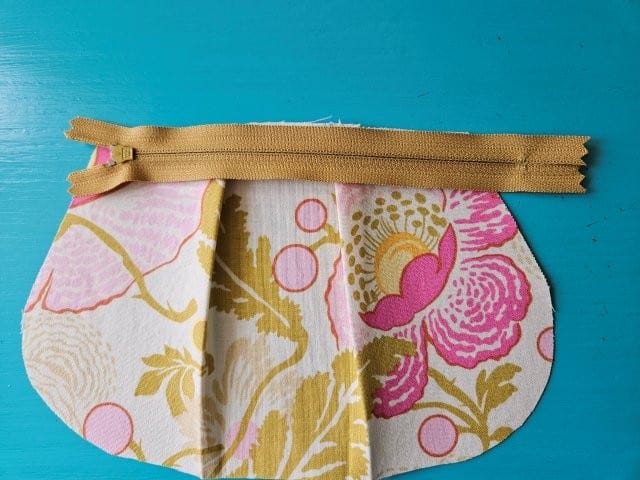
Place your zipper face down on one of the outer fabric pieces. Pin to hold in place.
Then place one or your lining fabric pieces on top of the zipper. Pin in place. The zipper should be face down, sandwiched between the outer fabric piece and lining fabric piece, right sides together.
Sew the zipper
Before sewing the zipper, open the zipper up about an inch – this will help with a smooth line of sewing.
Be sure your upper thread matches the outer fabric and your bobbin thread matches the lining fabric.
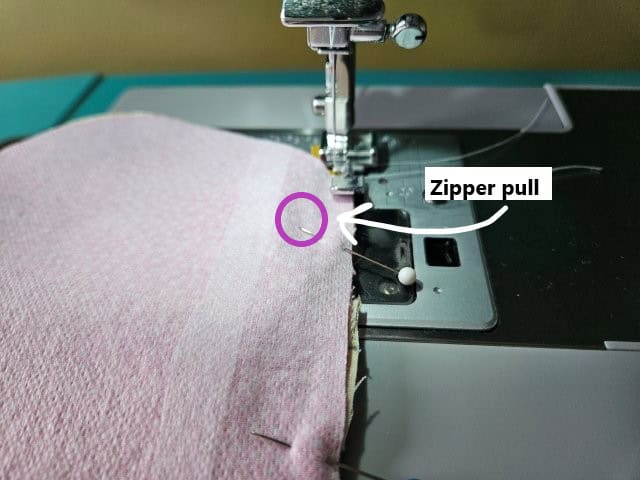
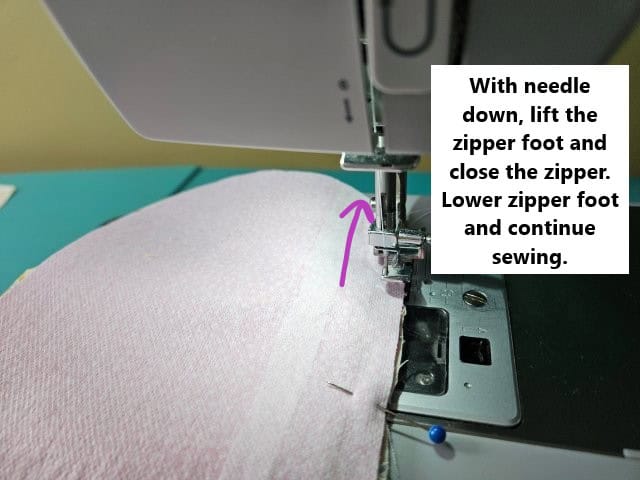
Use your zipper foot for sewing the zipper. Begin sewing the zipper, then when you get to the place almost to the zipper pull, with the needle down, lift the zipper foot and move the zipper pull back to the top. Then lower the foot and continue sewing.
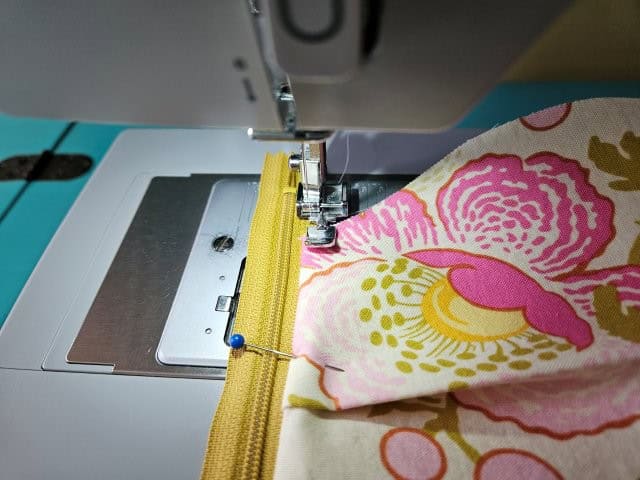
Top stitch along the zipper. This gives the pouch a finished look and keeps the fabric from getting caught in the zipper.
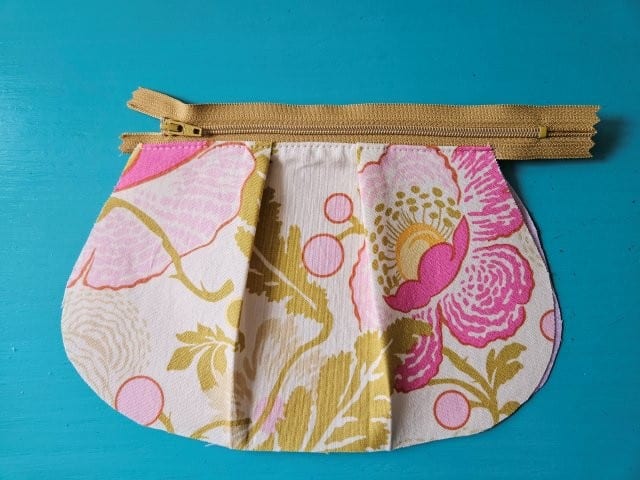
You now have one side of your pleated pouch finished.
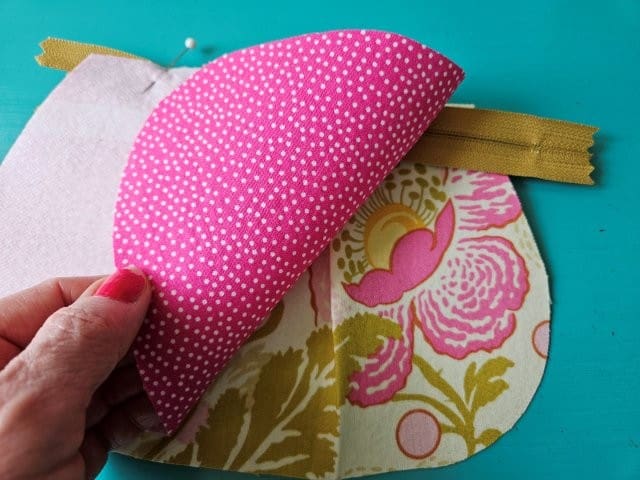
Repeat with the other fabric pieces
Now you’re going to repeat the same process to sew the other side of the zipper pouch.
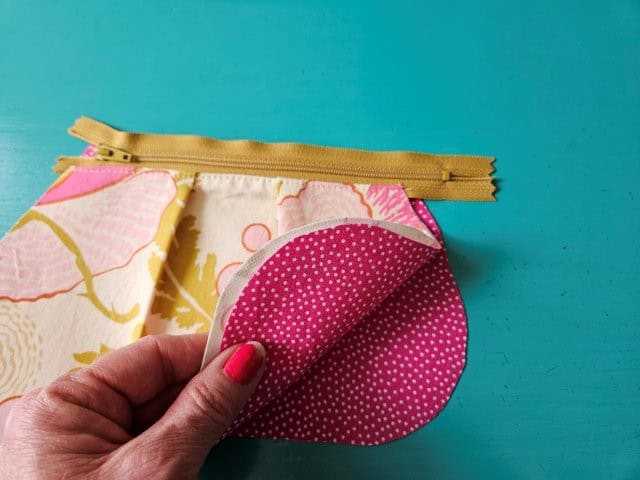
Place the zipper on top of the other lining fabric piece – lining fabrics right sides together. Pin to hold in place.

Now place the outer fabric piece of top of the zipper – outer fabric pieces right sides together.
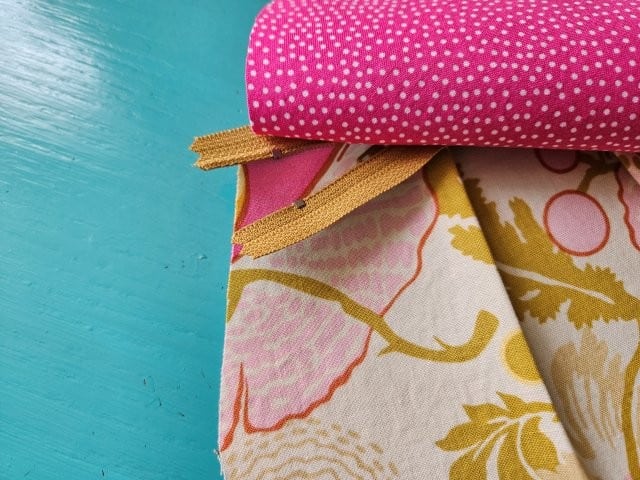
Sew the zipper – repeating the same process of opening and closing the zipper to sew a smooth line.
Top stitch along the zipper.
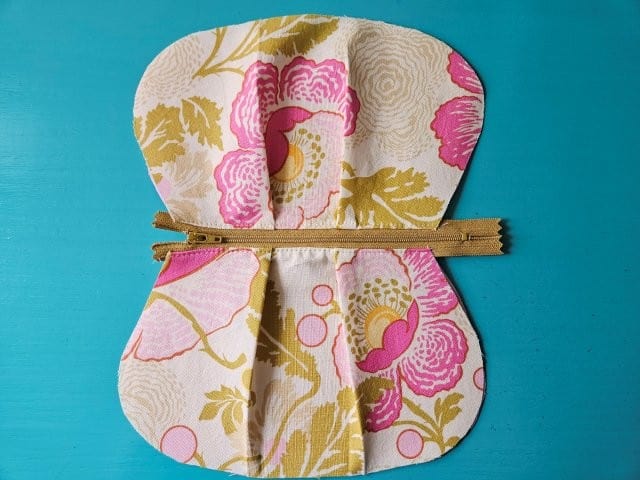
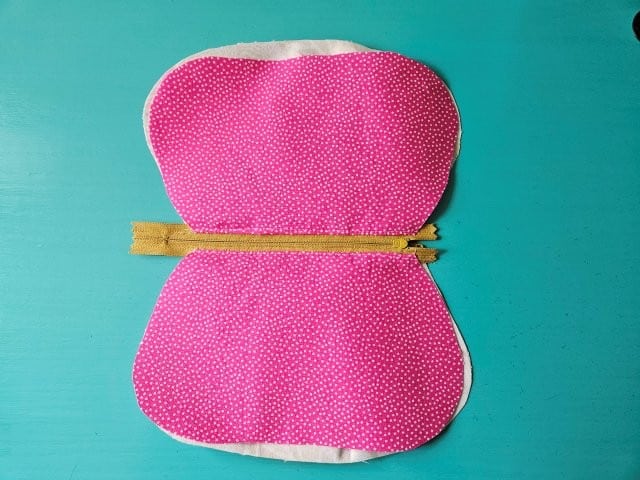
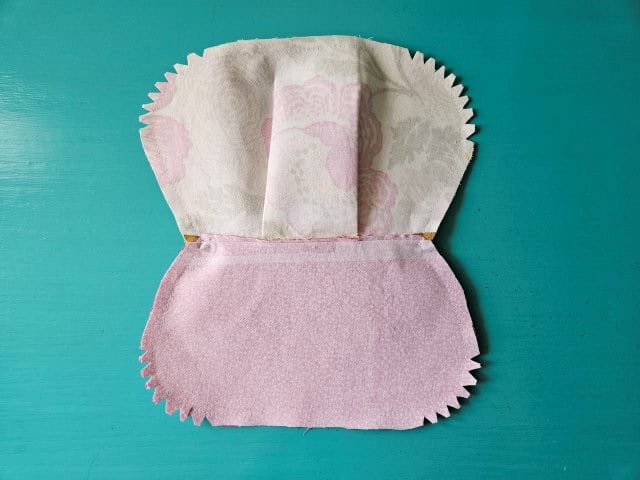
The above pictures show what the pleated zipper pouch looks like at this point. Trim the excess outer fabric if you’d like.
Sew it all together

Open the zipper to about halfway – you will need the zipper opened for turning.
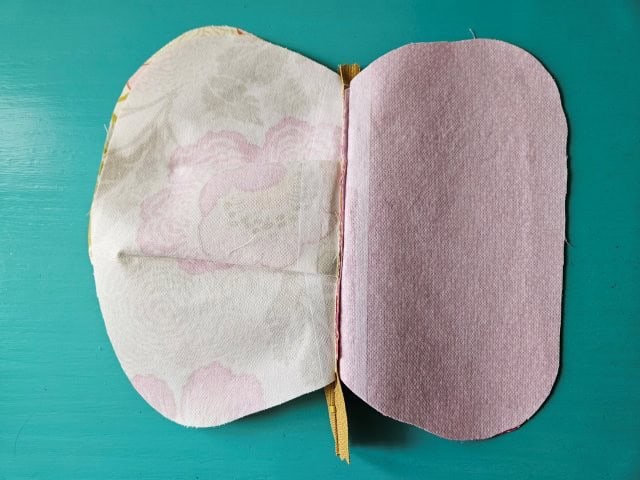
Fold the pouch so the outer fabric pieces are right sides together and the lining pieces are right sides together.

Pinch the zipper so the teeth are facing towards the lining and pin in place. Pin around the pouch to hold in place, leaving an opening at the bottom of the lining for turning.

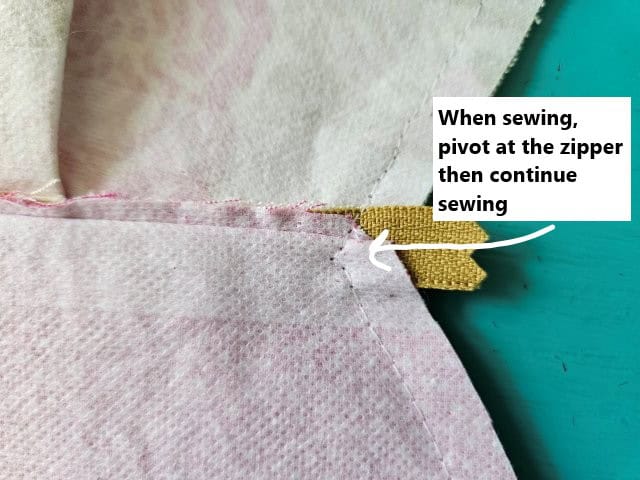
Sew around the pouch using a 3/8″ seam allowance, again leaving an opening at the bottom of the lining fabric for turning. Pivot at the zipper, then continue sewing.
Cut little triangles around the curves and trim the excess zipper using your sewing scissors.
Turn right side out
Through the bottom opening, reach inside and open the zipper all the way then turn right side out.

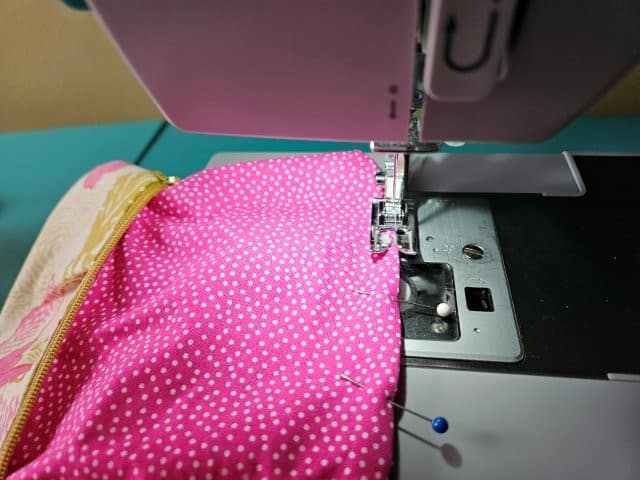
Press the opening. Sew the opening closed using a 1/8″-1/4″ seam allowance.
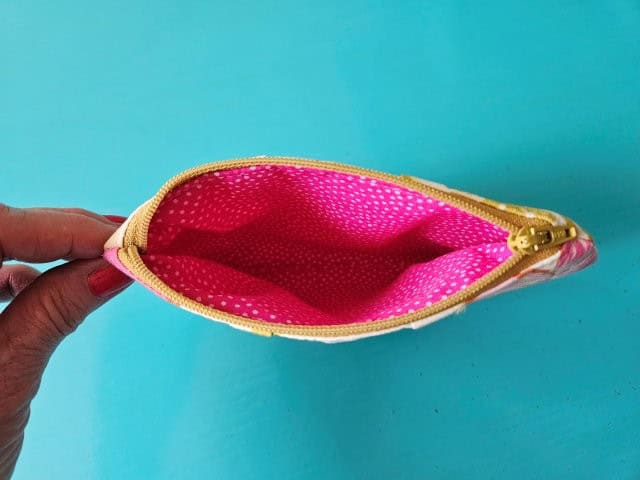
Push the lining down inside the pouch purse. Press for a nice finished look.
Pin for later!
***You can find the AD-FREE, printable PDF version of this sewing tutorial available for purchase in my Etsy shop HERE. Includes 15 pages of step-by-step instructions with pictures. Print a copy to keep next to your sewing machine for easy reference.***
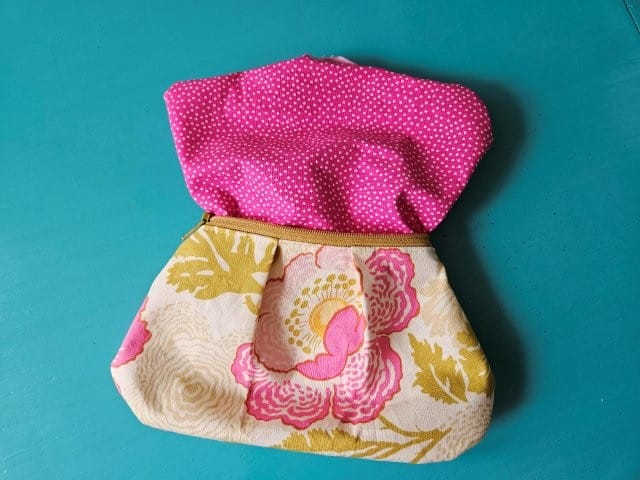
You are finished!
I hope you enjoyed this sewing tutorial on how to make a pleated zipper pouch with rounded corners. These little purses also make great gifts! Happy sewing!

Other zipper sewing projects:
- Vinyl Pencil Case Zipper Pouch Tutorial
- Belt Bag / Fanny Pack Sewing Pattern
- Lined Zipper Pouch Sewing Tutorial
- Mini Zipper Pouch Key Chain Tutorial