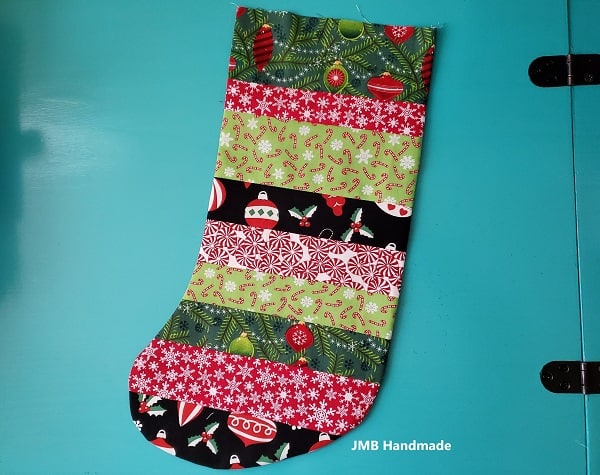
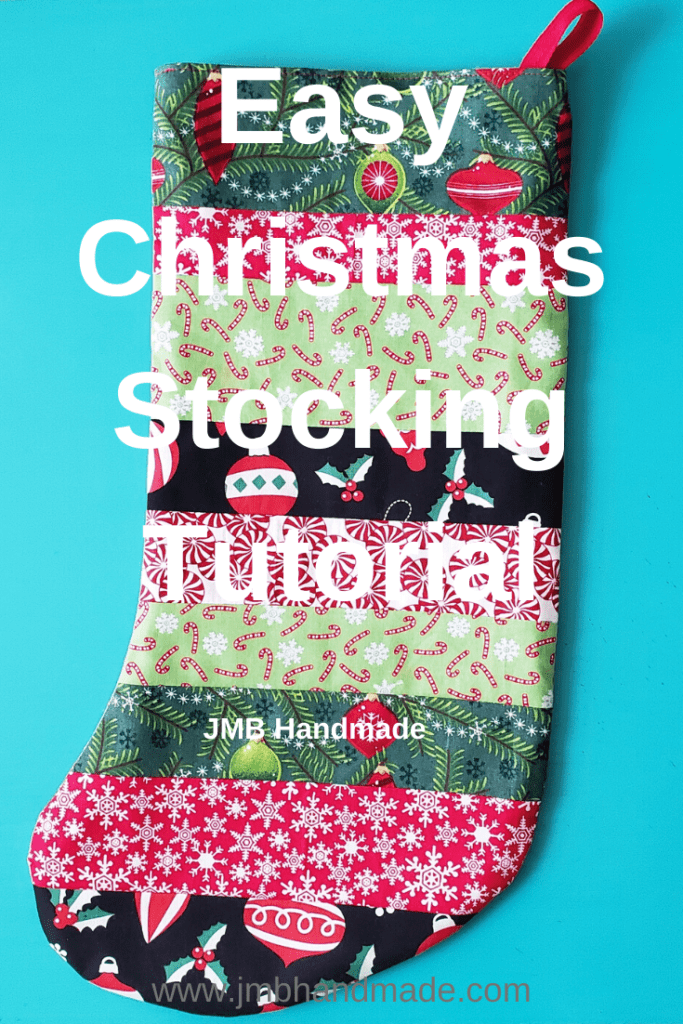
Easy Christmas Stocking Tutorial

Create your own Christmas stocking with this simple sewing tutorial. Dress up your mantel or use as a gift bag!
Use up those holiday fabric scraps and make Christmas stockings for the whole family or create just one. If you don’t have Christmas fabric scraps, you can use any fabric scraps or you can use this tutorial to make your stocking using one fabric piece as well.
Create a fabric bookmark, fabric luggage tag, or a mini zipper pouch key chain for some fun Christmas gifts or stocking stuffers.
Here are the easy to follow instructions on how you can make your own Christmas stocking.
This post contains affiliate links. Please see disclosure for more information.
***You can find the ad-free, printable PDF version of this sewing tutorial available for purchase HERE. Includes 13-pages of step-by-step instructions with pictures. Print a copy to keep next to your sewing machine for easy reference.***
Christmas stocking supplies needed:
- Fabric scraps – cut into strips – my favorite fabric shop
- Christmas stocking template – see below download button
- Pellon 830 Easy Pattern – to use for your stocking template
- Rotary cutter
- Cutting mat
- Clear ruler
- Sewing scissors
- Matching thread
- Ribbon
- Sewing machine
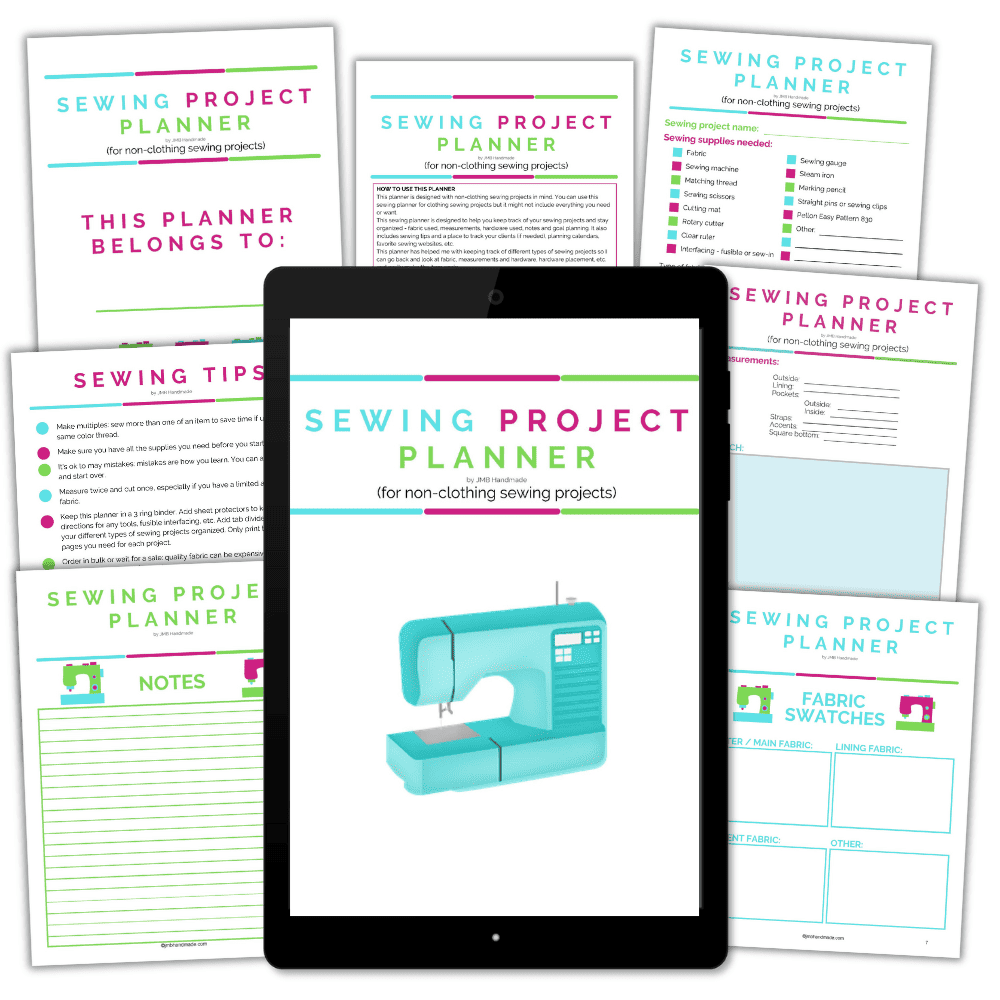
Keep track of your sewing projects, like this one, with a sewing planner. This sewing planner is specifically designed for non-clothing sewing projects and helps you stay organized – fabric used, measurements, hardware used, notes, etc. Also included are pages such as sewing tips and fabric shops. Get your sewing planner HERE.
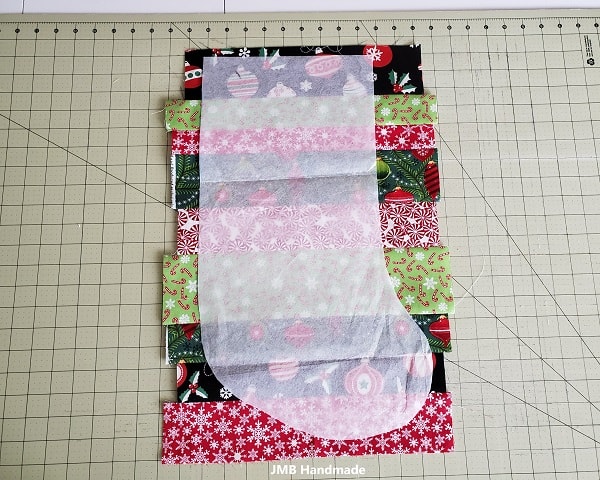
Download and print your Christmas stocking template
Download and print the Christmas stocking template.
Once you have printed the Christmas stocking template, tape the two pages together, lining up the stocking.
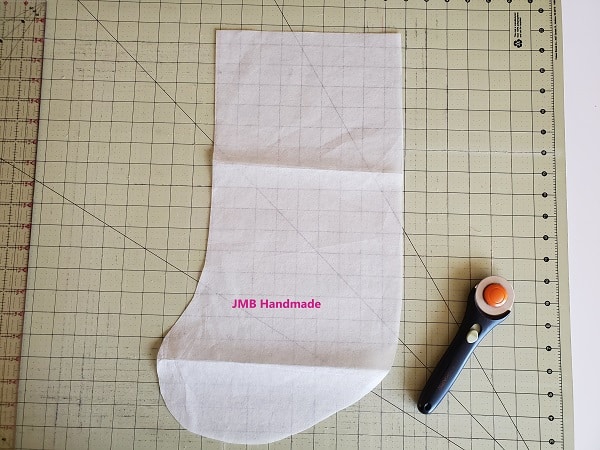
Cut out your template. Tape the back of the paper template to Pellon 830 Easy Pattern and cut out with your sewing scissors. I like to use Pellon 830 Easy Pattern because I plan on making multiple stockings and the templates will last much longer. You can use the paper template for the stocking if you don’t have the easy pattern.
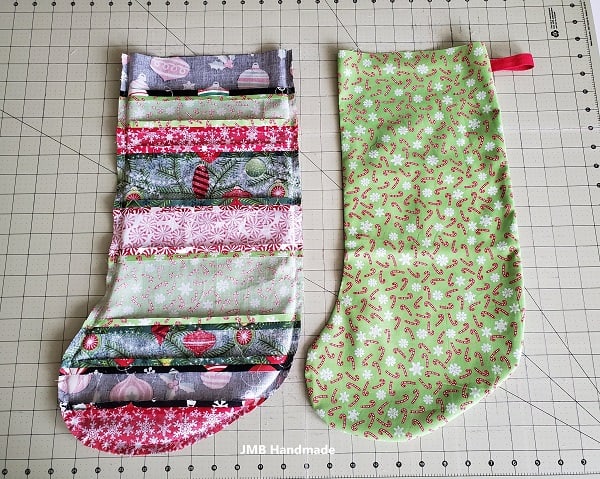
Cut your scraps
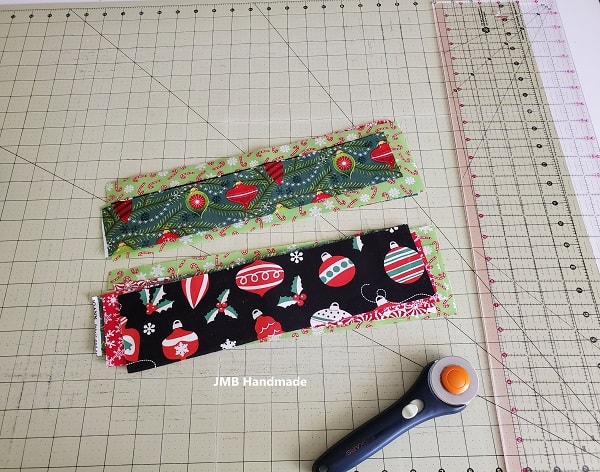
Using your cutting mat, clear ruler, and rotary cutter, cut your Christmas fabric into strips. I cut my scraps into different widths but you can cut them any way you want. Be sure the length of your strips is longer than the width of your stocking pattern. Cut enough for the front and back of your stocking.
Lay out your pattern
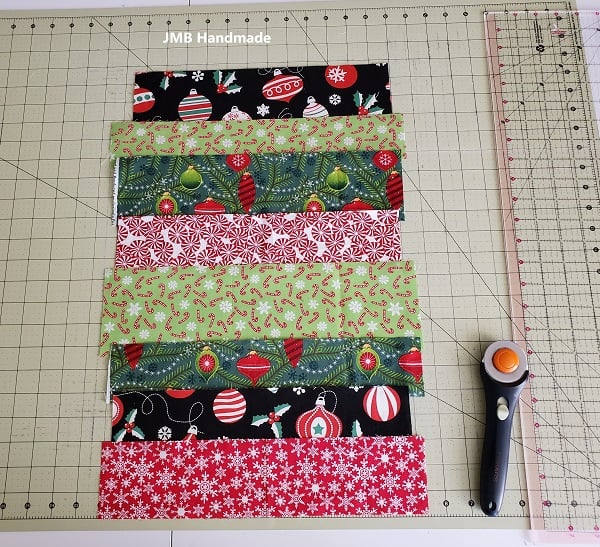
Lay out your fabric scraps in the pattern you want your Christmas stocking to look like. Over lap them a little bit because you will be sewing them together and you want to make sure you have enough to fit your template.
Repeat this step using the rest of your scraps for the other side of your stocking.
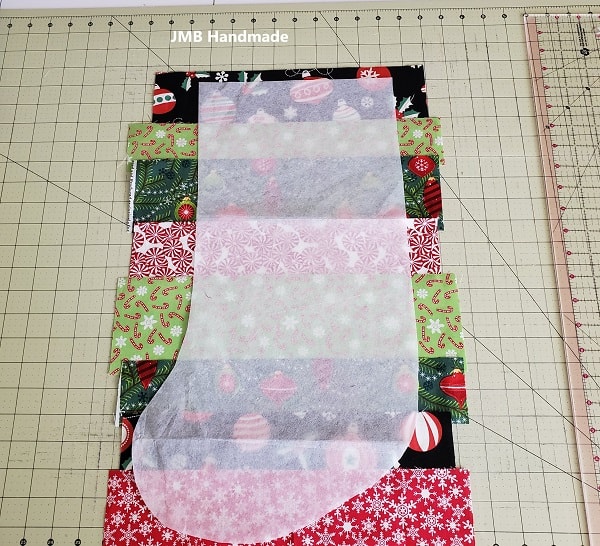
Place your template on top of the fabric strips to make sure you have enough strips for your stocking.
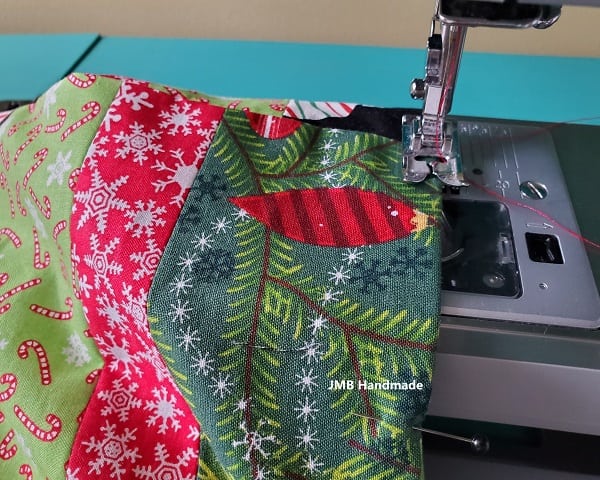
Sew the fabric strips together
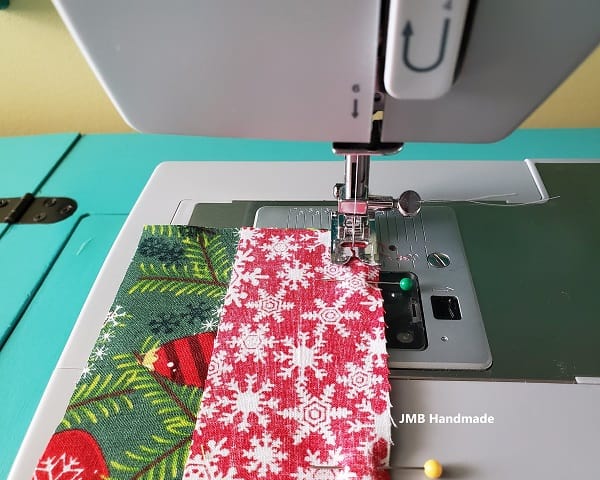
Using your sewing machine, sew your fabric strips together. Be sure to keep them in order.
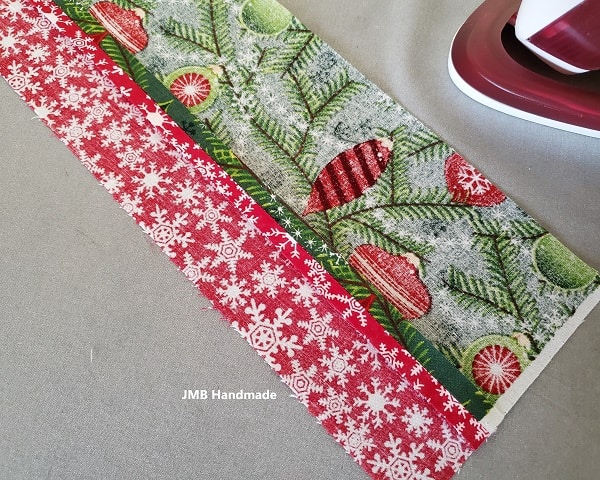
Press the seams flat.
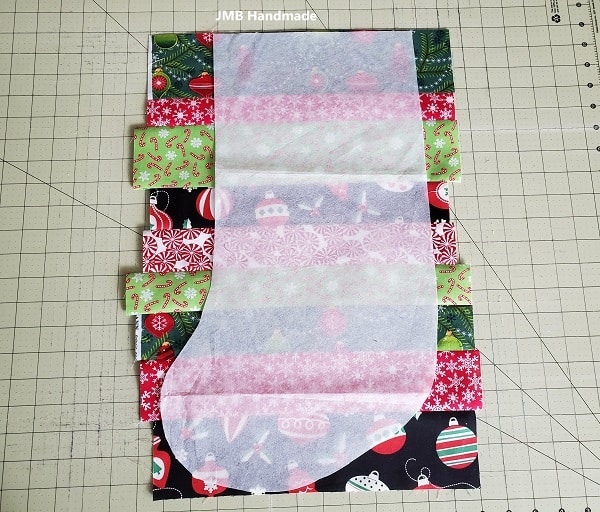
Be sure your template still fits after your fabric scraps have been sewn together.
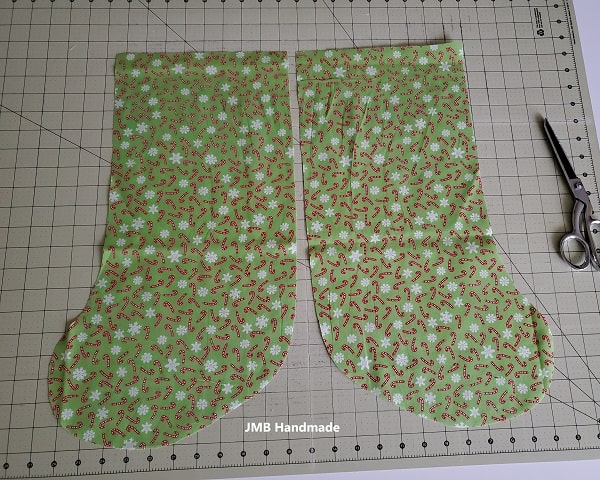
Cut out your stocking pieces
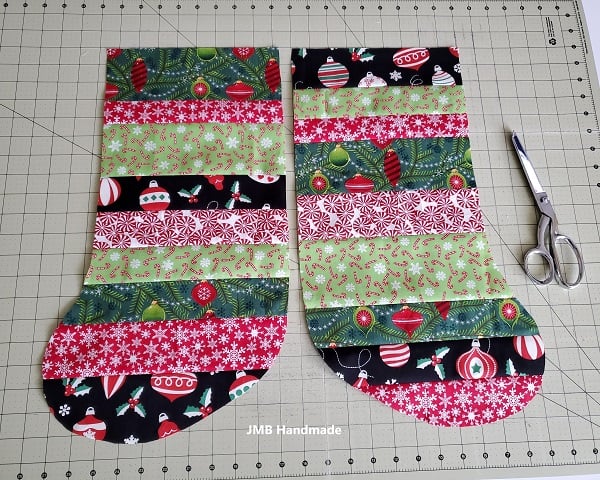
Pin your template and cut out your stocking pieces using your sewing scissors.
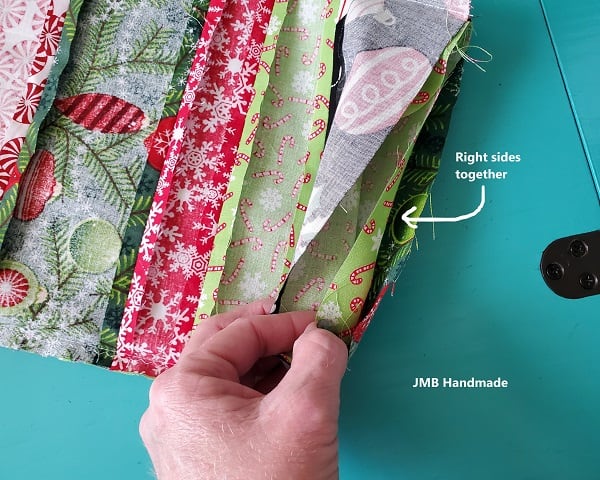
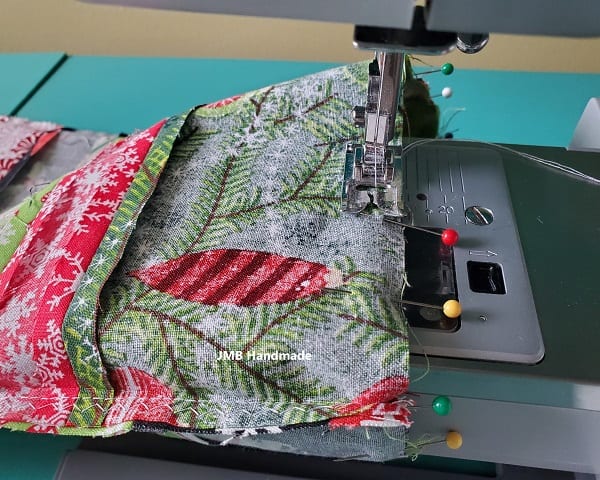
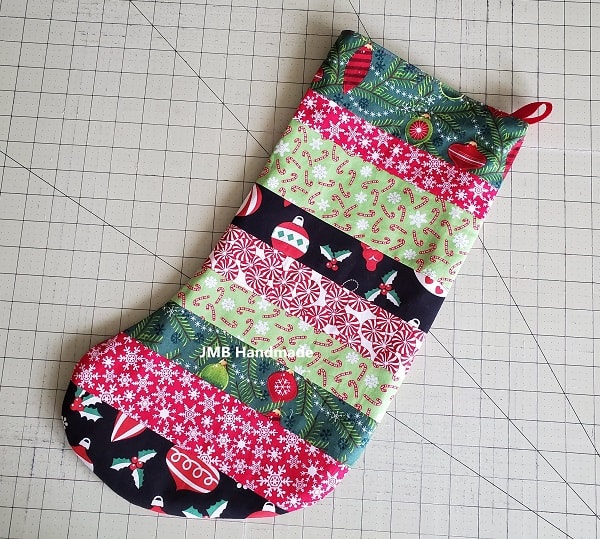
Time to sew
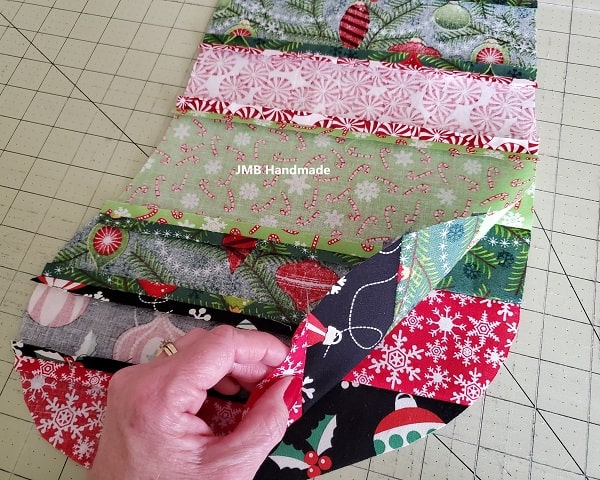
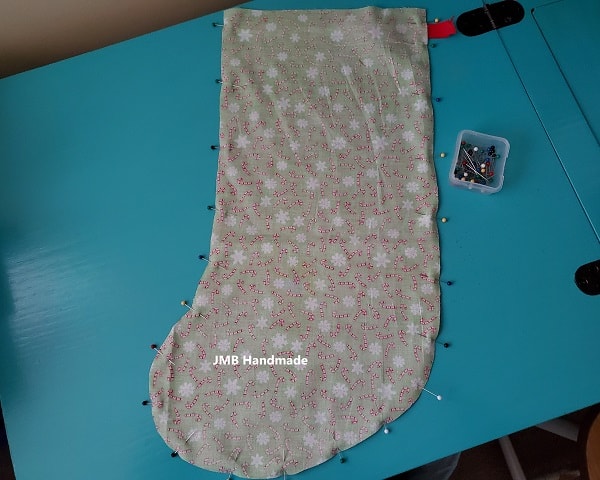
Place your stocking pieces right sides together and pin.
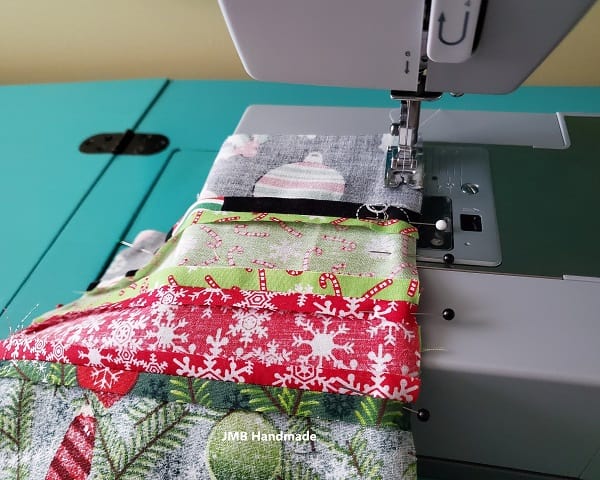
Sew around the sides and bottom, leaving the top of your stocking open.
The above picture shows the outside stocking piece sewn together.
***You can find the ad-free, printable PDF version of this sewing tutorial available for purchase HERE. Includes 13-pages of step-by-step instructions with pictures. Print a copy to keep next to your sewing machine for easy reference.***
Create the stocking lining
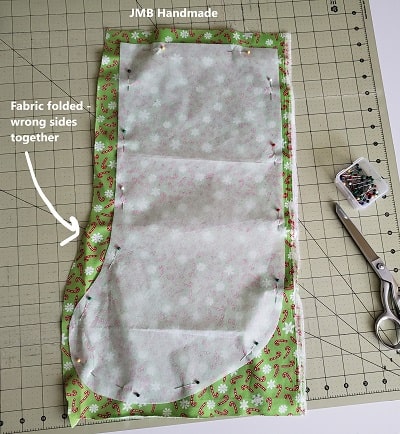
Fold your fabric in half wrong sides together. Place your template on top of the fabric, pin and cut using your sewing scissors.
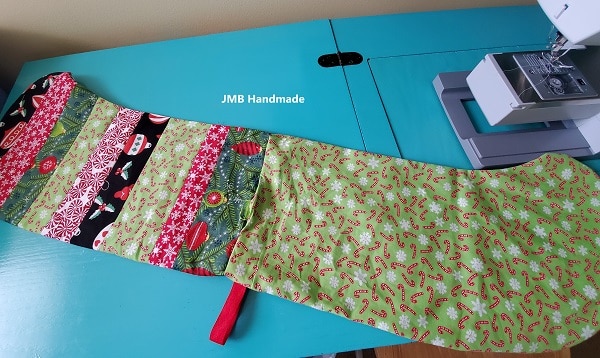
Attach your ribbon
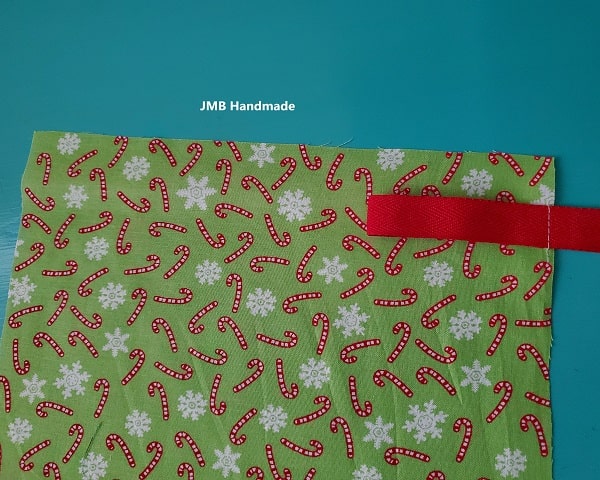
Cut a small piece of matching ribbon and fold in half. Sew the ribbon to hold in place as show above. This is what you will use to hang your stocking. If you won’t be hanging your socking, you can skip this step.
Sew the lining pieces together
Place the lining pieces on top of each other, right sides together.
Pin in place and sew around the sides and bottom using a 3/8″ seam allowance, leaving the top of the stocking open.
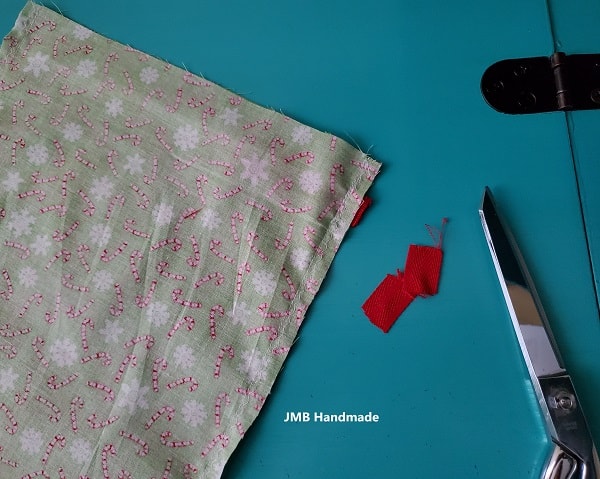
Cut off the excess ribbon.
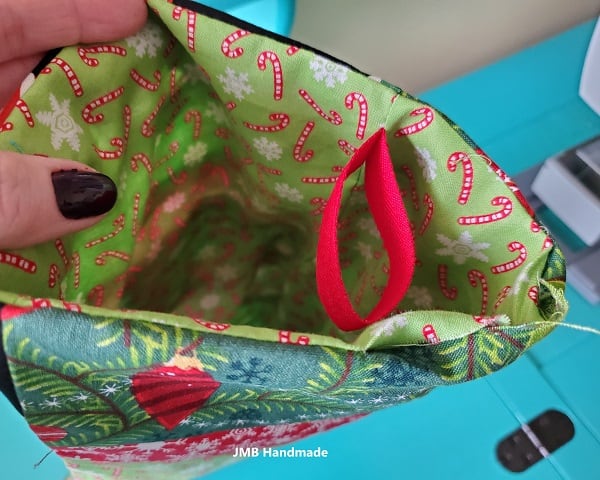
Sew it all together
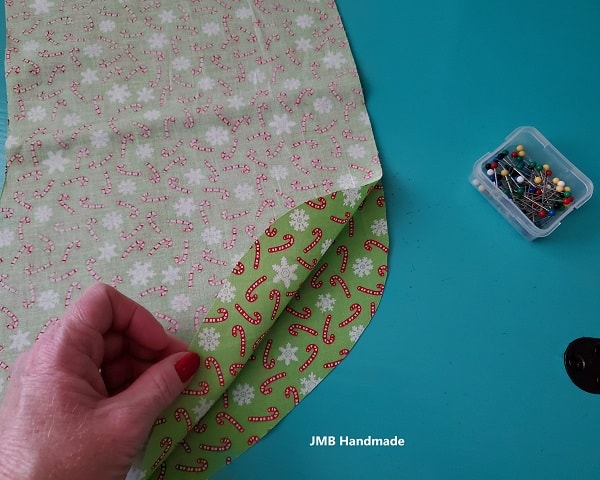
Keep the outer stocking inside out and turn the lining stocking right side out, as shown in above picture.
Stuff the lining stocking inside the outer stocking. The right sides of the fabric should be facing each other.
Pin around the top, leaving a small opening for turning. Be sure to line up the side seams. Sew around the top of the stocking using a 3/8″ seam allowance, leaving an opening for turning.
Turn the fabric right side out.
Push the inside stocking into the outer stocking. Press the seam around the top.
Top stitch around the top to close the opening and to give it a nice finished look.
***You can find the ad-free, printable PDF version of this sewing tutorial available for purchase HERE. Includes 13-pages of step-by-step instructions with pictures. Print a copy to keep next to your sewing machine for easy reference.***
You are finished!
Now you’re ready to hang your stocking(s) or give as a gift!
Feel free to share your finished Christmas stocking! Happy holidays and happy sewing!
Pin for later!
Related Christmas Sewing Tutorials:
- Drawstring Gift Bag Sewing Project
- Easy Placemats Tutorial
- Memory Heart Christmas Ornament Sewing Tutorial