DIY Curling Iron Travel Case Sewing Tutorial
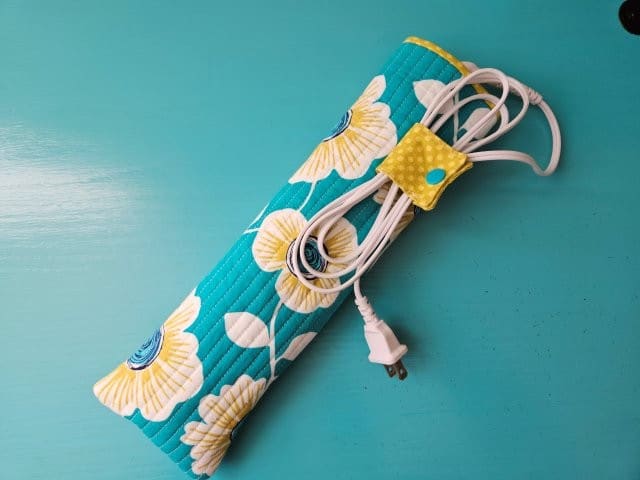
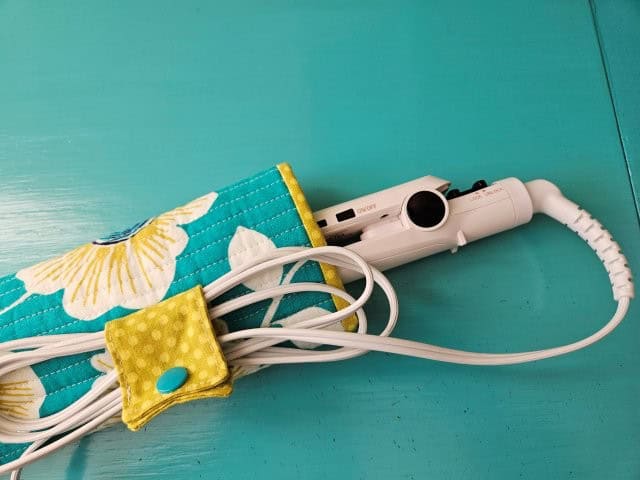
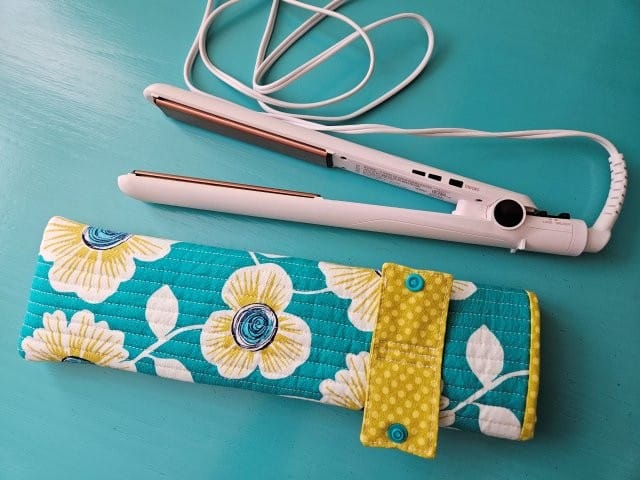
Sew a curling iron or flat iron case to protect your packed items from melting when traveling using this simple sewing tutorial.
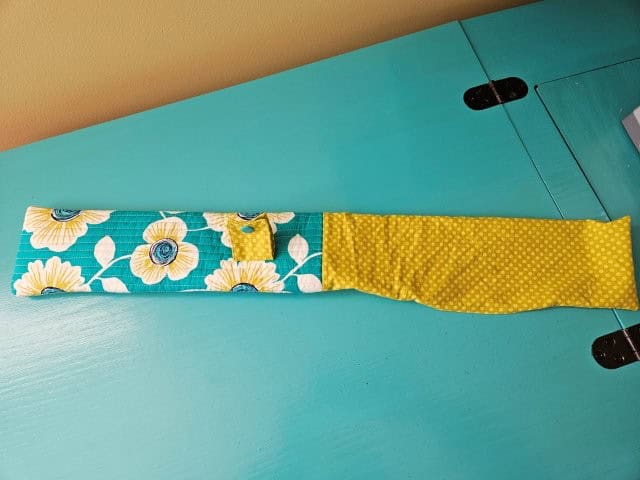
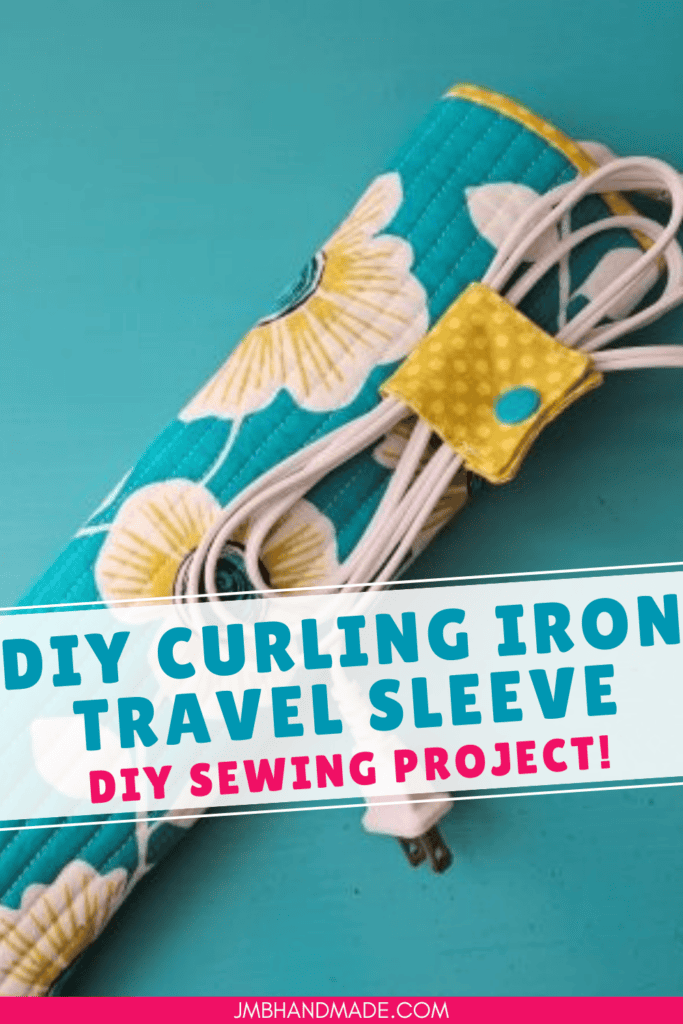
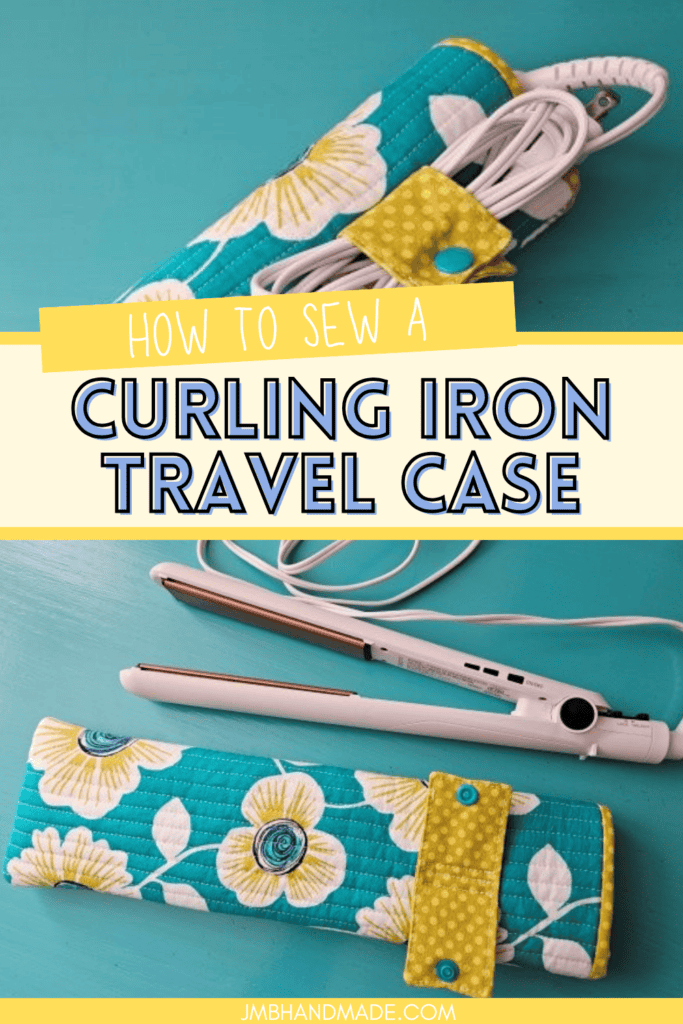
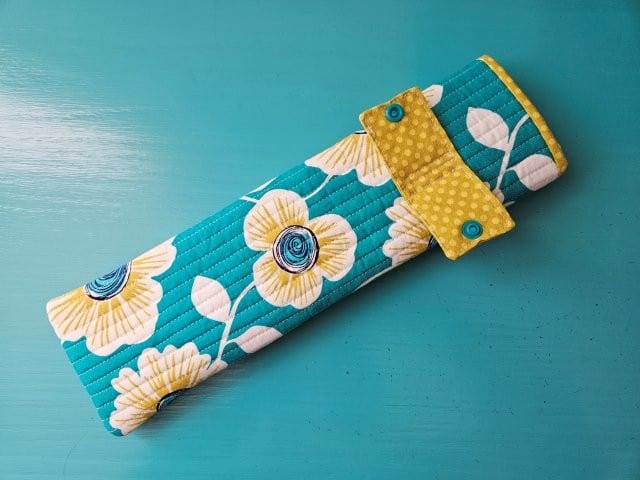
The DIY curling iron travel case sewing project is quick and easy to sew and is perfect to use when traveling. Let your curling iron or flat iron cool down a bit and put it in the case when packing up from your trip! This curling iron travel sleeve is lined with cotton batting and Insul-Bright to help protect the iron from melting other items in your bag or suitcase.
This curling iron travel case sewing pattern is similar to my hot pad sewing pattern and oven mitt sewing tutorial with the use of cotton batting and Insul-Bright quilted together. You can use your leftover supplies to make some fun items for your kitchen!
This post contains affiliate links. Please see below disclosure for more information.
***You can find the AD-FREE, printable PDF version of this sewing tutorial available for purchase in my Etsy shop HERE. Includes 10 pages of step-by-step instructions with pictures. Print a copy to keep next to your sewing machine for easy reference.***
Curling iron cover supplies needed:
- Outer fabric – one piece measuring 8.5″W x 13.5″H – my favorite fabric shop
- Lining fabric – one piece measuring 8″W x 13″H
- One lining fabric piece measuring 4.5″W x 2″H for the cord strap
- Cutting mat
- Rotary cutter
- Clear ruler
- Cotton batting – my favorite brand is Warm & White
- Insul-Bright
- KAM snap kit
- Sewing scissors
- Sewing machine
For more sewing supplies, check out my list of favorites here.
Measure and cut your fabric
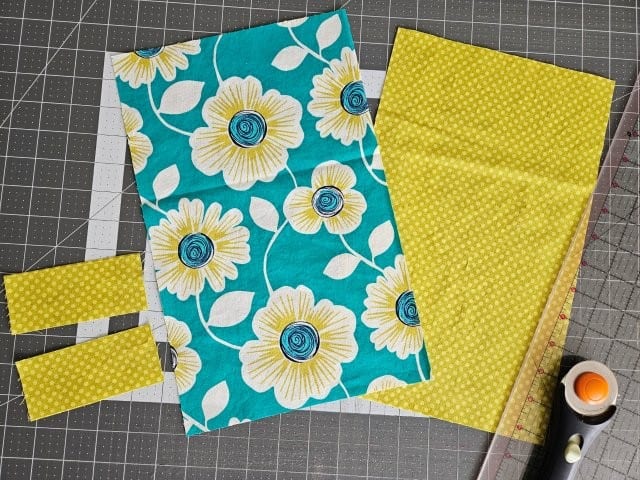
Using your cutting mat, clear ruler, and rotary cutter, cut one piece of outer fabric measuring 8.5″W x 13.5″H and one piece of lining fabric measuring 8″W x 13″H.
Cut one piece of lining fabric measuring 4.5″W x 2″H for the cord strap.
Measure and cut your batting and Insul-Bright
Cut one piece of cotton batting and one piece of Insul-Bright each measuring 8.5″W x 13.5″H.
Attach Insul-Bright and Batting
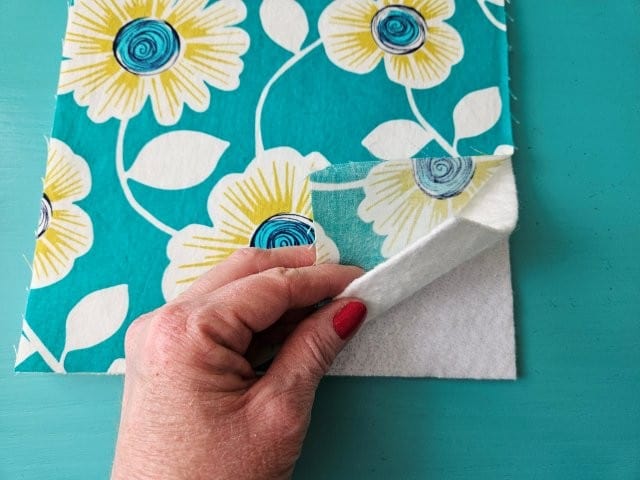
Place the batting, Insul-Bright, and outer fabric piece in the following order: Insul-Bright, cotton batting, and outer fabric piece (right side up).
Quilt the pieces together using the quilting pattern of your choice. I am using straight lines to keep it simple.
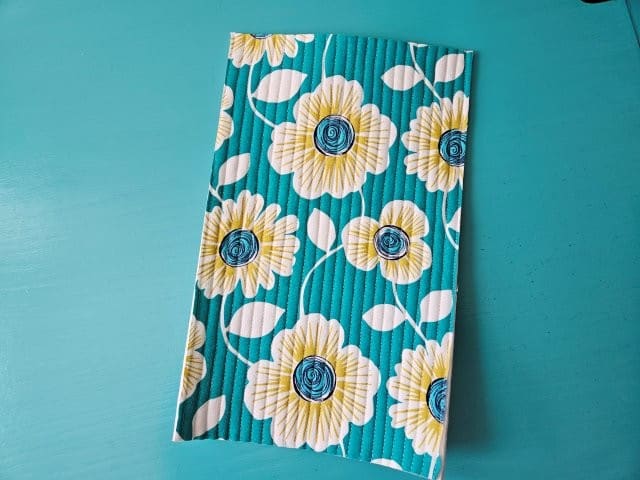
Trim the edges down to 8″W x 13″H.
Make the cord strap
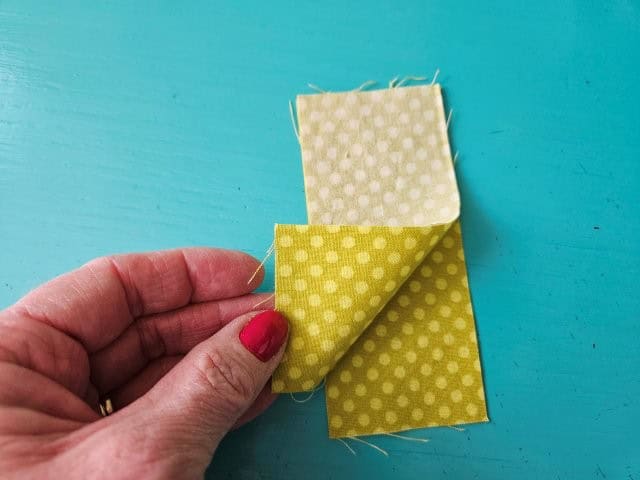
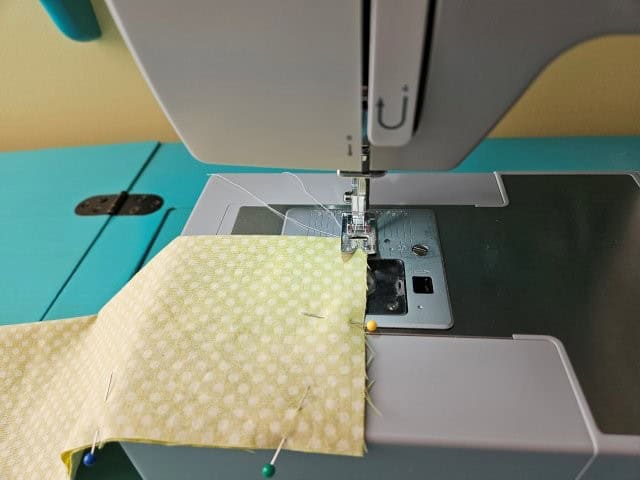
Place the cord strap fabric pieces right sides together. Pin to hold in place.
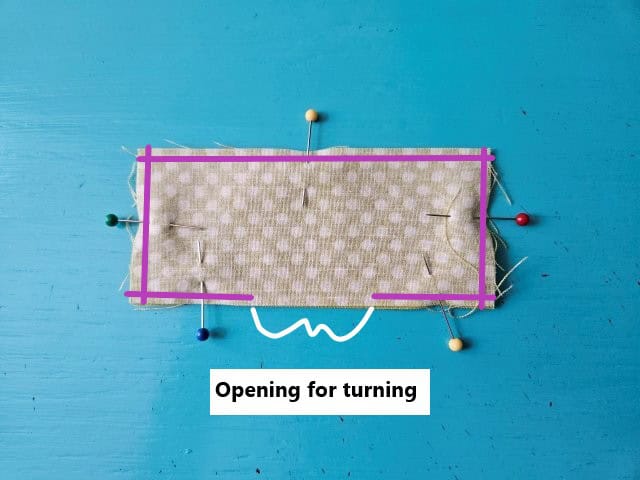
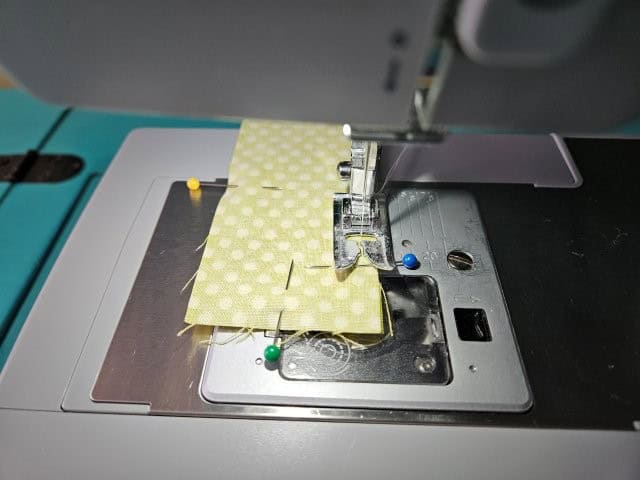
Sew around using a 1/4″ seam allowance, leaving an opening on one of the long sides for turning.
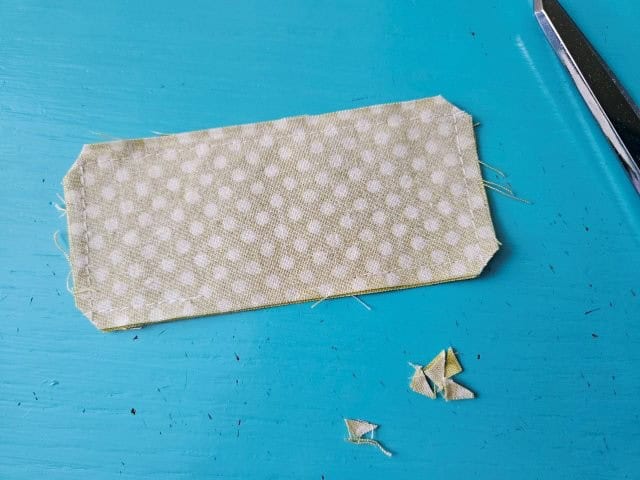
Clip the corners using your sewing scissors.
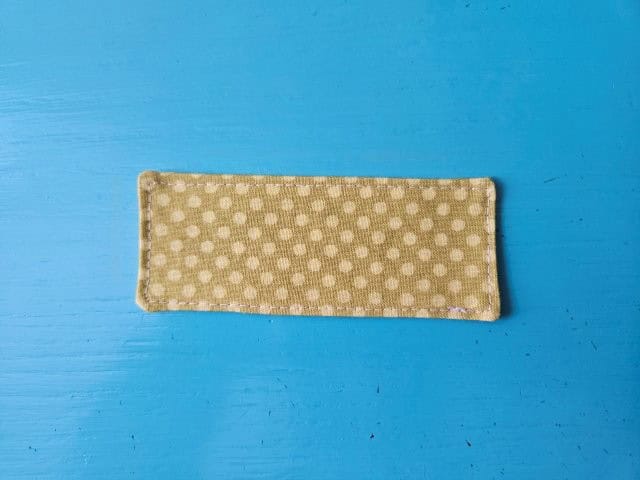
Turn right side out and press. Top stitch all around the strap.
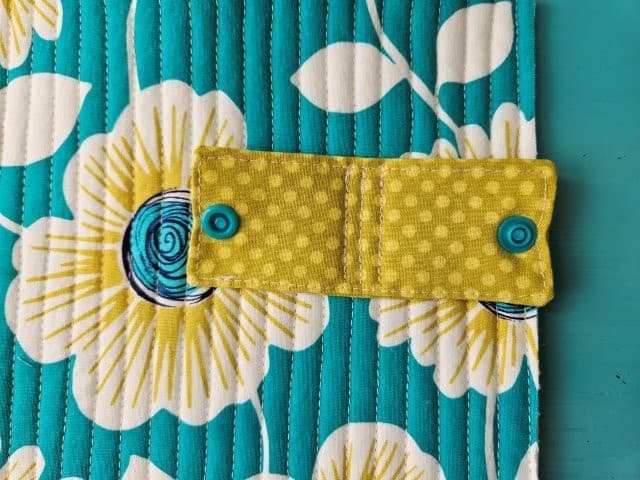
Add the KAM snap
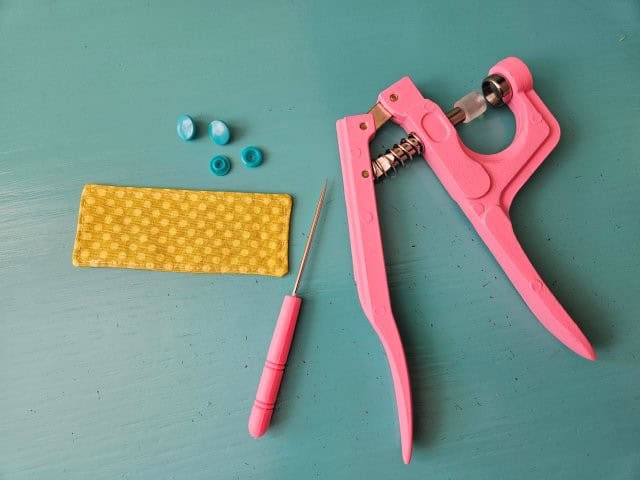
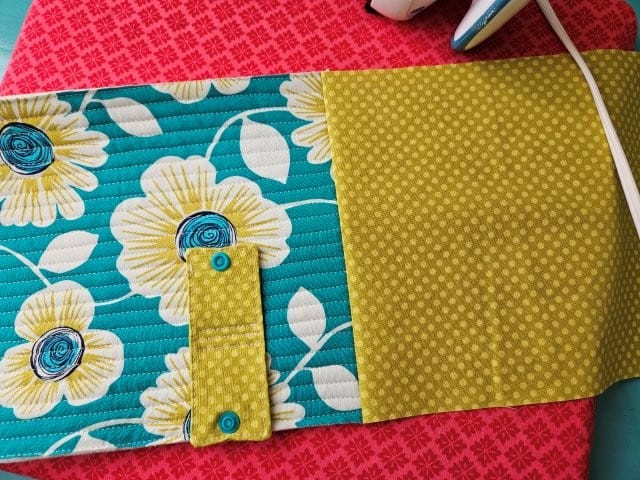
For this travel curling iron case cord strap, I’m using plastic KAM snaps. The KAM snap has four parts – male, female, and two caps.
Find the center on the short sides of the strap and make a mark 1/4″ from the edge. You’ll want the male and female snap parts on the same side of the strap. Follow the package instructions on how to attach the snap. You can find a starter kit with all the supplies here.
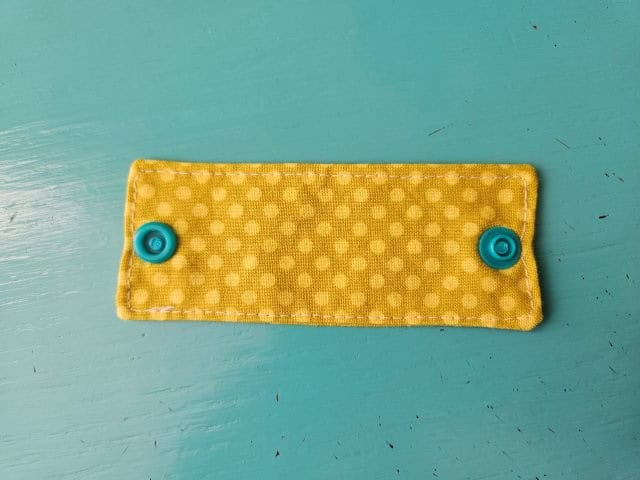
The above picture shows the attached snap.
***You can find the AD-FREE, printable PDF version of this sewing tutorial available for purchase in my Etsy shop HERE. Includes 10 pages of step-by-step instructions with pictures. Print a copy to keep next to your sewing machine for easy reference.***
Attach the cord strap
Now you are going to attach the cord strap to the outer fabric piece.
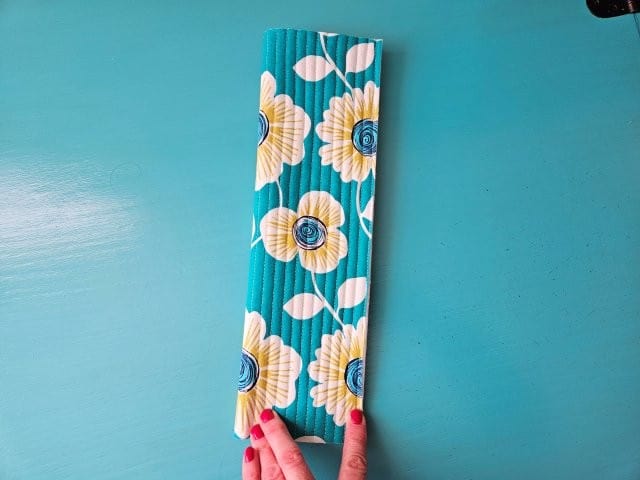
Fold the outer fabric piece together lengthwise to find the center. Then find the center again.
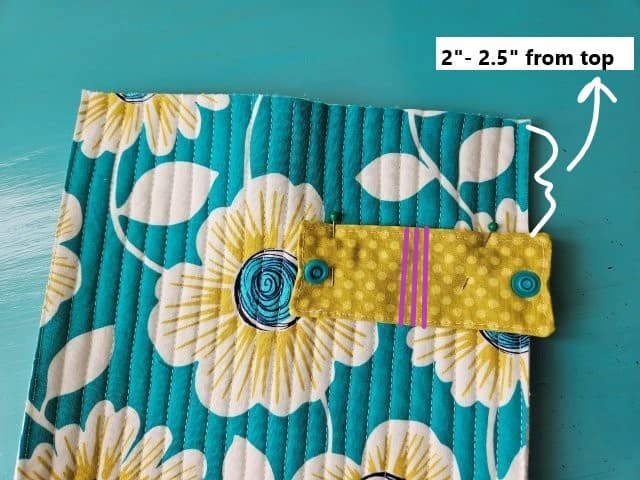
Then position the cord strap about 2″-2.5″ from the top with the middle of the strap in the center. Pin to hold in place. Sew two or three vertical lines down the center of the cord strap to attach. I sewed each line a couple times for extra durability.
The above picture shows the attached cord strap.
Sew it all together
Use 1/4″ seam allowance.
Place the lining piece on top of the outer fabric piece right sides together.
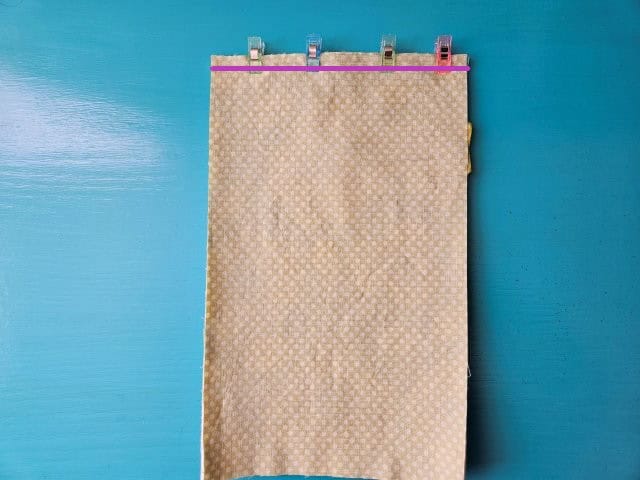
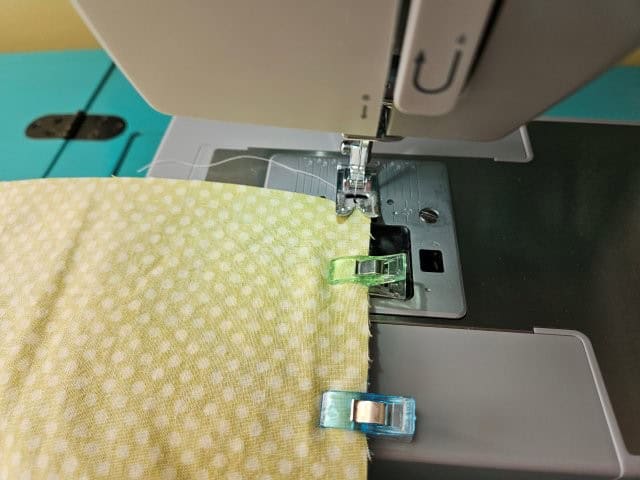
Pin or clip along the top. Sew along the top edge of the travel flat iron sleeve using a 1/4″ seam allowance.
Press the seam.
Snap the cord strap together to keep it out of the way while sewing.
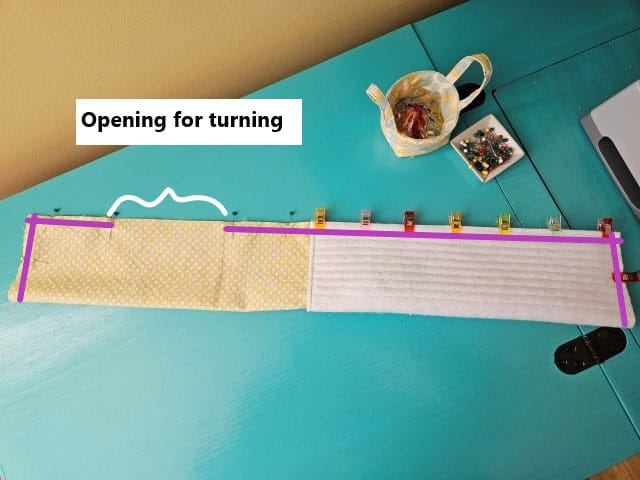
Fold the curling iron travel case in half lengthwise, right sides together. Pin or clip to hold in place, leaving an opening in the lining for turning.
Sew around the travel case (the raw edges) using 1/4″ seam allowance, again leaving an opening for turning. Clip the corners.
Turn right side out
Through the opening in the lining, turn the curling iron / flat iron travel bag right side out. Press the opening and sew the opening closed.
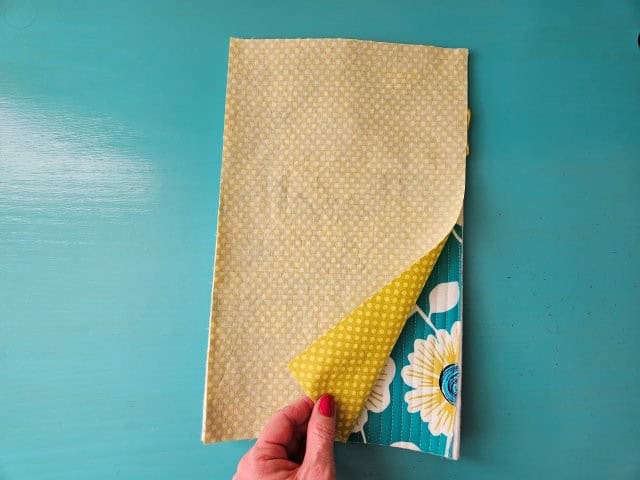
Push the lining into the outer sleeve. I used the blunt end of a knitting needle to push the lining into the outer travel case. I kept about 1/4″ of the lining out as an accent. Press.
Pin for later!
***You can find the AD-FREE, printable PDF version of this sewing tutorial available for purchase in my Etsy shop HERE. Includes 10 pages of step-by-step instructions with pictures. Print a copy to keep next to your sewing machine for easy reference.***
You are finished!
I hope you enjoyed this sewing tutorial on how to make a travel case for your curling iron or flat iron. Now your packed items will be protected from melting! Happy sewing and traveling!
Other travel sewing projects to try:
- Travel Neck Pillow Sewing Tutorial
- Fabric Passport Cover Sewing Project
- Fabric Luggage Tag Sewing Pattern – Address cards included
- DIY Tote Bag with Recessed Zipper