How to Sew a Simple Notepad Holder – Sewing Tutorial
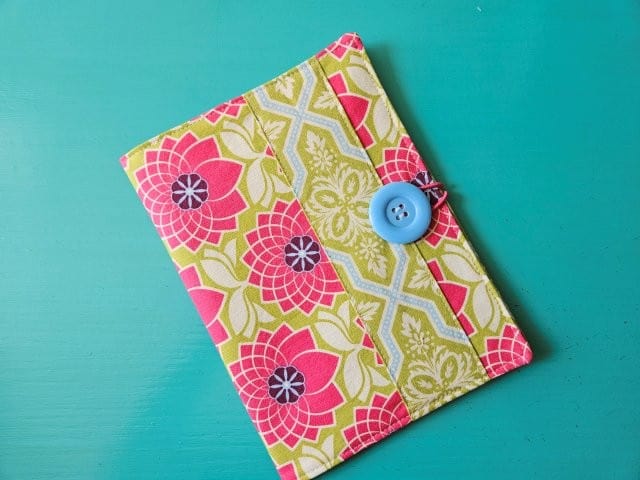
Make a notepad holder with pockets using this easy sewing tutorial.
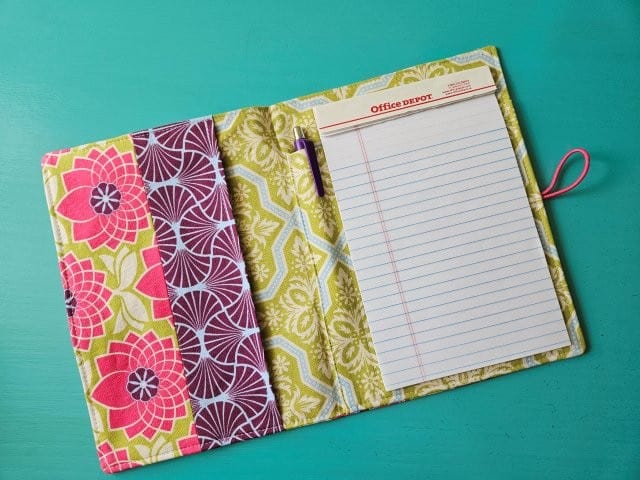
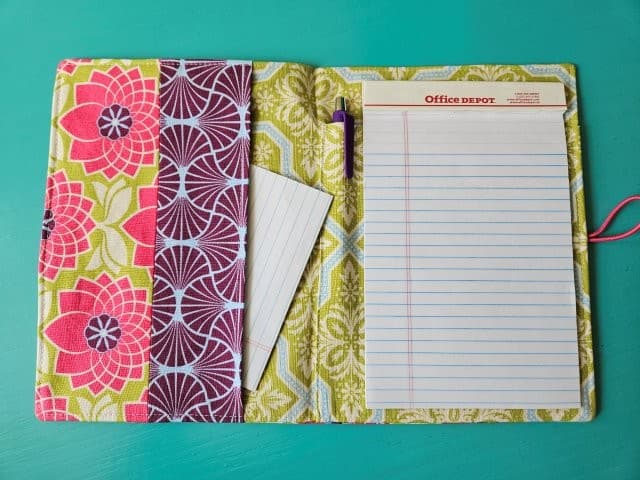
The DIY notepad holder pattern features a side pocket, a pen pocket, a pocket to hold a 5″x8″ notepad, and button closure to keep you organized while on the go. Sometimes it just feels good to physically write notes or lists with a pen and paper.
Sew one of these simple notepad holders to carry in your purse for grocery lists, coupons, notes, or sew one as a gift. This notepad holder sewing tutorial is perfect for beginners and using up those fabric scraps!
Try sewing a matching simple tote bag or a fabric checkbook cover to go with it!
This post contains affiliate links. Please see below disclosure for more information.
***You can find the AD-FREE, printable PDF version of this sewing tutorial available for purchase in my Etsy shop HERE. Includes 14 pages of step-by-step instructions with pictures. Print a copy to keep next to your sewing machine for easy reference.***
Notepad holder supplies needed:
Outer fabric pieces:
- 1 – 14″W x 9.5″H – my favorite fabric shop
- 1 – 9.5″W x 3.5″H
Lining fabric pieces:
- 1 – 14″W x 9.5″H
- 1 – 9.5″W x 8″H
- 1 – 7.25″W x 15″H
Front accent fabric:
- 1 – 4″W x 9.5″H
- dfh sjjgshx
Other supplies needed:
- Cutting mat
- Clear ruler
- Rotary cutter
- Fusible interfacing – Pellon P44F Fusible Interfacing
- Button – 1.5 inch
- Elastic hair band
- Marking pencil
- Sewing scissors
- Sewing machine
Measure and cut your fabric
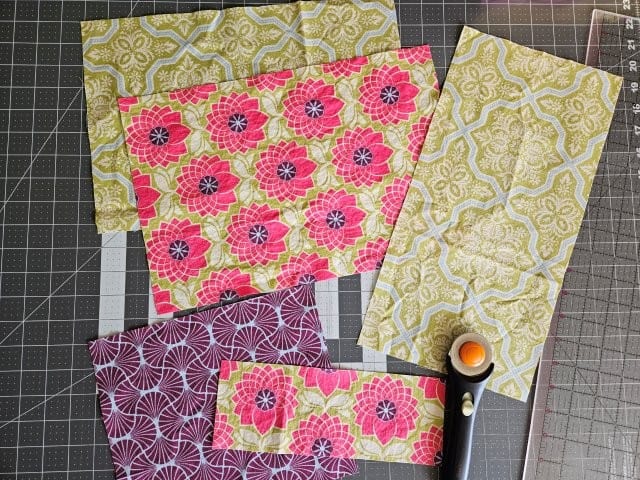
Using your cutting mat, clear ruler, and rotary cutter, cut one outer fabric piece and one lining fabric piece each measuring 14″W x 9.5″H.
Cut one outer fabric piece measuring 9.5″W x 3.5″H, one lining fabric piece measuring 9.5″W x 8″H for the inside side pocket. (OR you can cut one lining fabric piece measuring 9.5″W x 10.75″H).
For the notepad and pen pocket, cut one lining fabric piece measuring 7.25″W x 15″H.
OPTIONAL: Cut one coordinating fabric piece measuring 4″W x 9.5″H for the front accent piece.
Sew the side pocket
You are going to sew the 9.5″W x 3.5″H fabric piece to the bottom of the 9.5″W x 8″H fabric piece. If you are using one fabric piece, you can skip to the “attach the fusible interfacing” step.
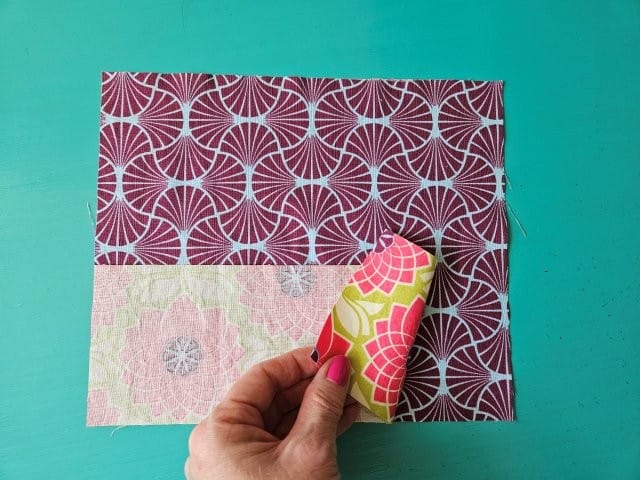
Place the 9.5″W x 3.5″H piece on top of the 9.5″W x 8″H piece right sides together. If you are using directional fabric, the top edge of the smaller fabric piece should be lined up with the bottom edge of the larger piece.
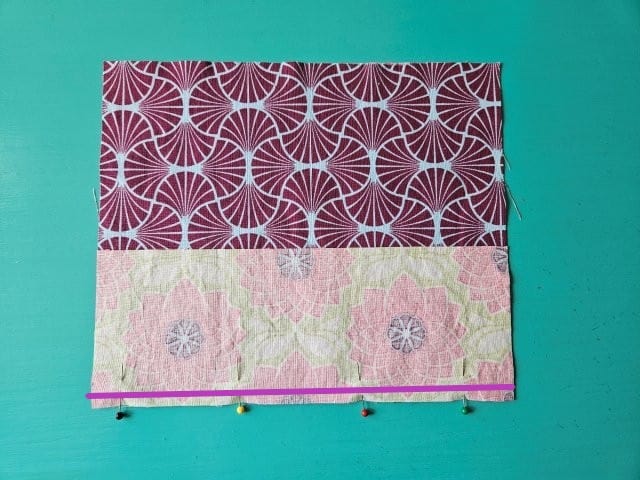
Sew along the edge using a 3/8″ seam allowance.
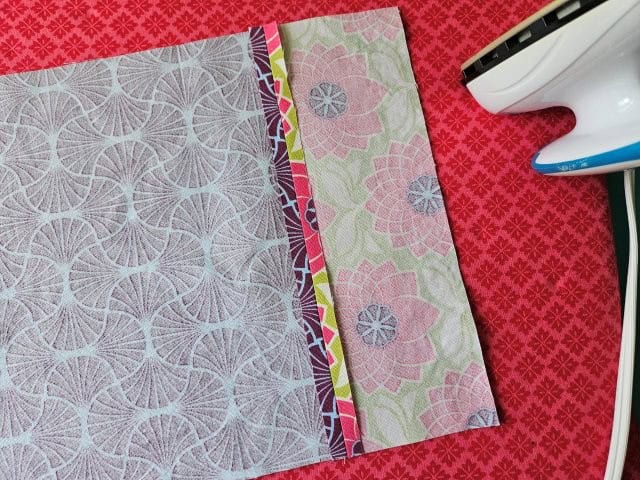
Press the seam flat.
Check out these instructions on how to make your own mini ironing board for small sewing projects.
Attach the fusible interfacing
I am using Pellon P44F Fusible Interfacing for this DIY notebook holder but any lightweight interfacing will work. Cut your interfacing pieces the same size as your fabric pieces.
Attach the fusible interfacing to the wrong side of all fabric pieces, except the front accent piece, if using, following the package instructions.
Accent piece (optional)
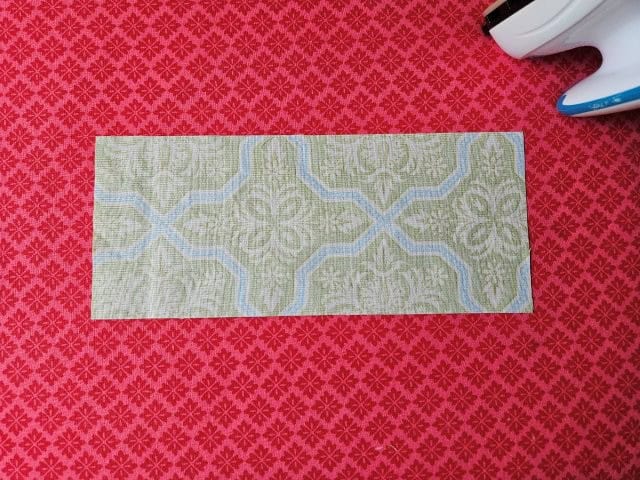
Place the front accent fabric piece wrong side up on your ironing board.
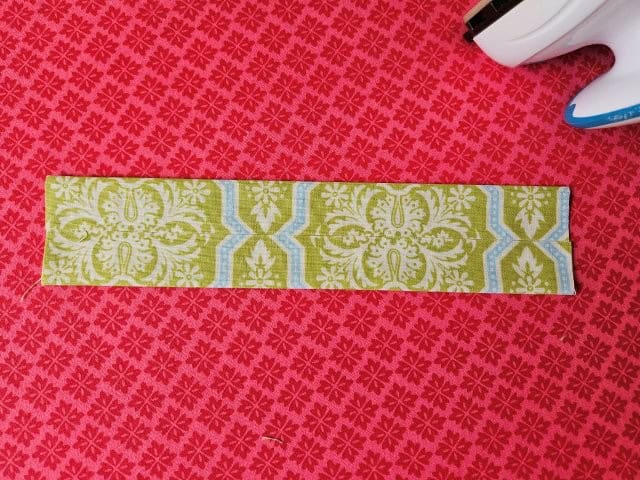
Fold each long edge to the center and press.
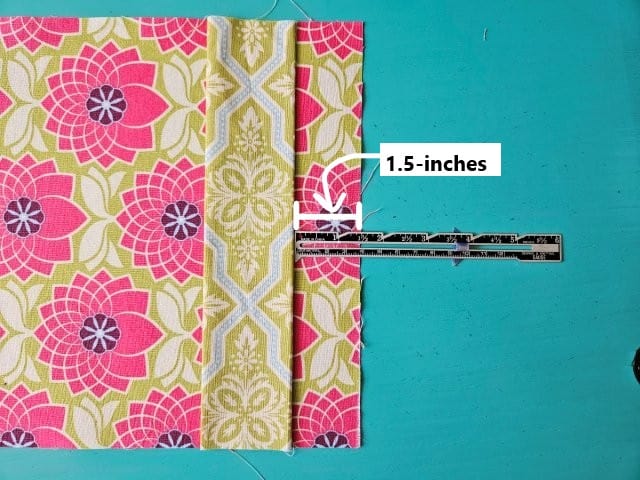
With your outer fabric piece right side up, place the accent on top 1.5″ from the right edge. Pin to hold in place.
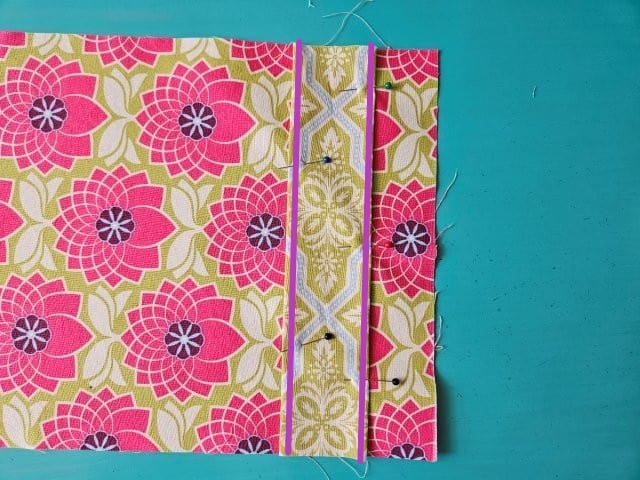
Sew along each folded edges using an 1/8″-1/4″ seam allowance.
Add the side pocket
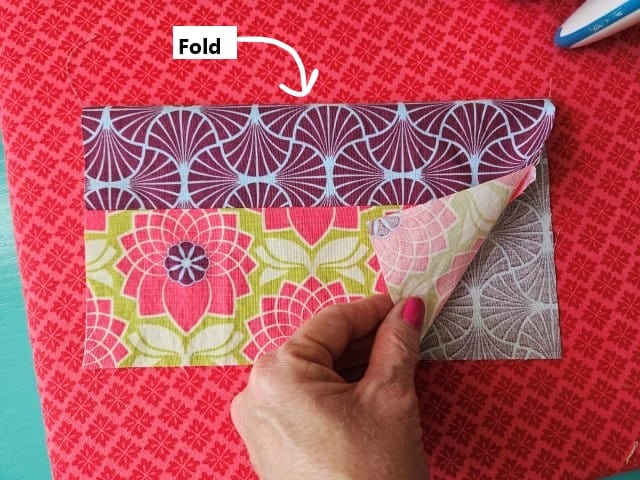
Fold the side pocket fabric piece in half with the 9.5″ edges together and press the fold.
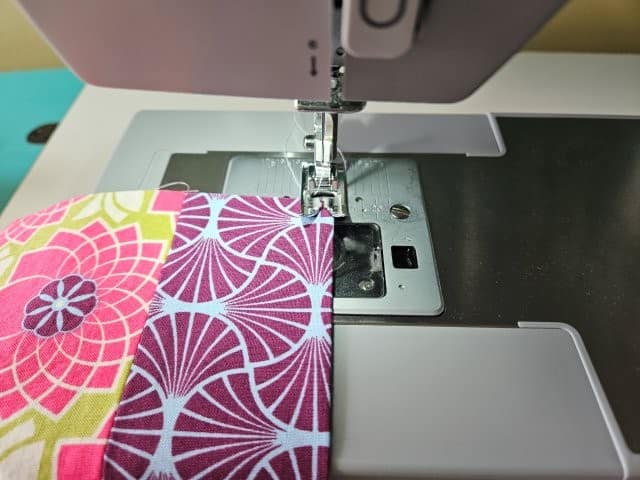
Top stitch along the fold.
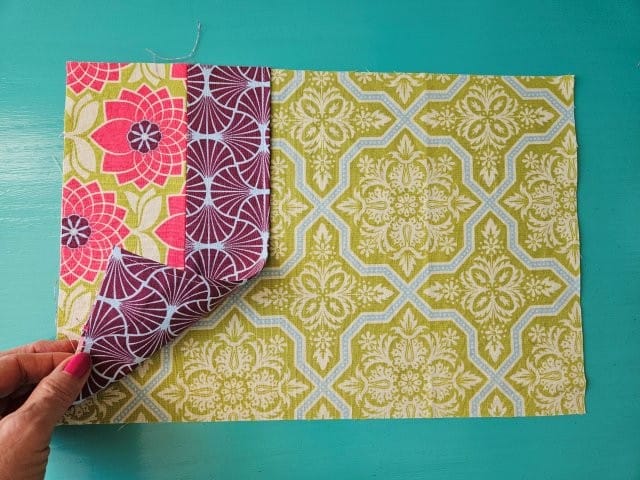
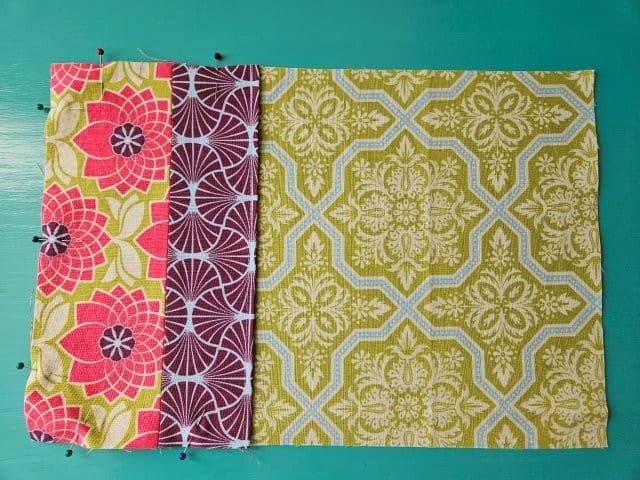
With the lining fabric piece right side up, place the side pocket piece on the left side of the lining piece, lining up the raw edges. Pin the three raw edges to hold in place.
***You can find the AD-FREE, printable PDF version of this sewing tutorial available for purchase in my Etsy shop HERE. Includes 14 pages of step-by-step instructions with pictures. Print a copy to keep next to your sewing machine for easy reference.***
Make the notepad and pen pockets
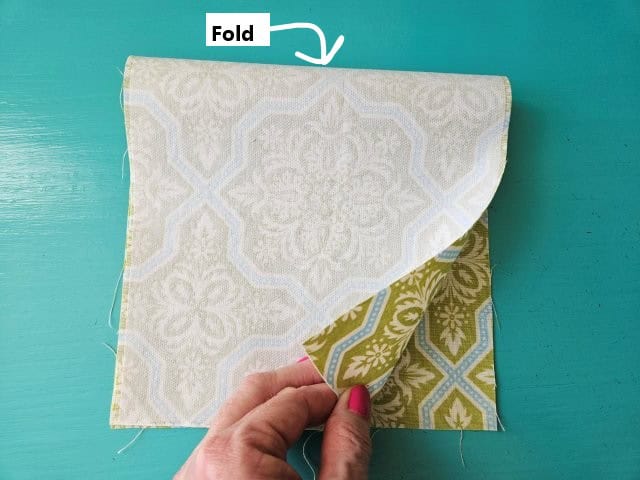
Take the 7.25″W x 15″H fabric piece and fold in half, right sides together, lining up the 7.25″ raw edges.
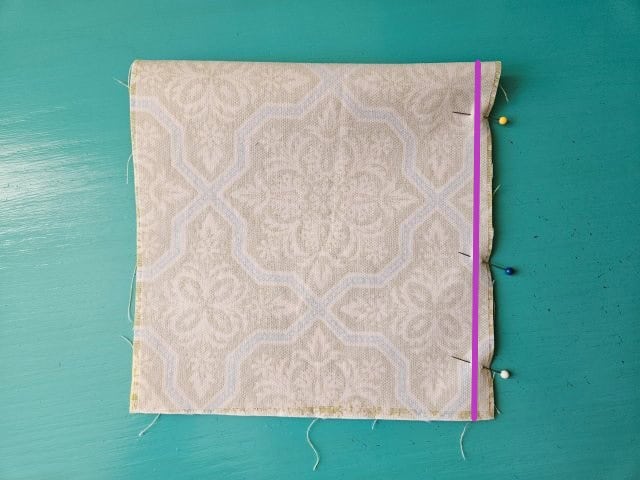
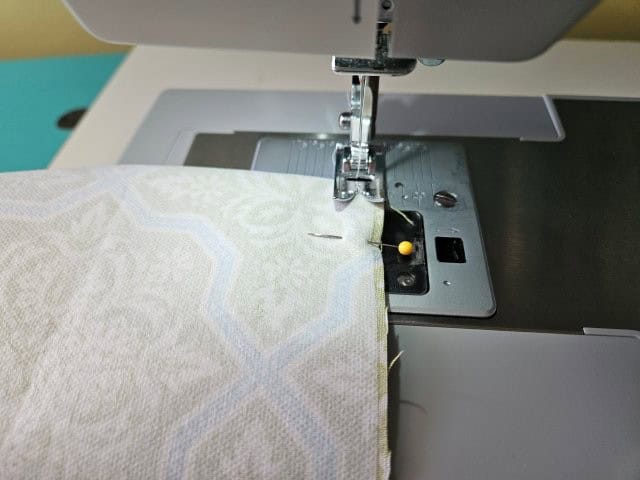
Sew along the right side using a 3/8″ seam allowance.
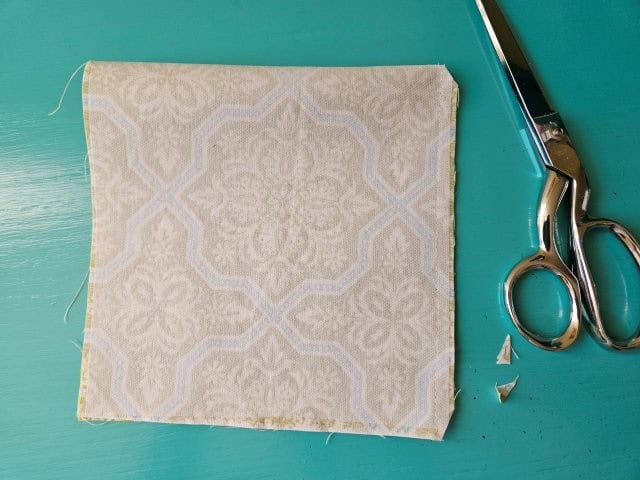
Clip the top and bottom corners using your sewing scissors.
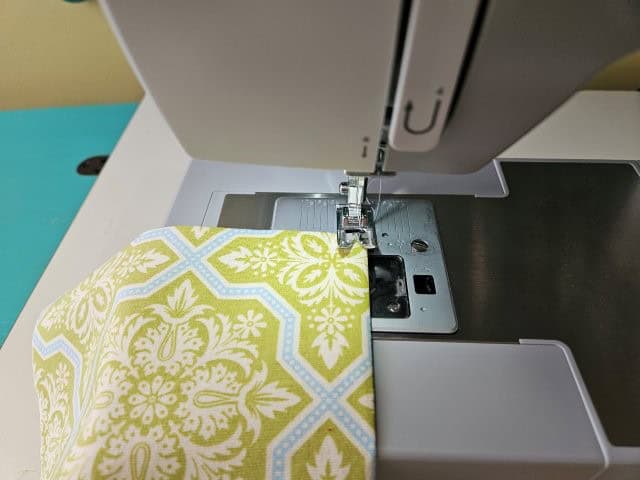
Turn right side out and press the top and side seam. Top stitch along the top.
Attach the notepad pocket
Now you are going to attach the notepad and pen pockets to the lining fabric piece.
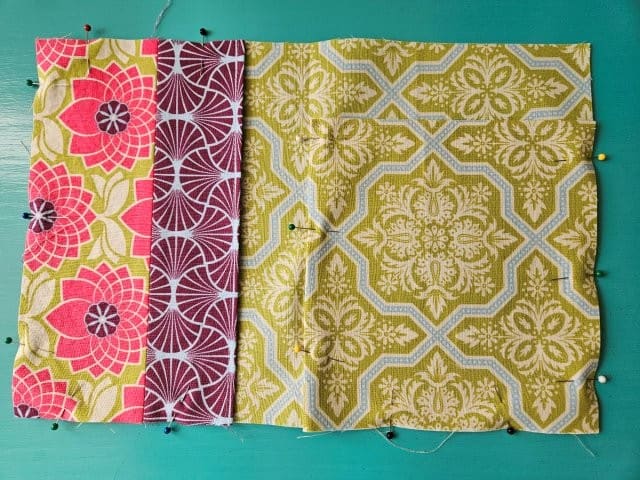
Place the pocket piece on the right side of the lining piece, lining up the side and bottom raw edges. Pin to hold in place.
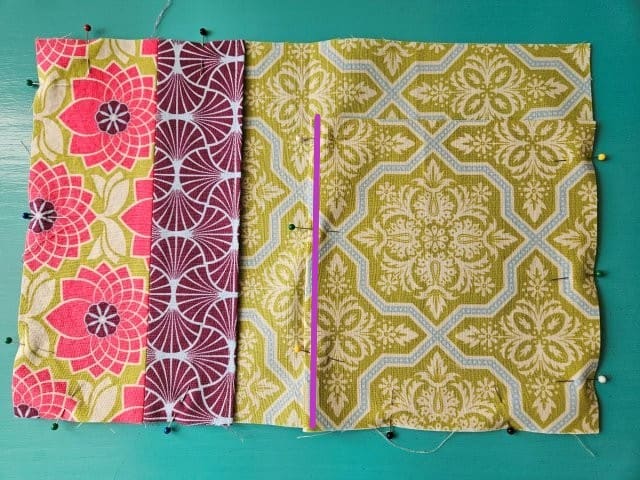
Sew along the left side of the pocket as close to the edge as possible.
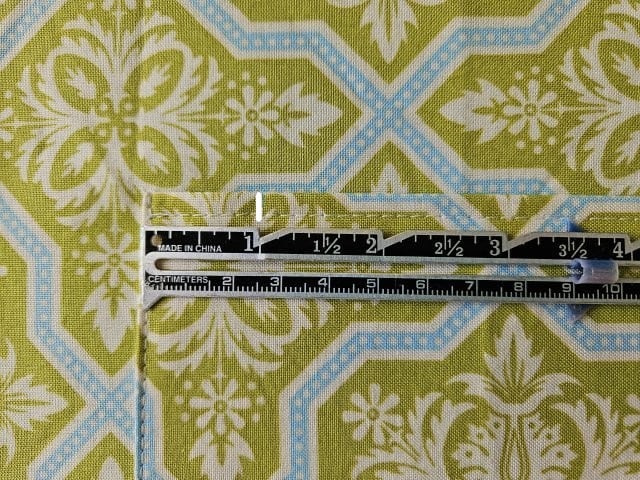
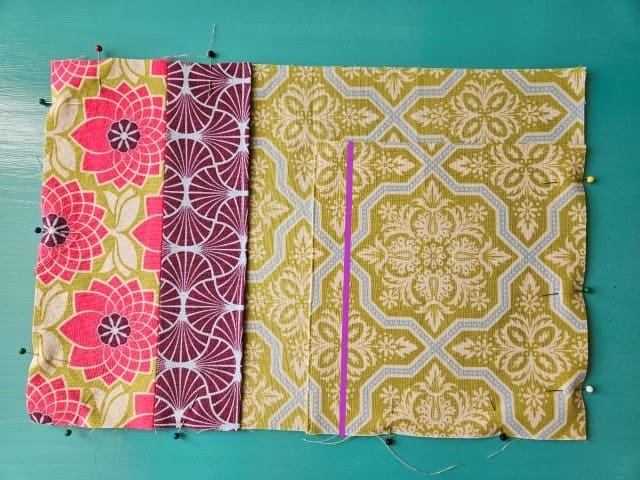
Then sew another vertical line of stitching 1-inch from the previous stitching (see above picture).
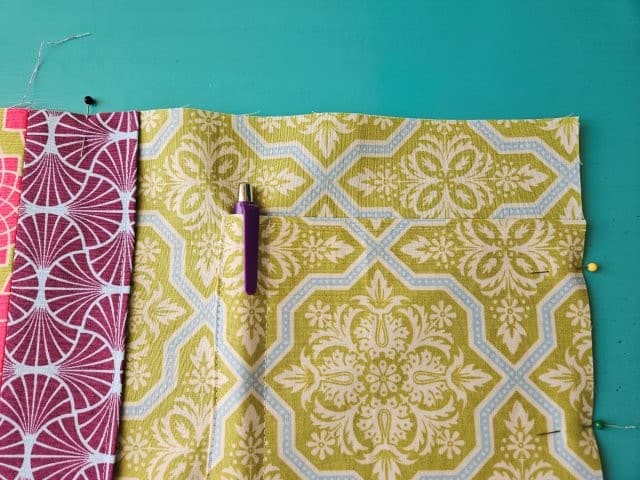
You now have your pen pocket sewn.
Sew the button on the front
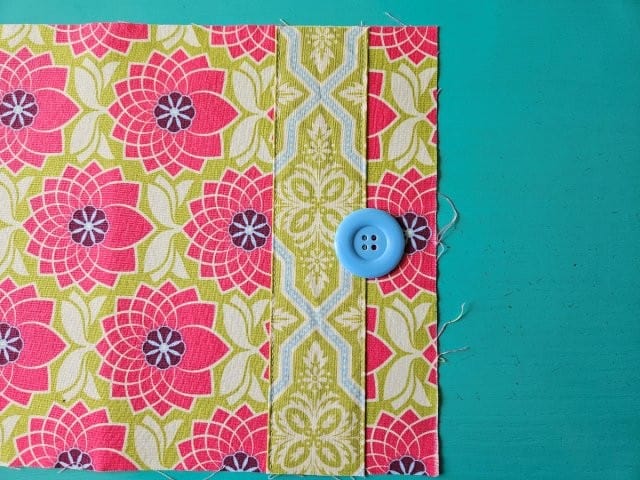
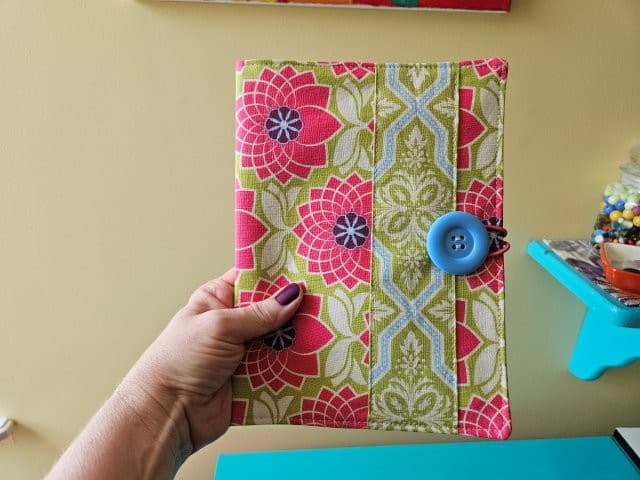
You are going to sew the 1.5-inch button on the front, in the center, with the holes right next to the right edge of the accent.
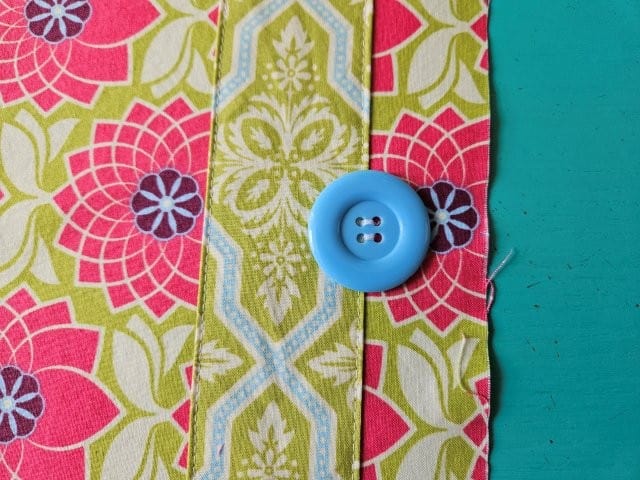
Sew the button by hand onto the front of the notepad holder until secure. The button placement should allow for the 3/8″ seam allowance.
Baste the hair tie
You are going to baste the hair tie to the right side of the lining with the loop towards the inside.
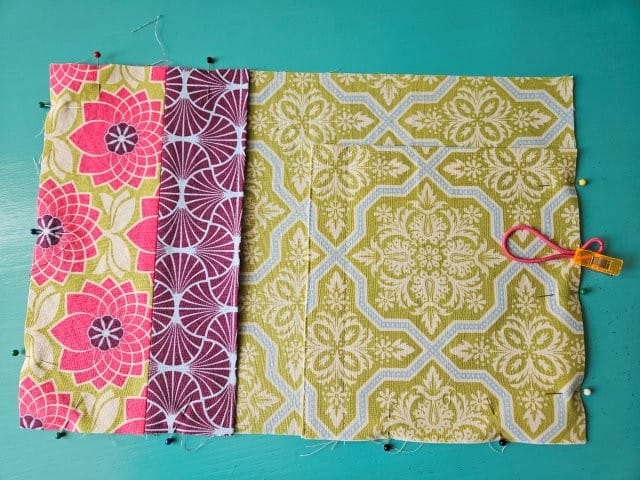
With the lining piece right side up, place the hair tie in the center of the right side – 4.75″. The loop should be on the inside.
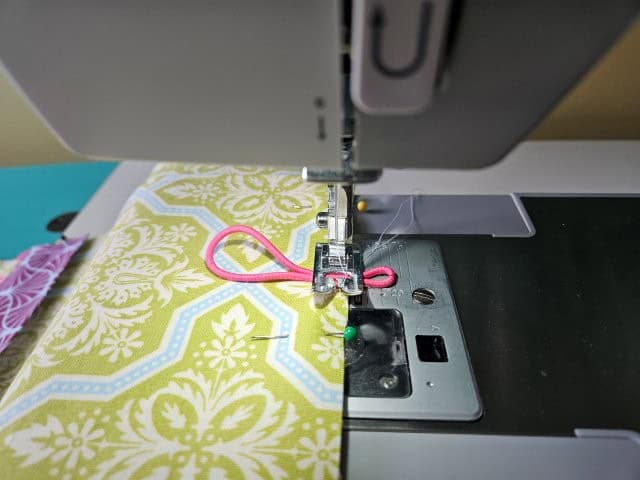
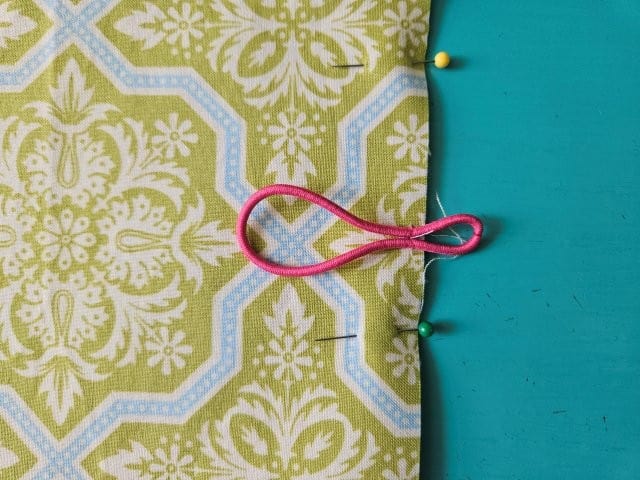
Baste the hair tie to the notepad holder lining piece to hold in place.
Sew it all together
Use a 3/8″ seam allowance.
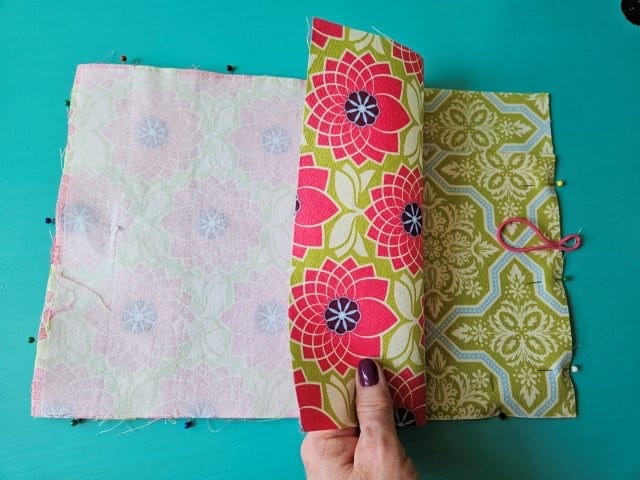
Place the outer fabric piece on top of the lining fabric piece, right sides together. Pin all around, leaving an opening at the top for turning.
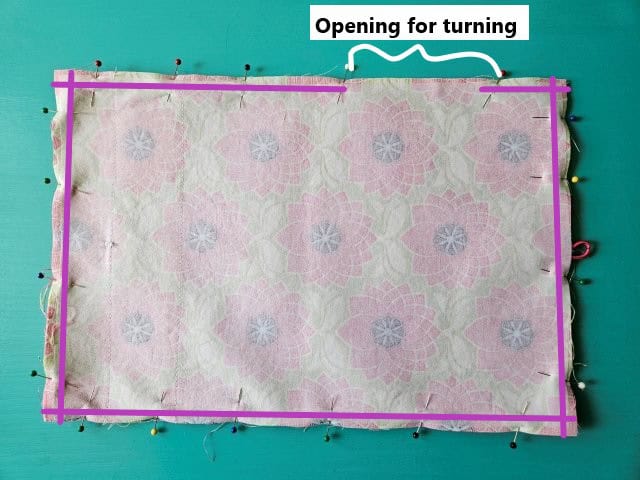
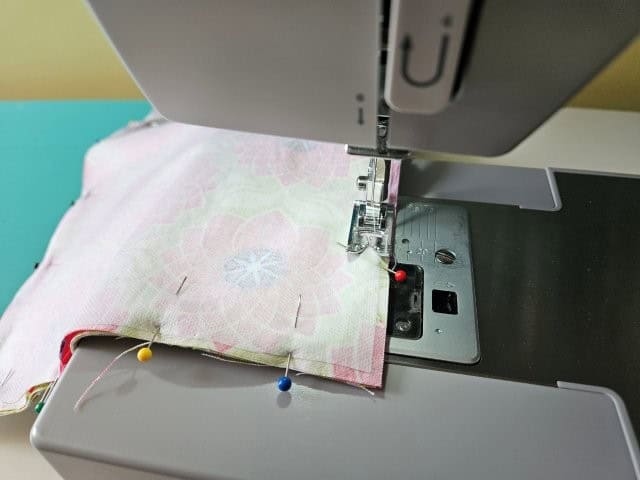
Sew all around using a 3/8″ seam allowance, again, leaving an opening for turning. Be sure to sew over the hair tie a couple times for extra durability.
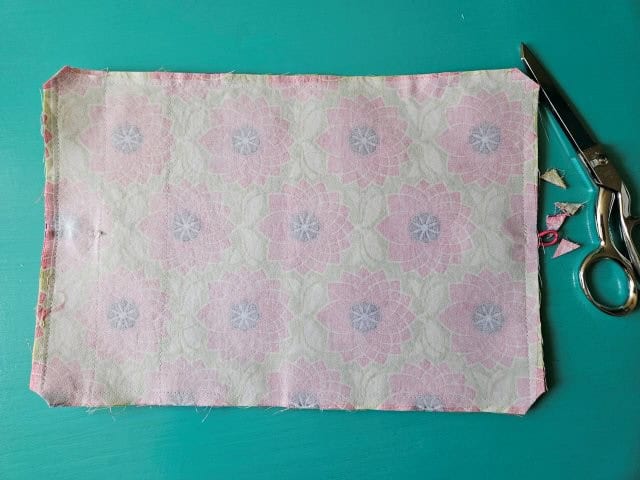
Clip the corners and the excess hair tie using your sewing scissors.
Turn right side out
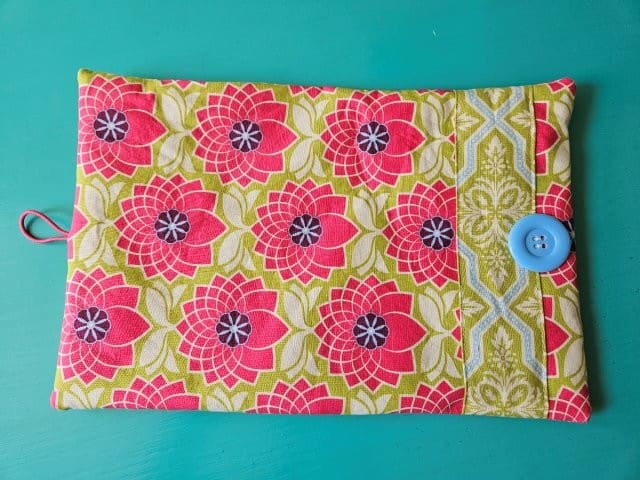
Through the opening, turn the notepad cover right side out. Push out the corners and press.
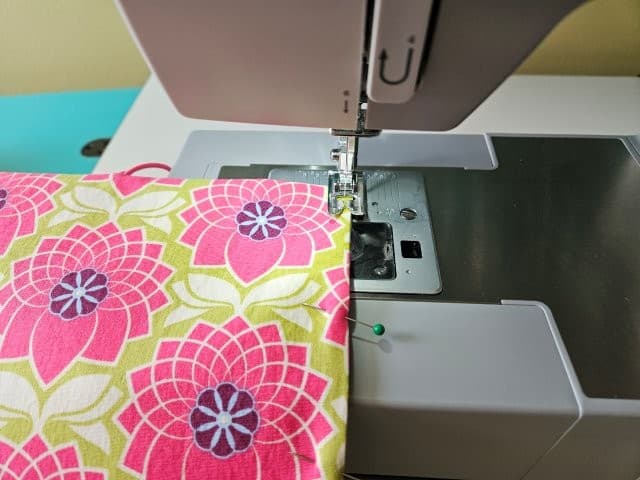
Top stitch all around, pivoting the corners, to give it a finished look and to close the opening. Press again.
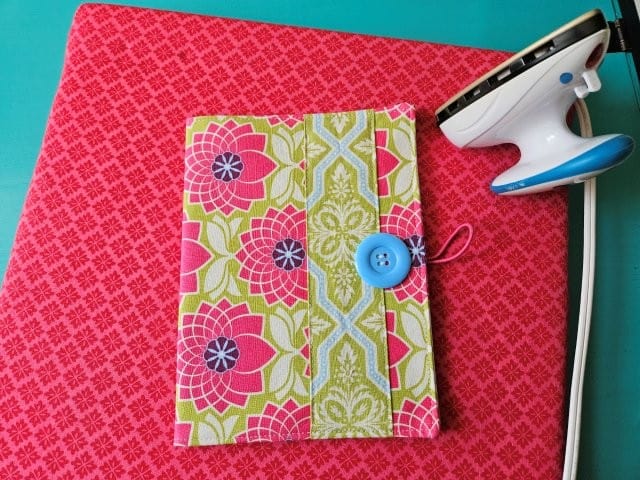
Fold the notepad holder in half and press the fold. Insert your notepad and pen and you’re all set!
Pin for later!
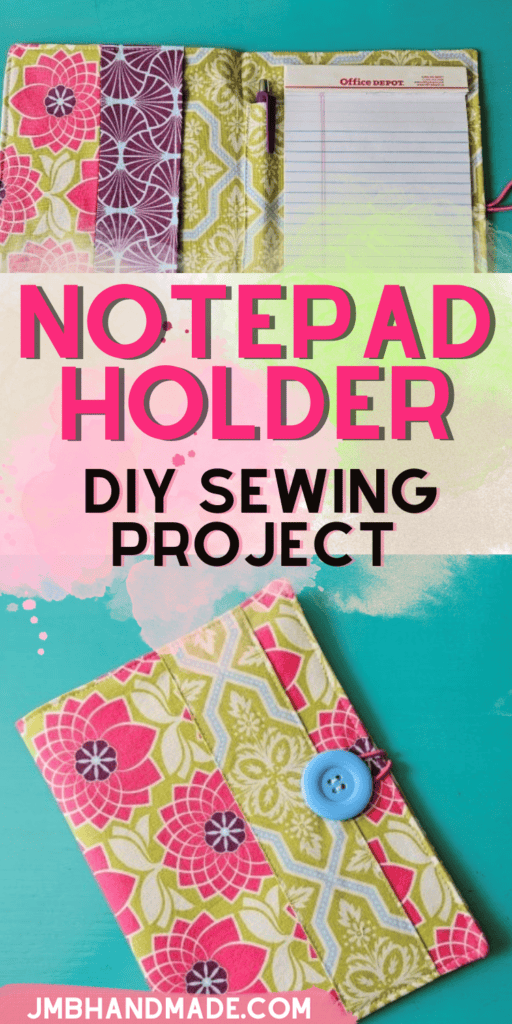
***You can find the AD-FREE, printable PDF version of this sewing tutorial available for purchase in my Etsy shop HERE. Includes 14 pages of step-by-step instructions with pictures. Print a copy to keep next to your sewing machine for easy reference.***
You are finished!
I hope you enjoyed this sewing tutorial on how to sew a simple notepad holder! Now you’ll always have a pen and paper on hand when you’re on the go for lists and notes. Happy sewing!
Other JMB Handmade sewing tutorials:
- Lip Balm Holder Key Chain Sewing Tutorial
- Drawstring Backpack Pattern
- Quilted Laptop Case Sewing Tutorial
- Large Storage Basket with Handles Sewing Project